How I Planned a Midsummer Night's Dream Party
Oct 12, 2026 · Amberleigh Adoff
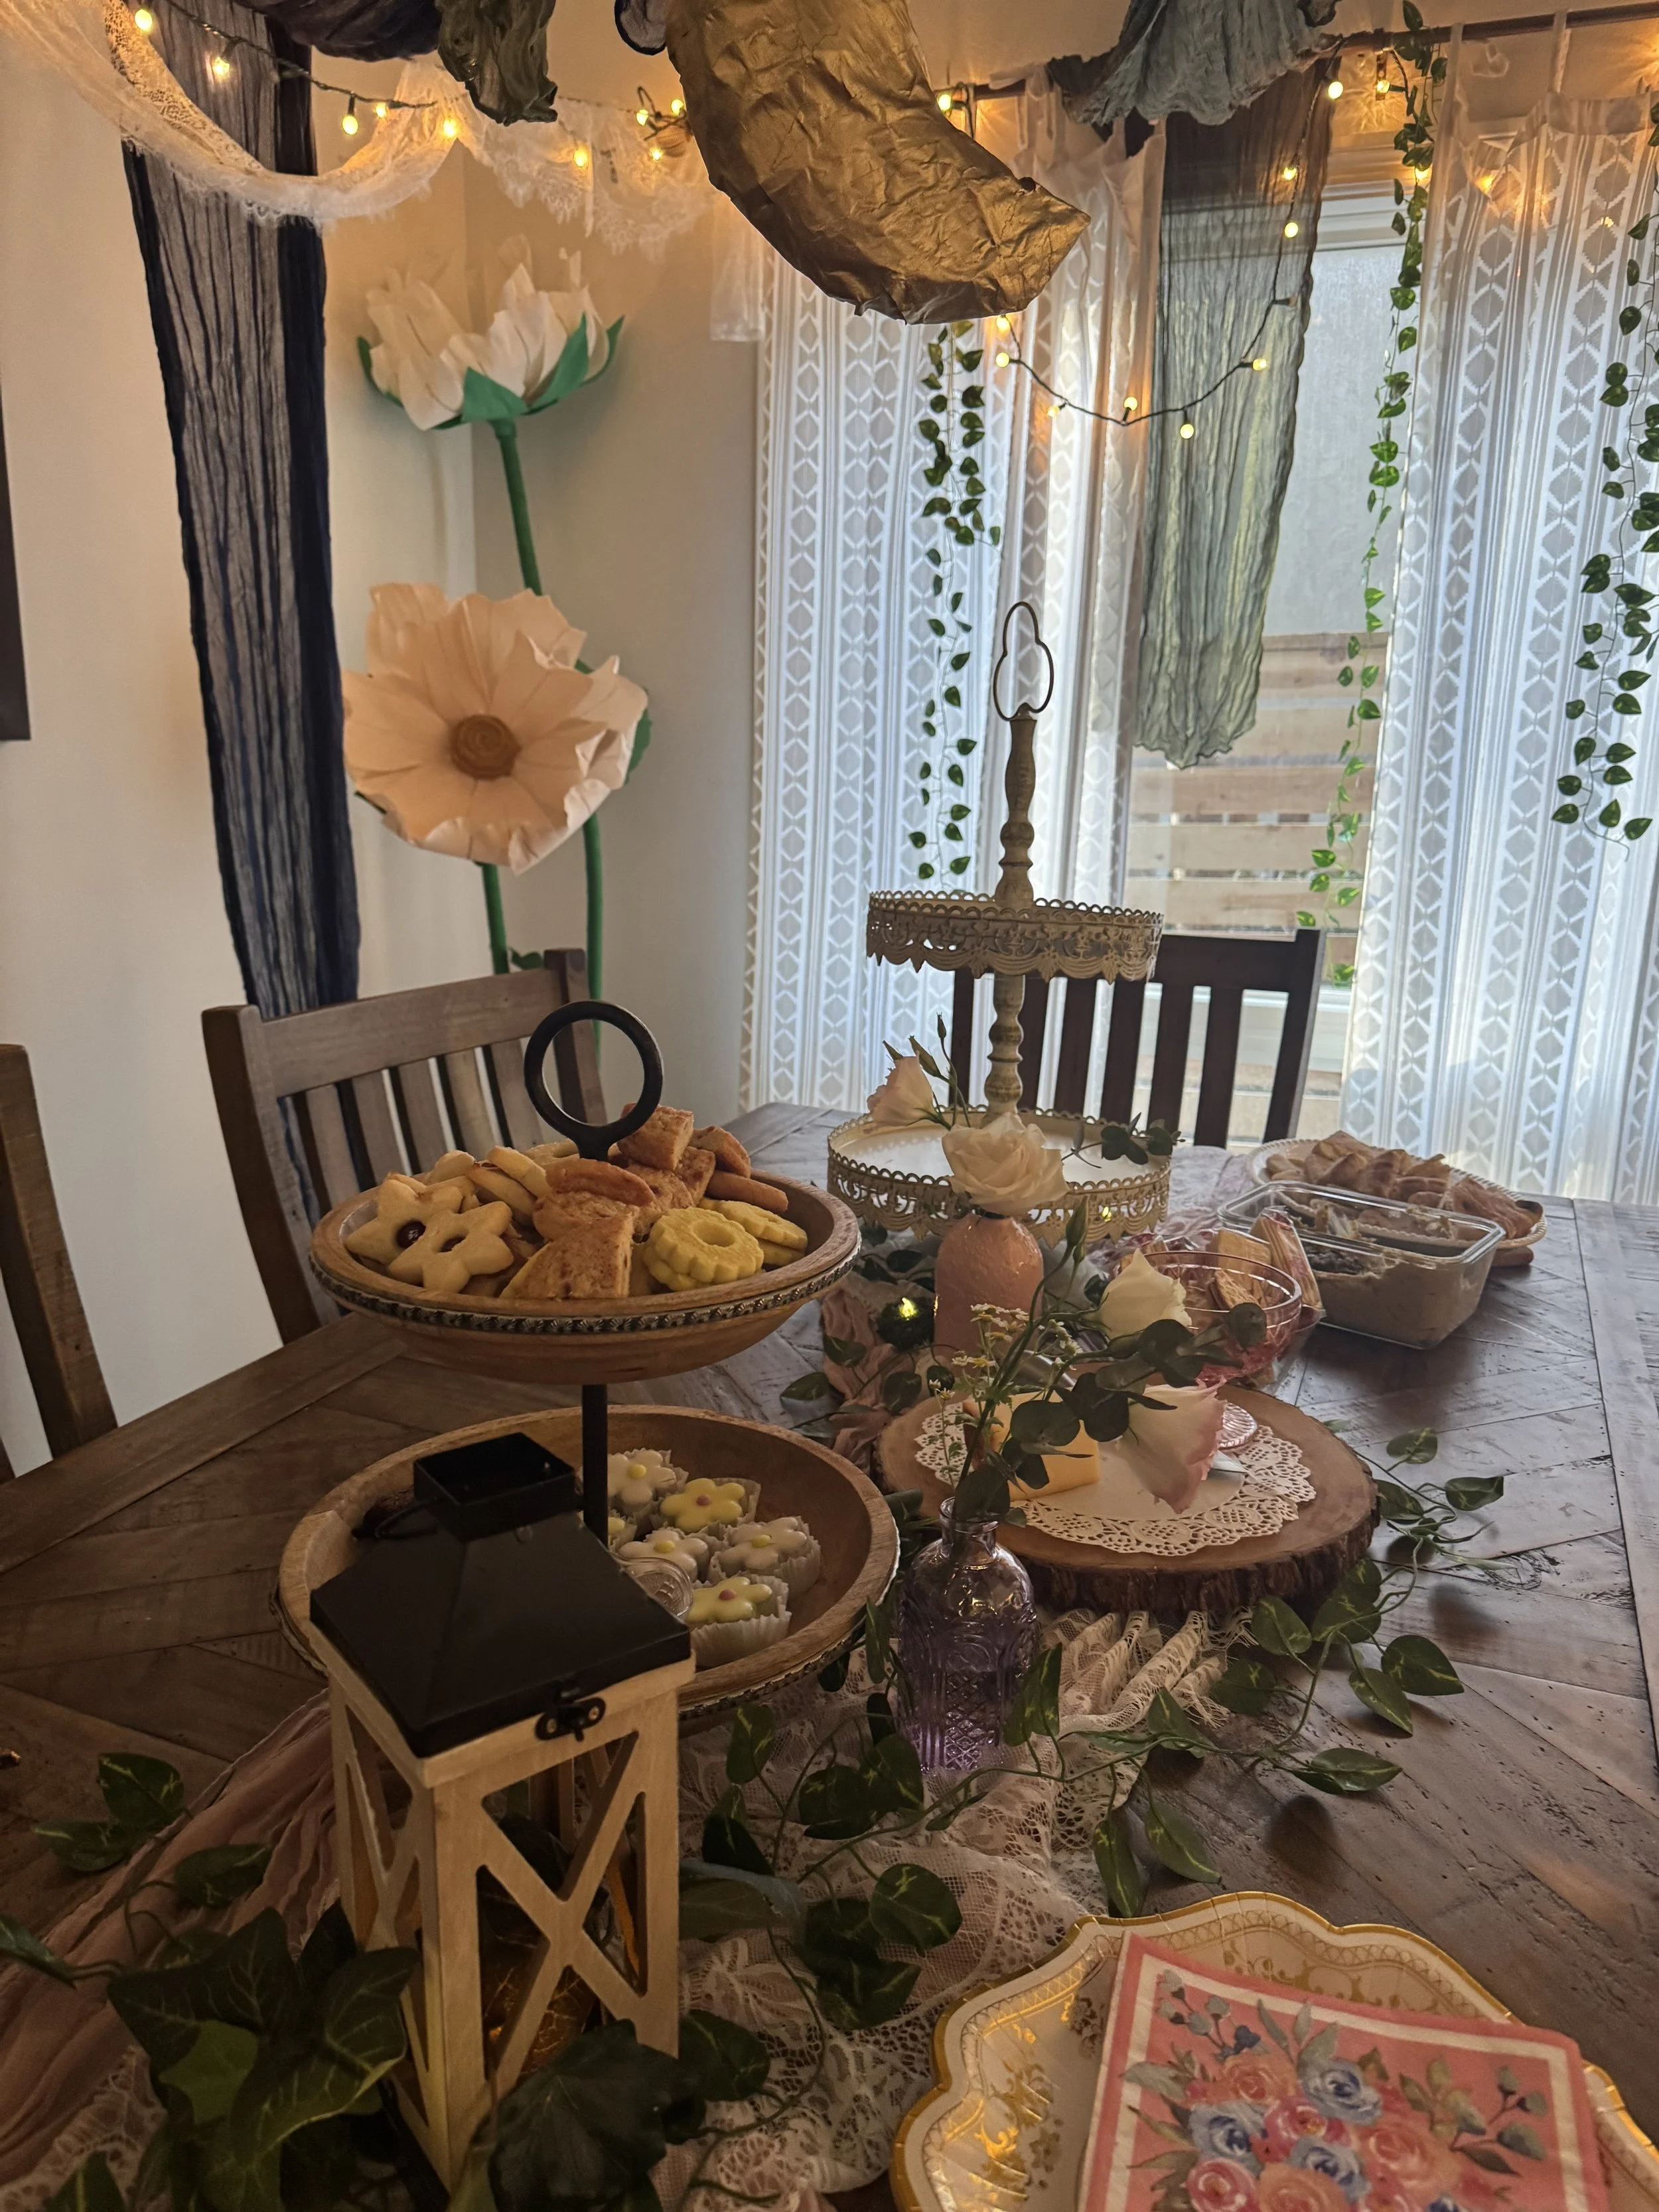
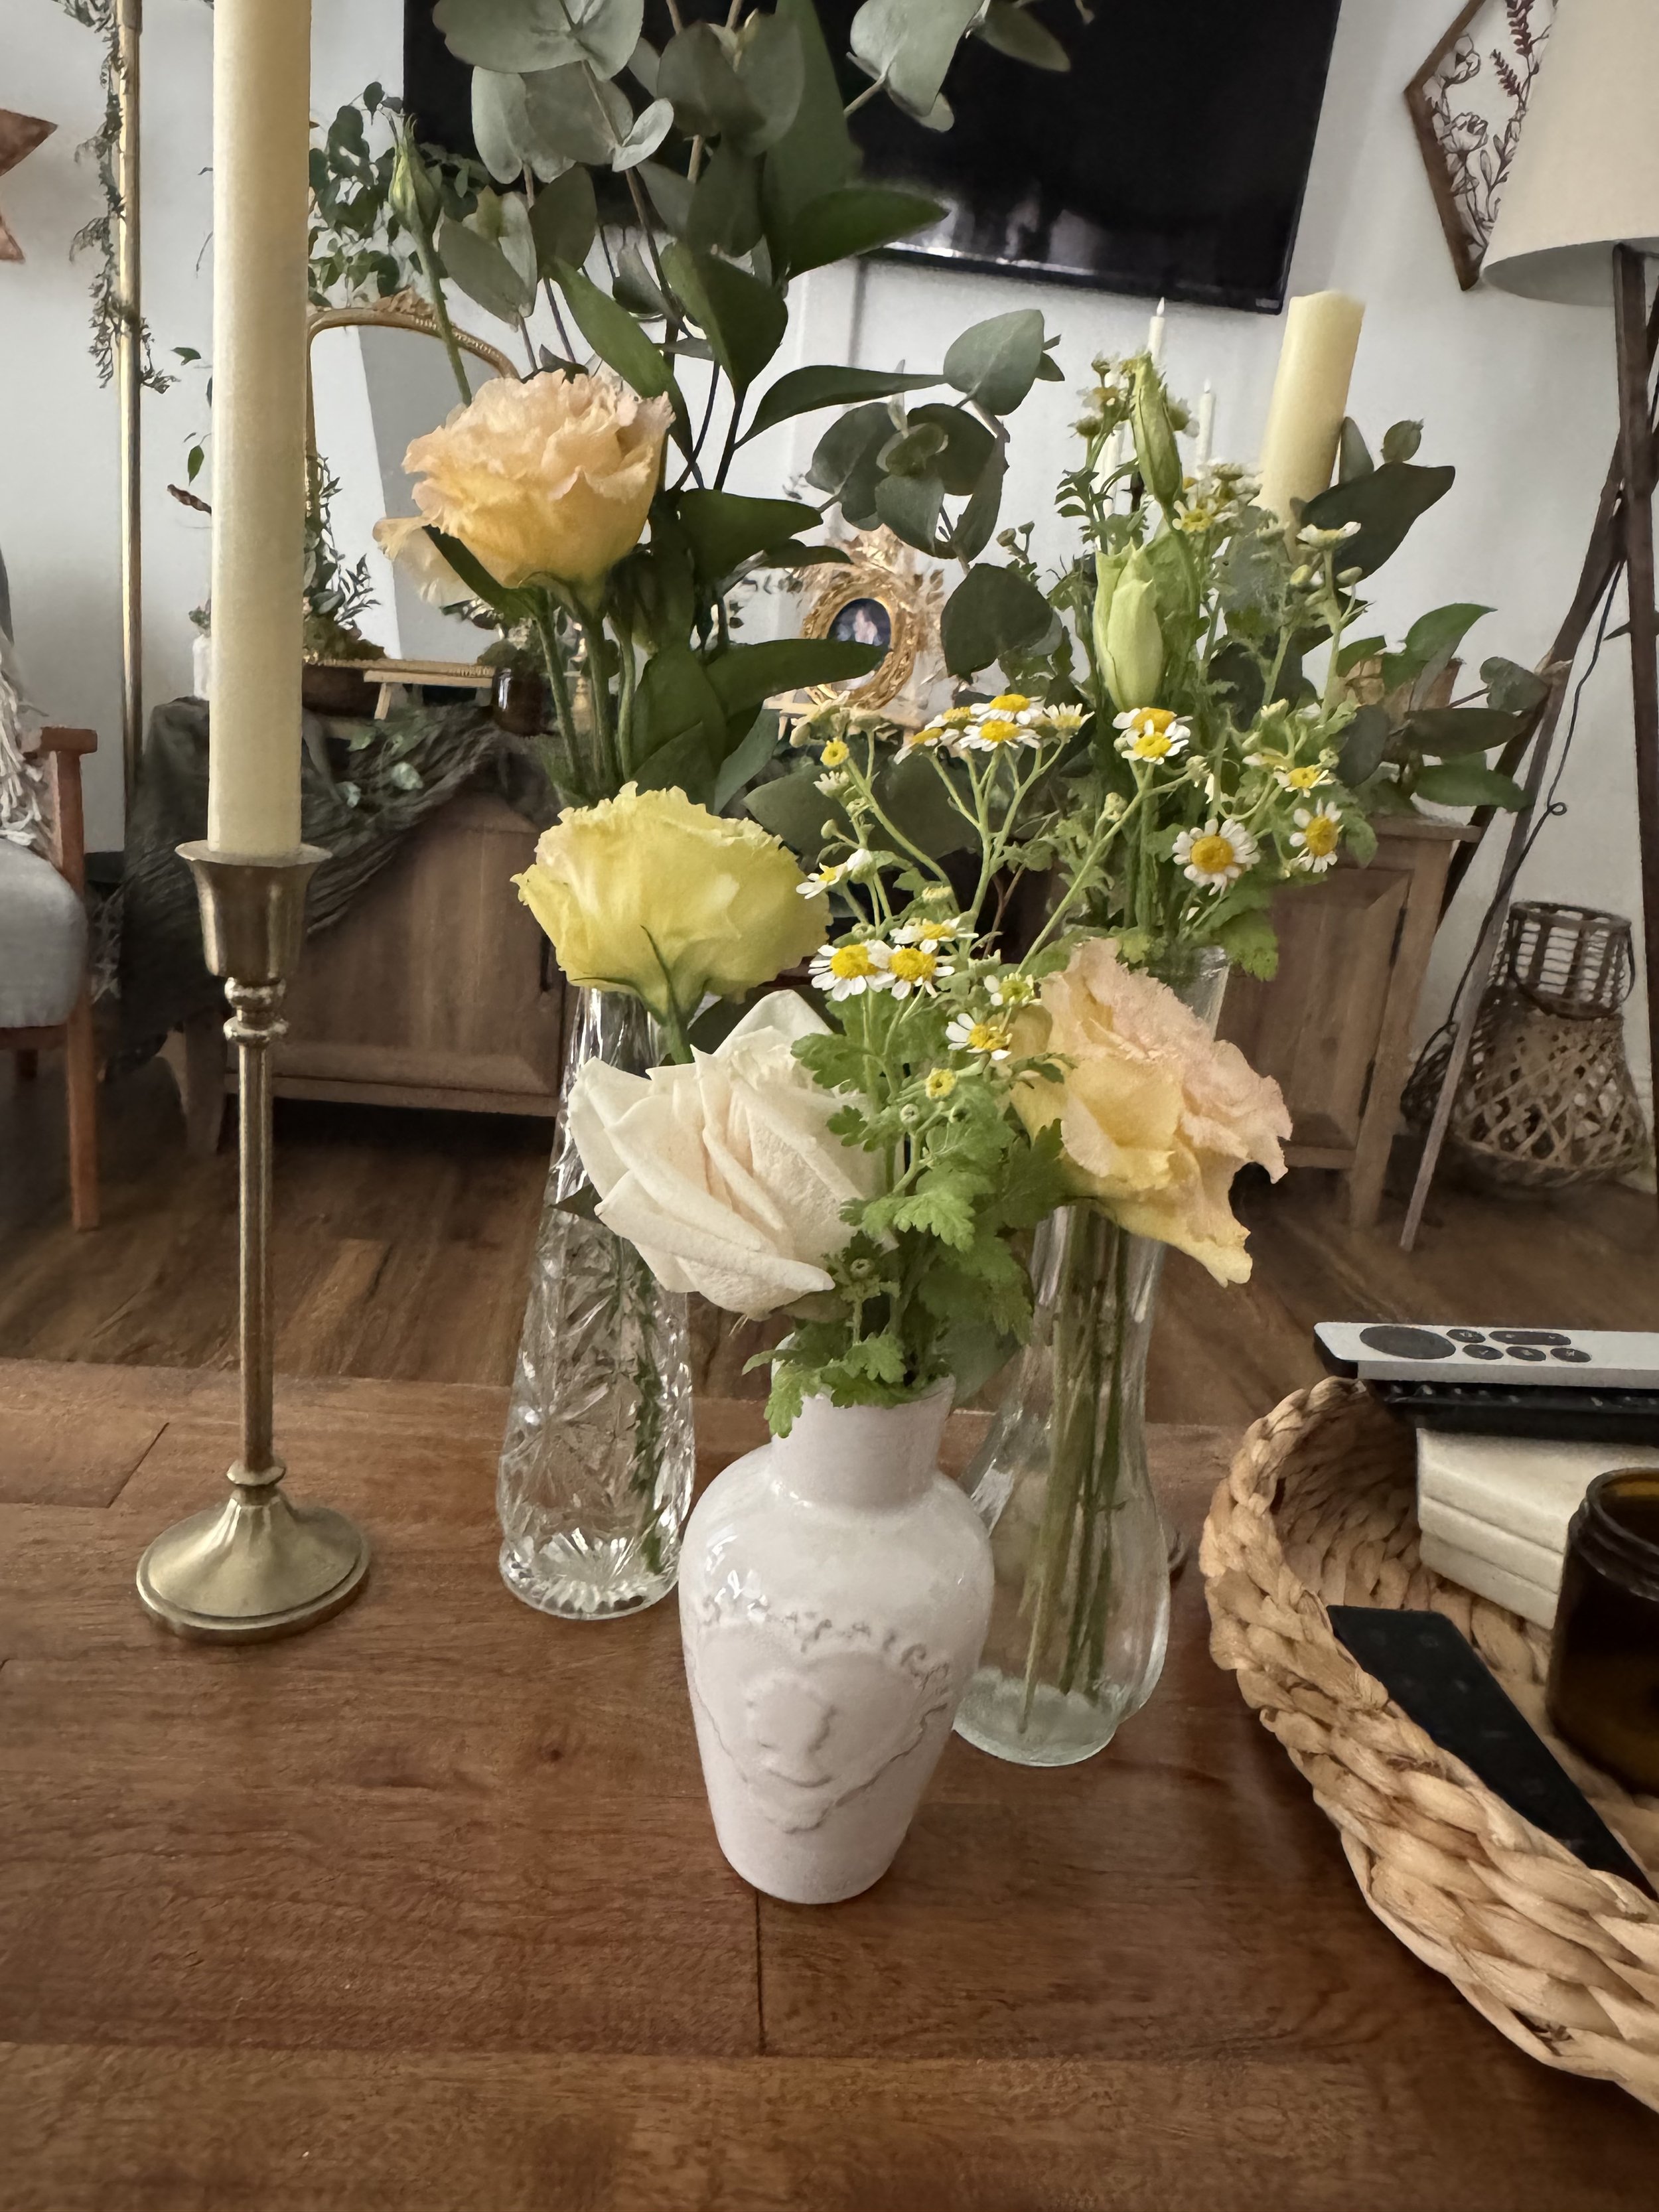
Every year, I mark either the start or the end of summer with a themed party, and this year I went full fairy: a Midsummer Night's Dream party. My goal was simple. When guests walked in, I wanted them to feel like they'd stumbled into an enchanted forest, the kind of whimsical place where fairies hold court after dark.
In this post, I'm walking you through how I planned it, the decor I made by hand, the food, and the Fairy Queen gown I wore to host it all.
Where the planning starts
Every party I throw begins the same way: a moodboard and a slide deck full of ideas. The moodboard sets the feeling (colors, textures, lighting), and the slide deck is where I sort ideas into actual projects.
From there, I map out my major decoration builds. For this party, I knew I wanted three big things:
Giant flowers to make guests feel fairy-sized
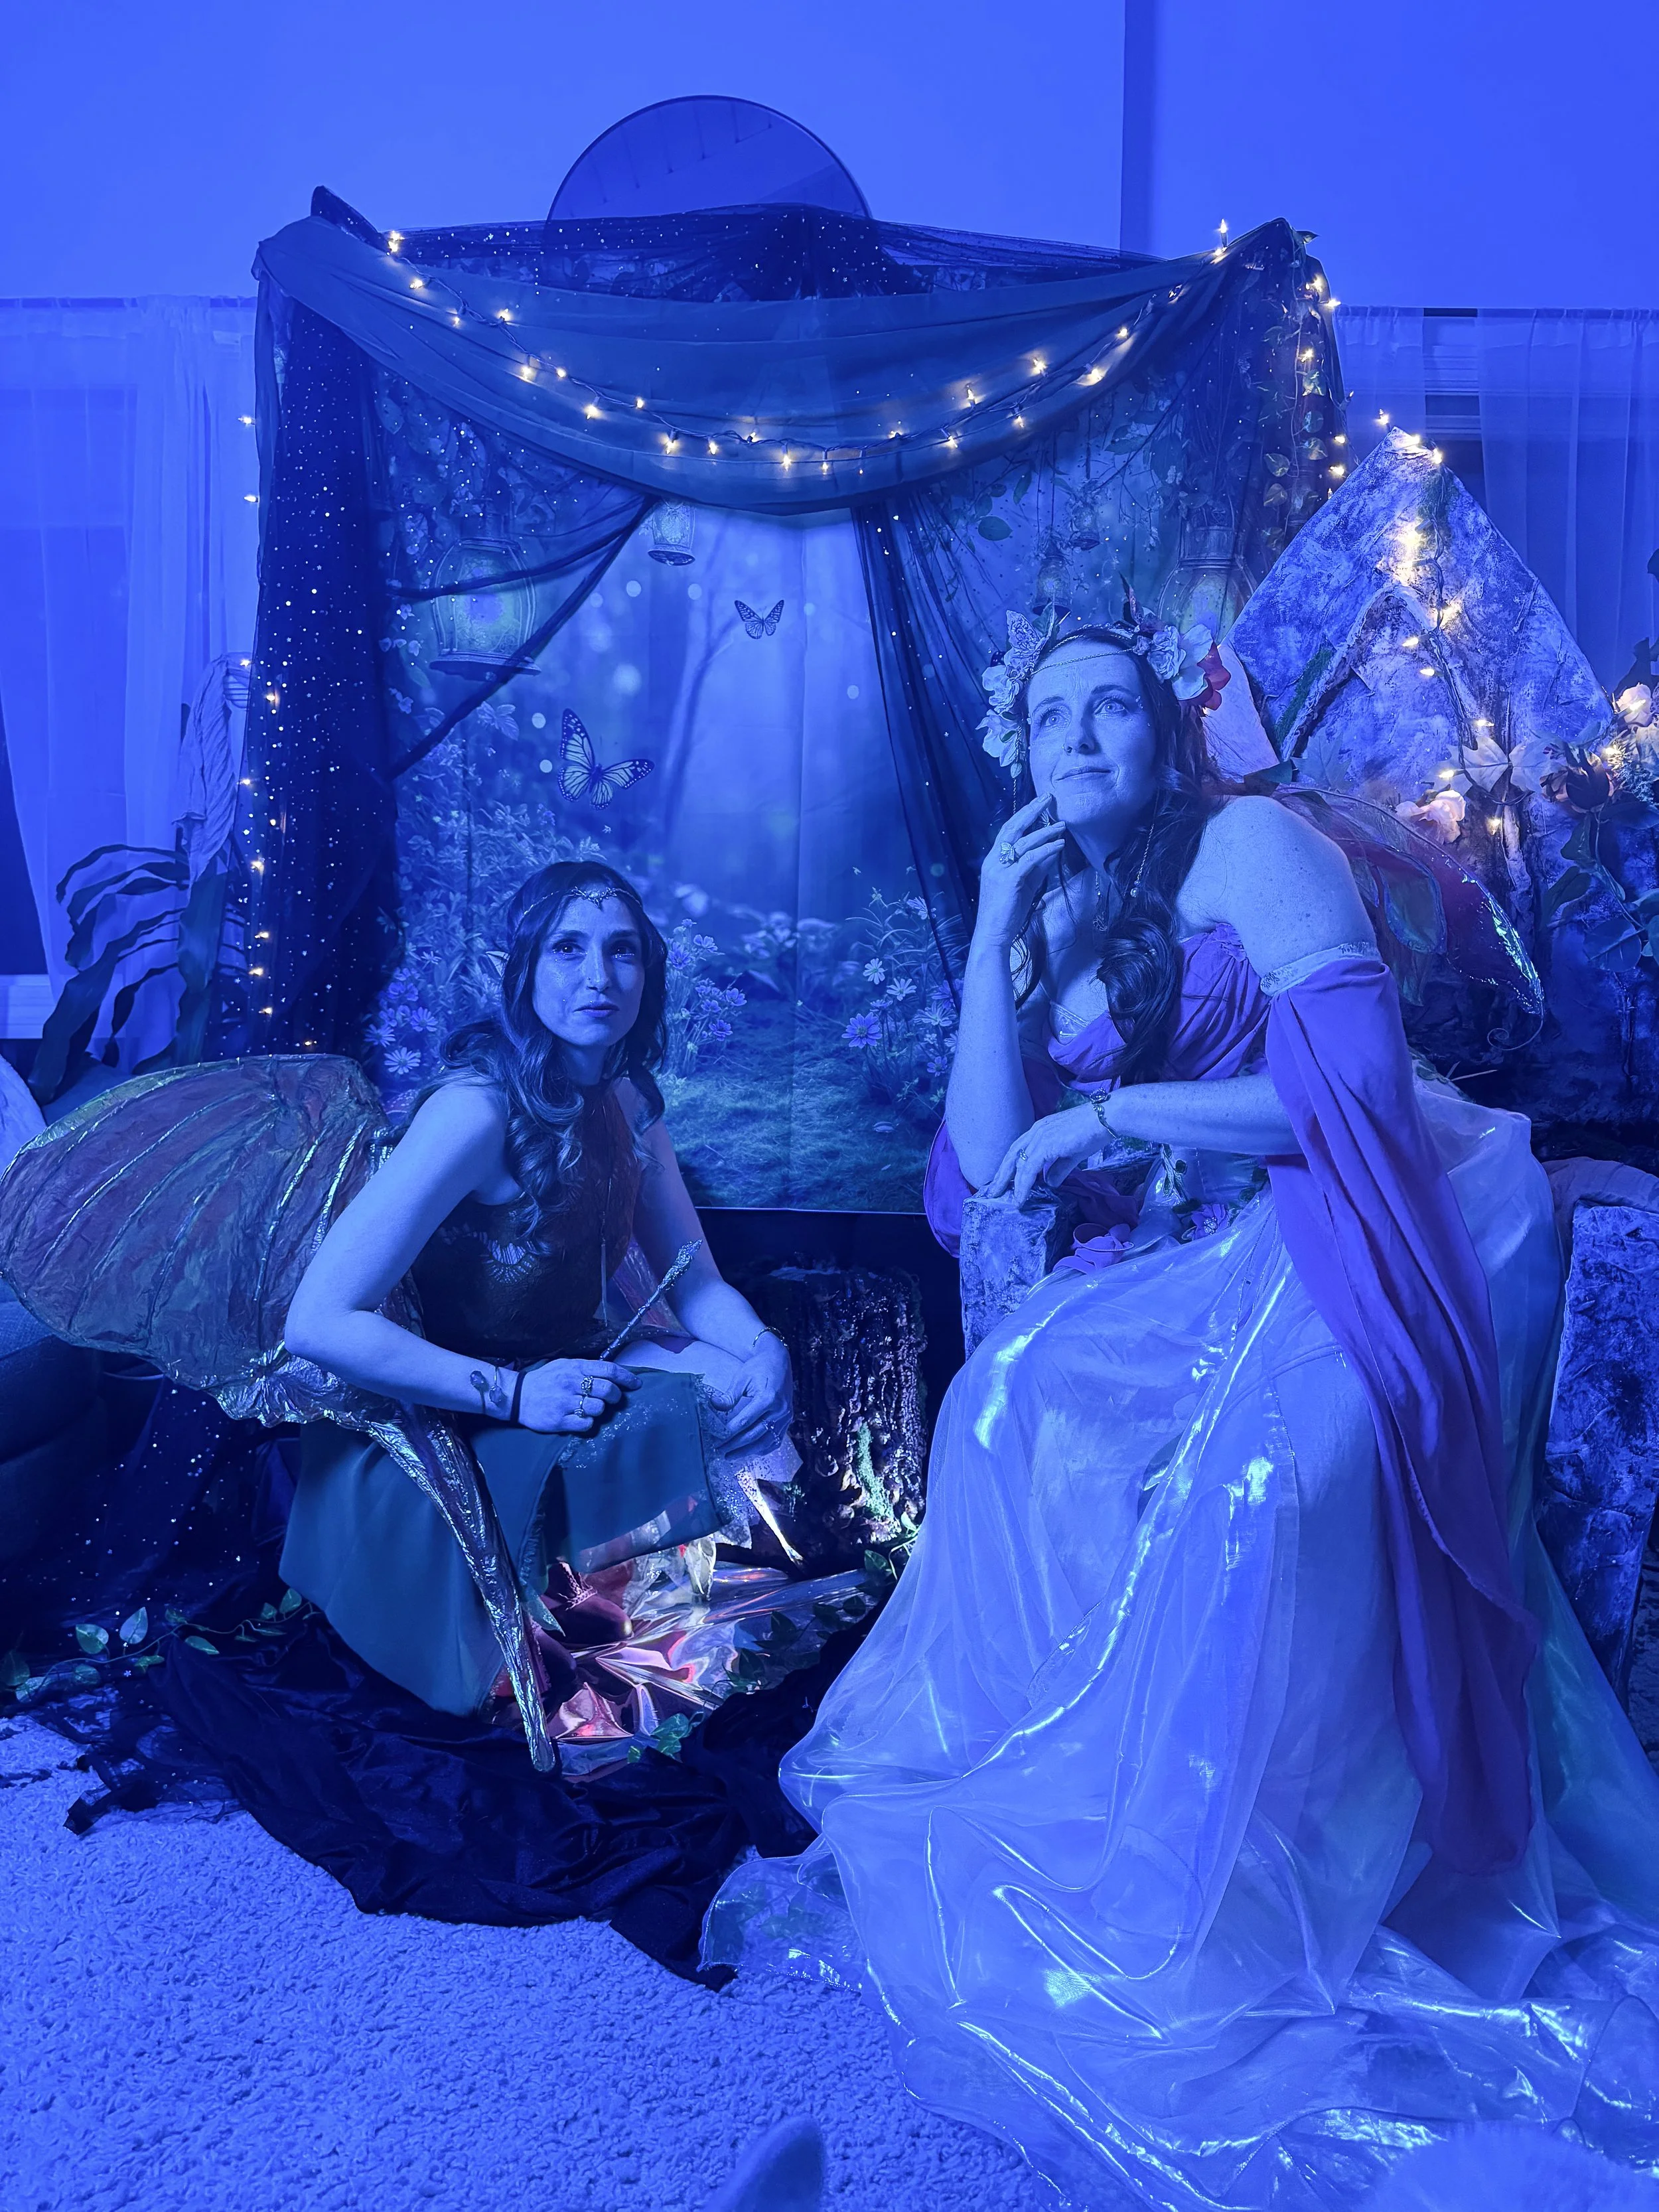
A photo scene where everyone could pose and play
Woodland details, like a tree stump and mushrooms, to sell the forest-floor feeling
I also had a secret weapon already in storage. I'd built a throne for a previous Villains party, and I knew it could be reborn as a fairy throne with the right makeover. Repurposing past builds is one of my favorite ways to stretch both my budget and my time.
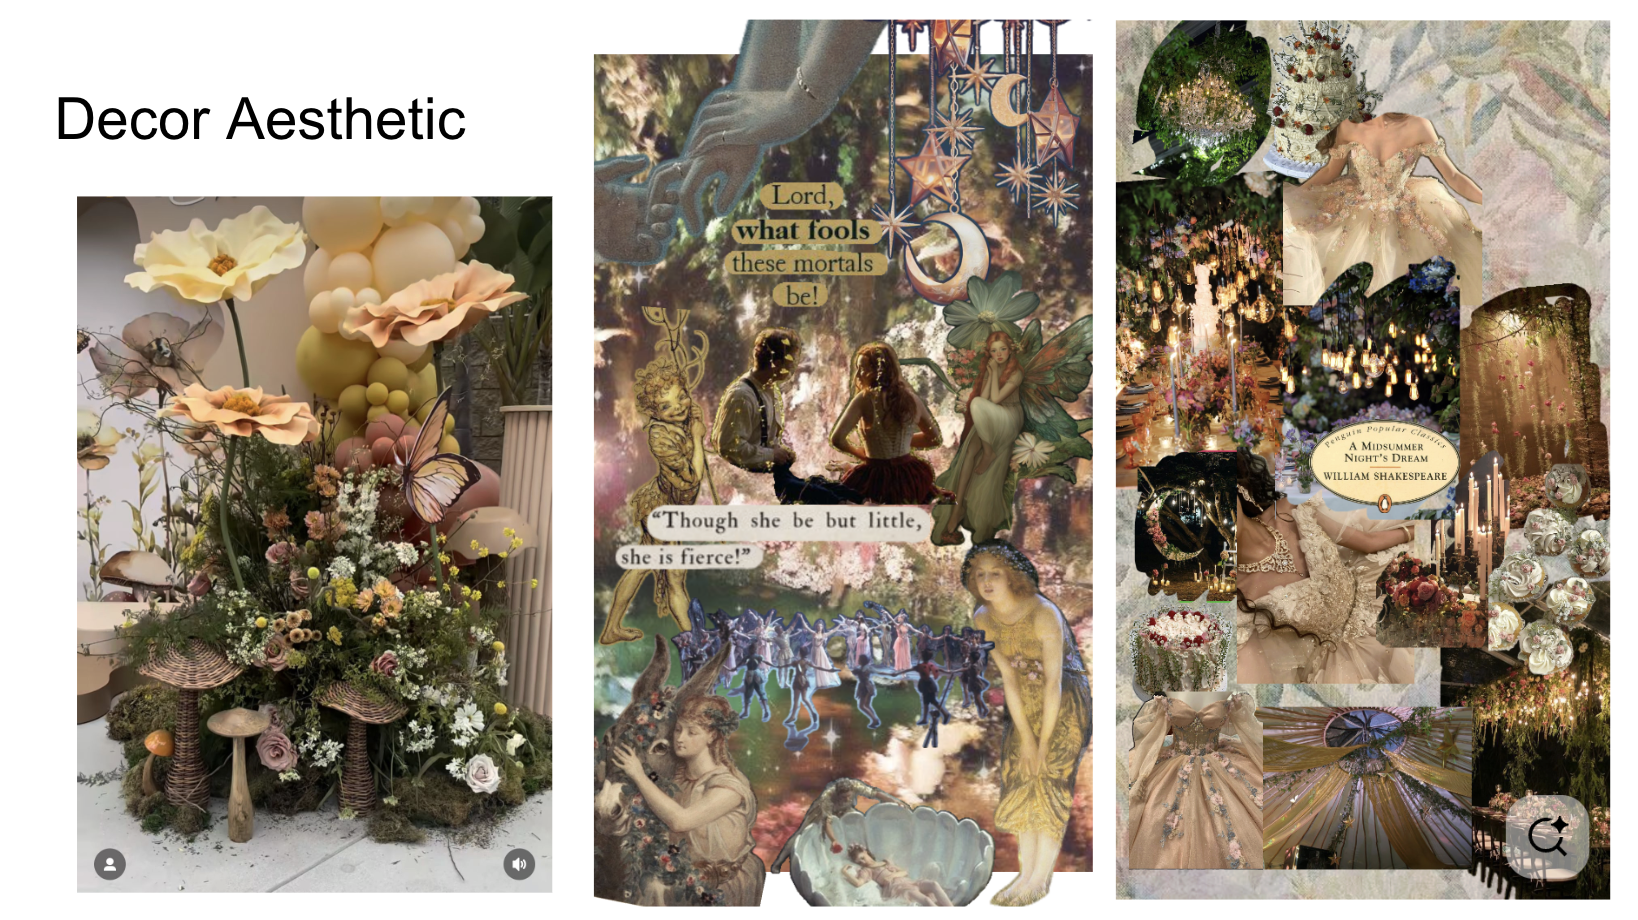
A slide from my planning deck
Bringing the fairy glade to life
Here's how the big decor projects turned out.
Giant flowers
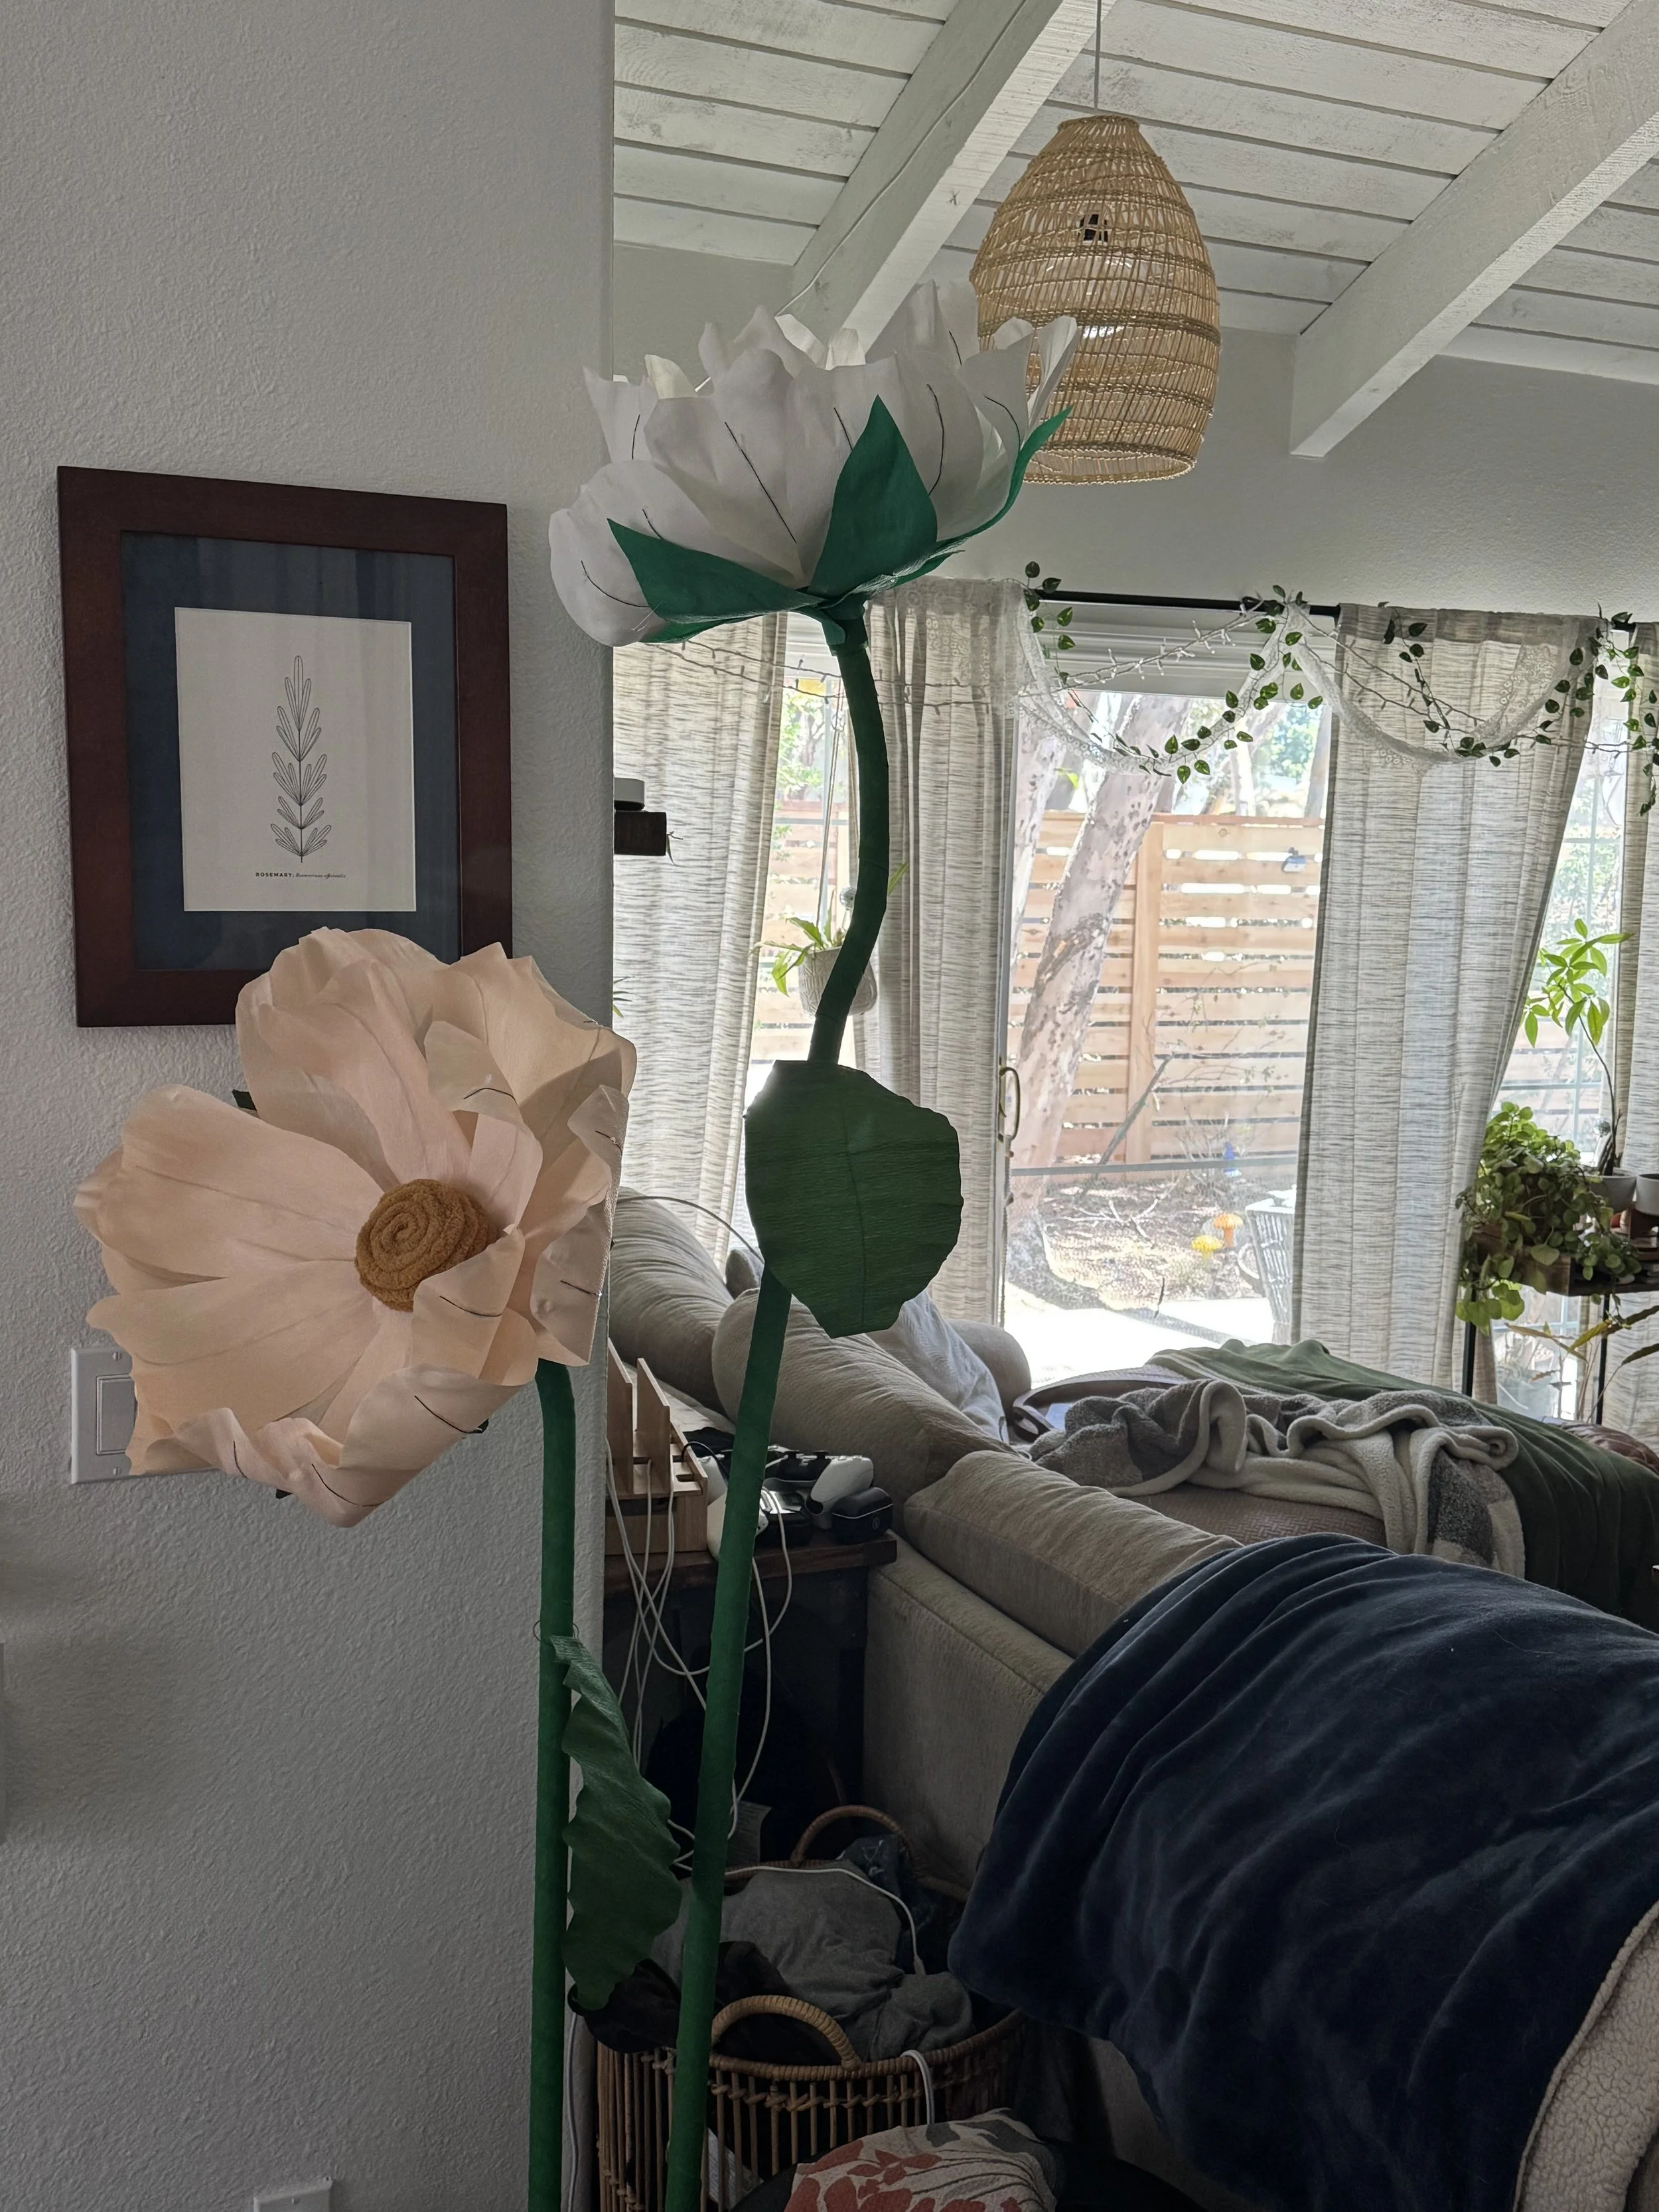
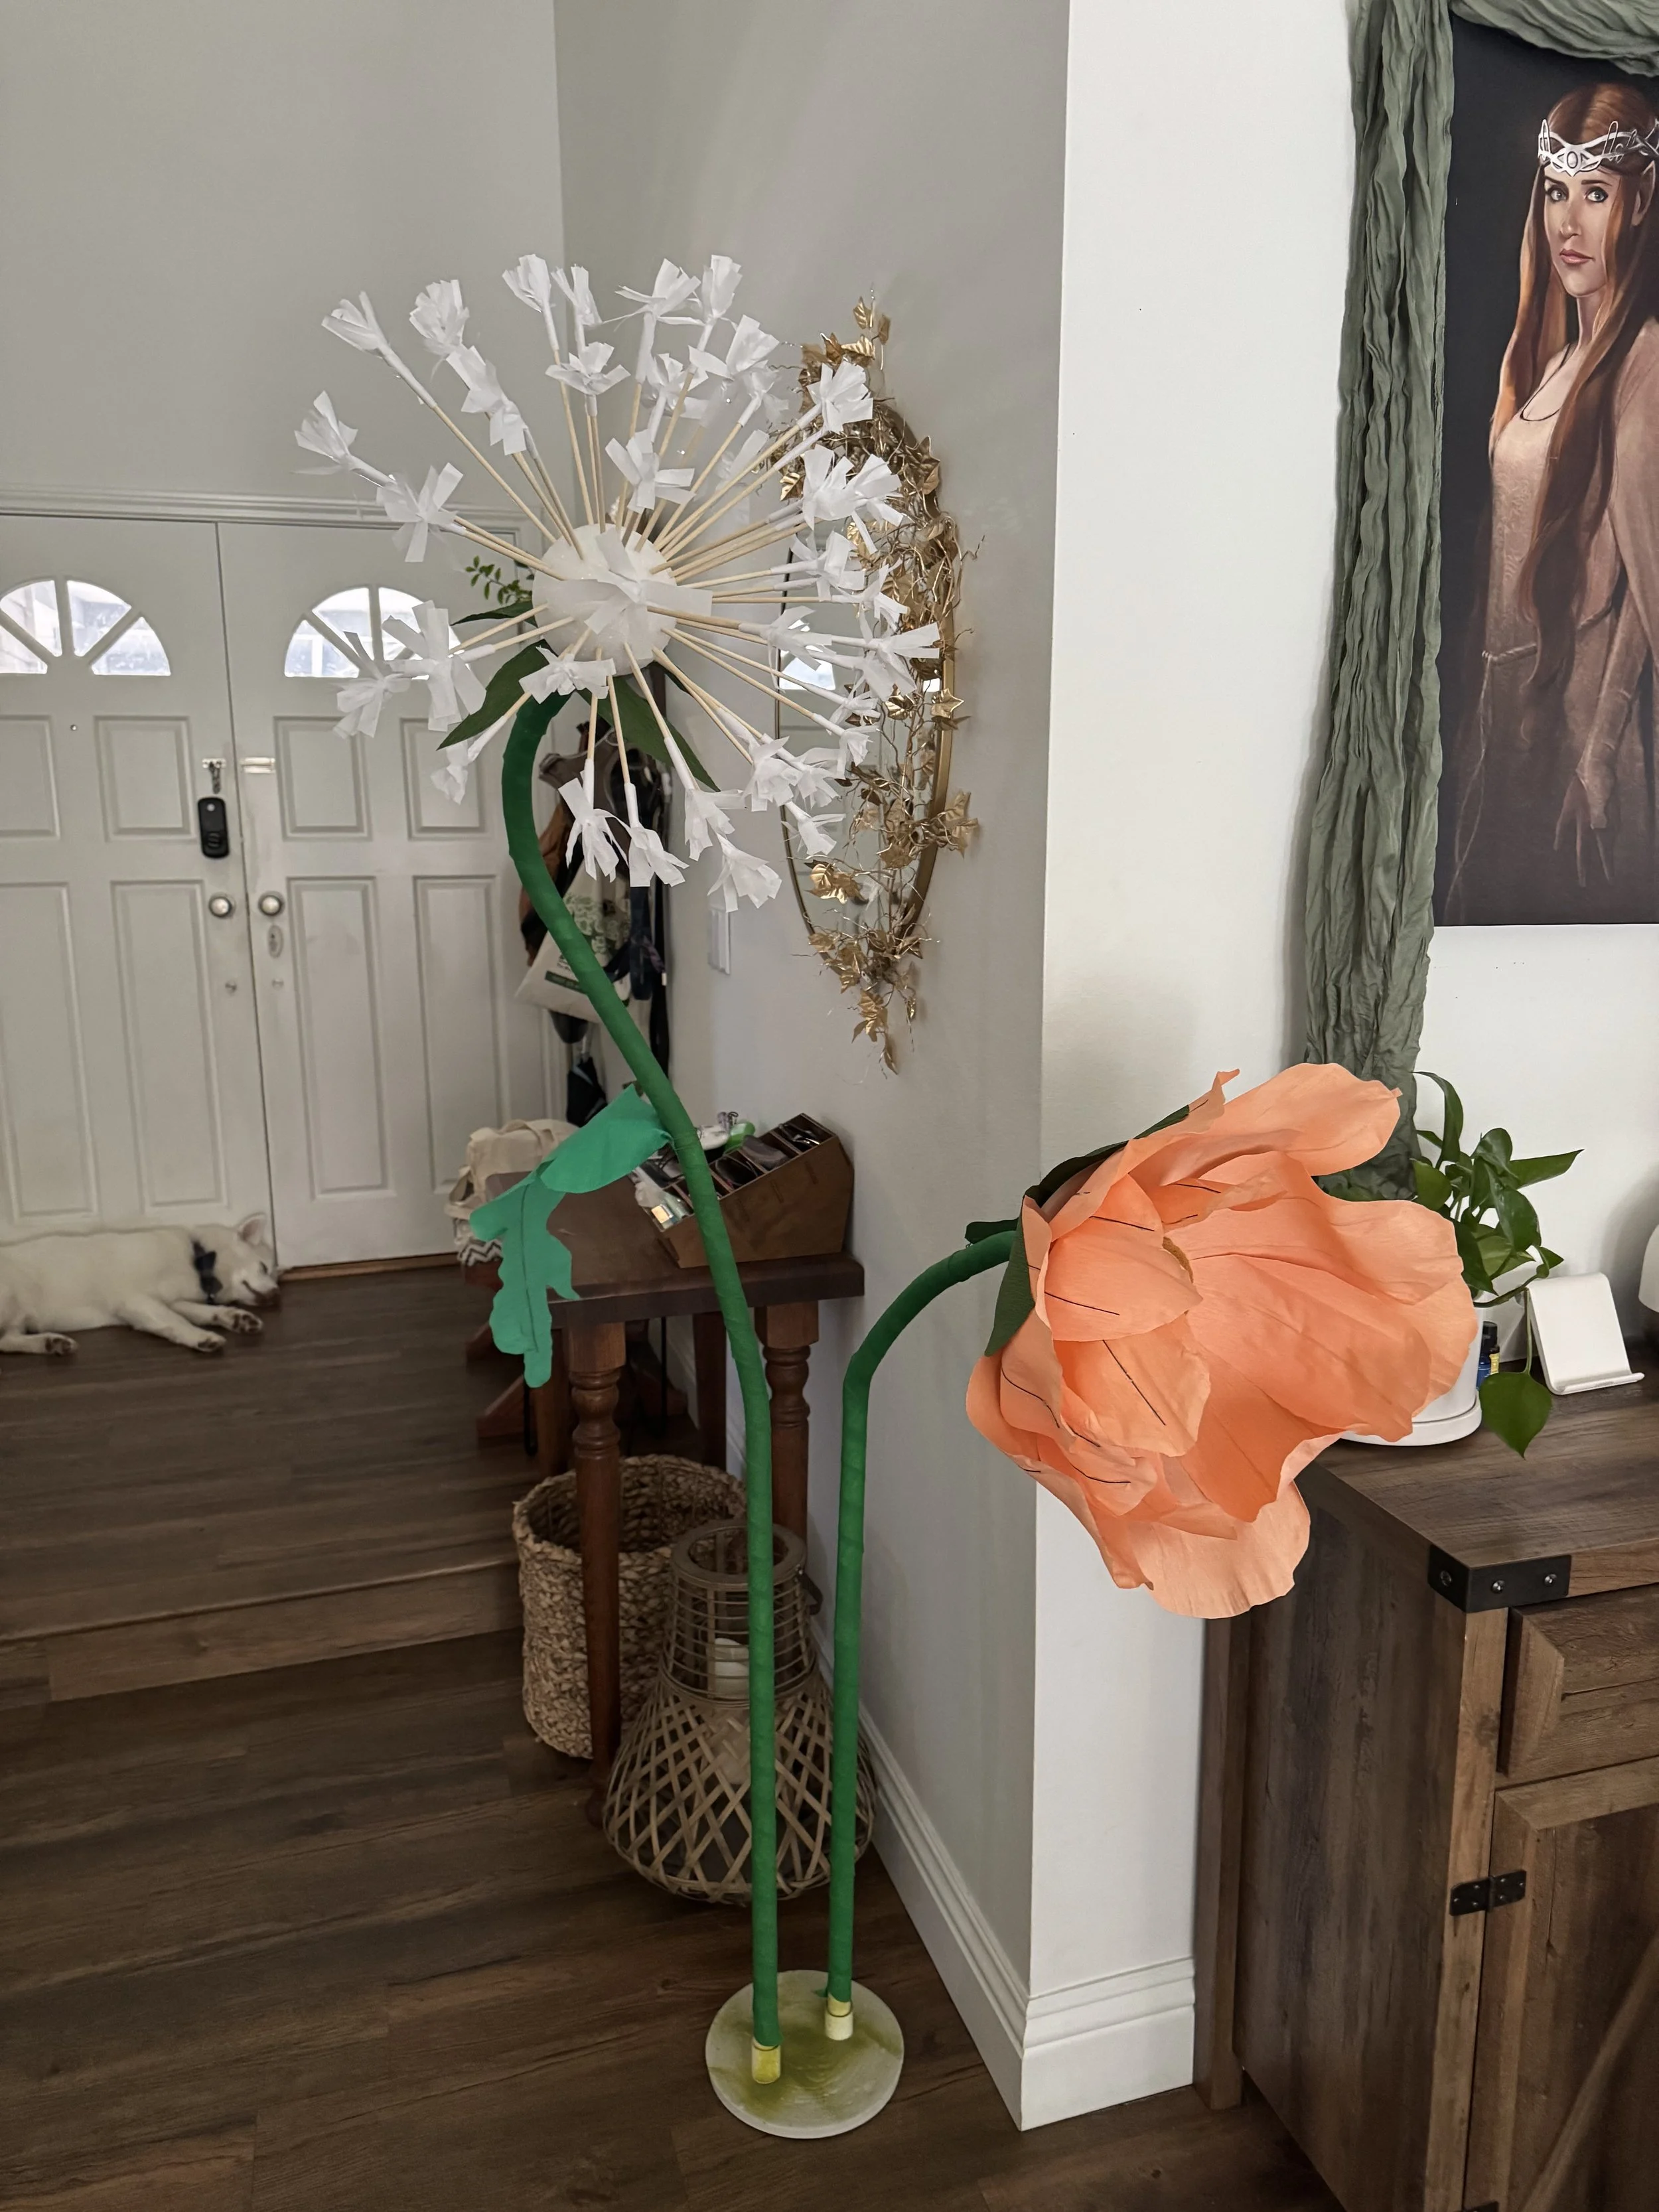
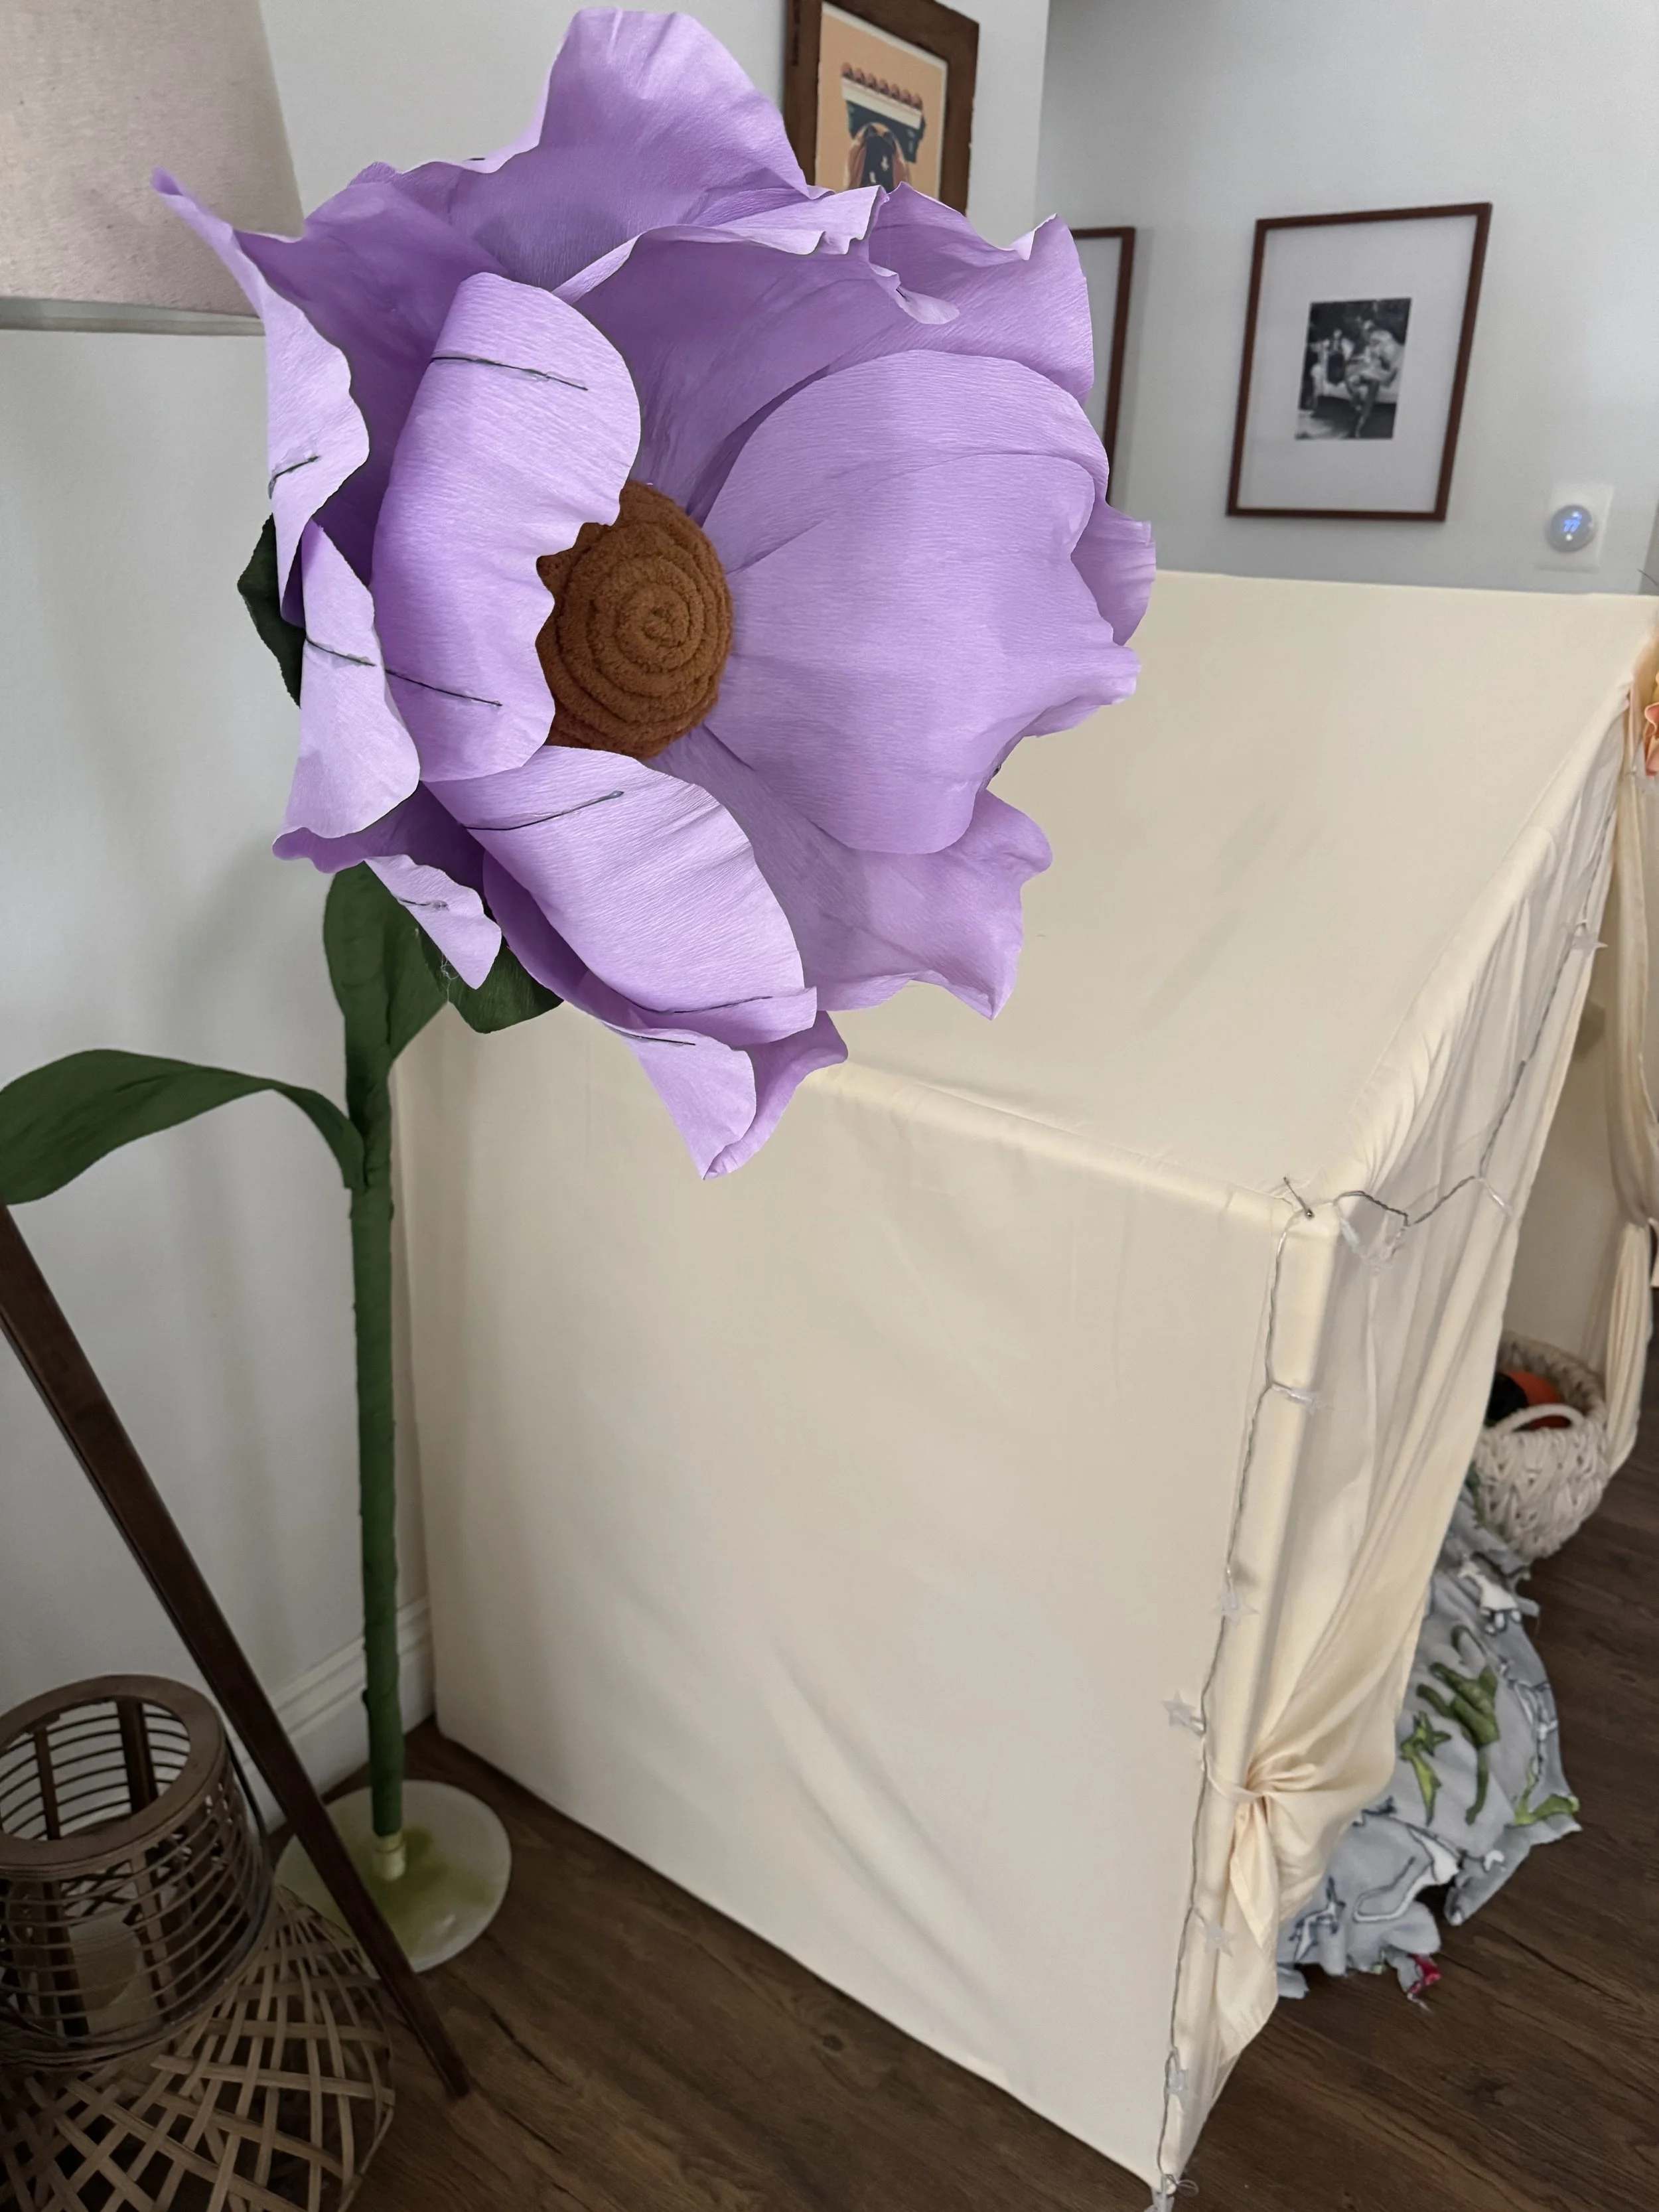
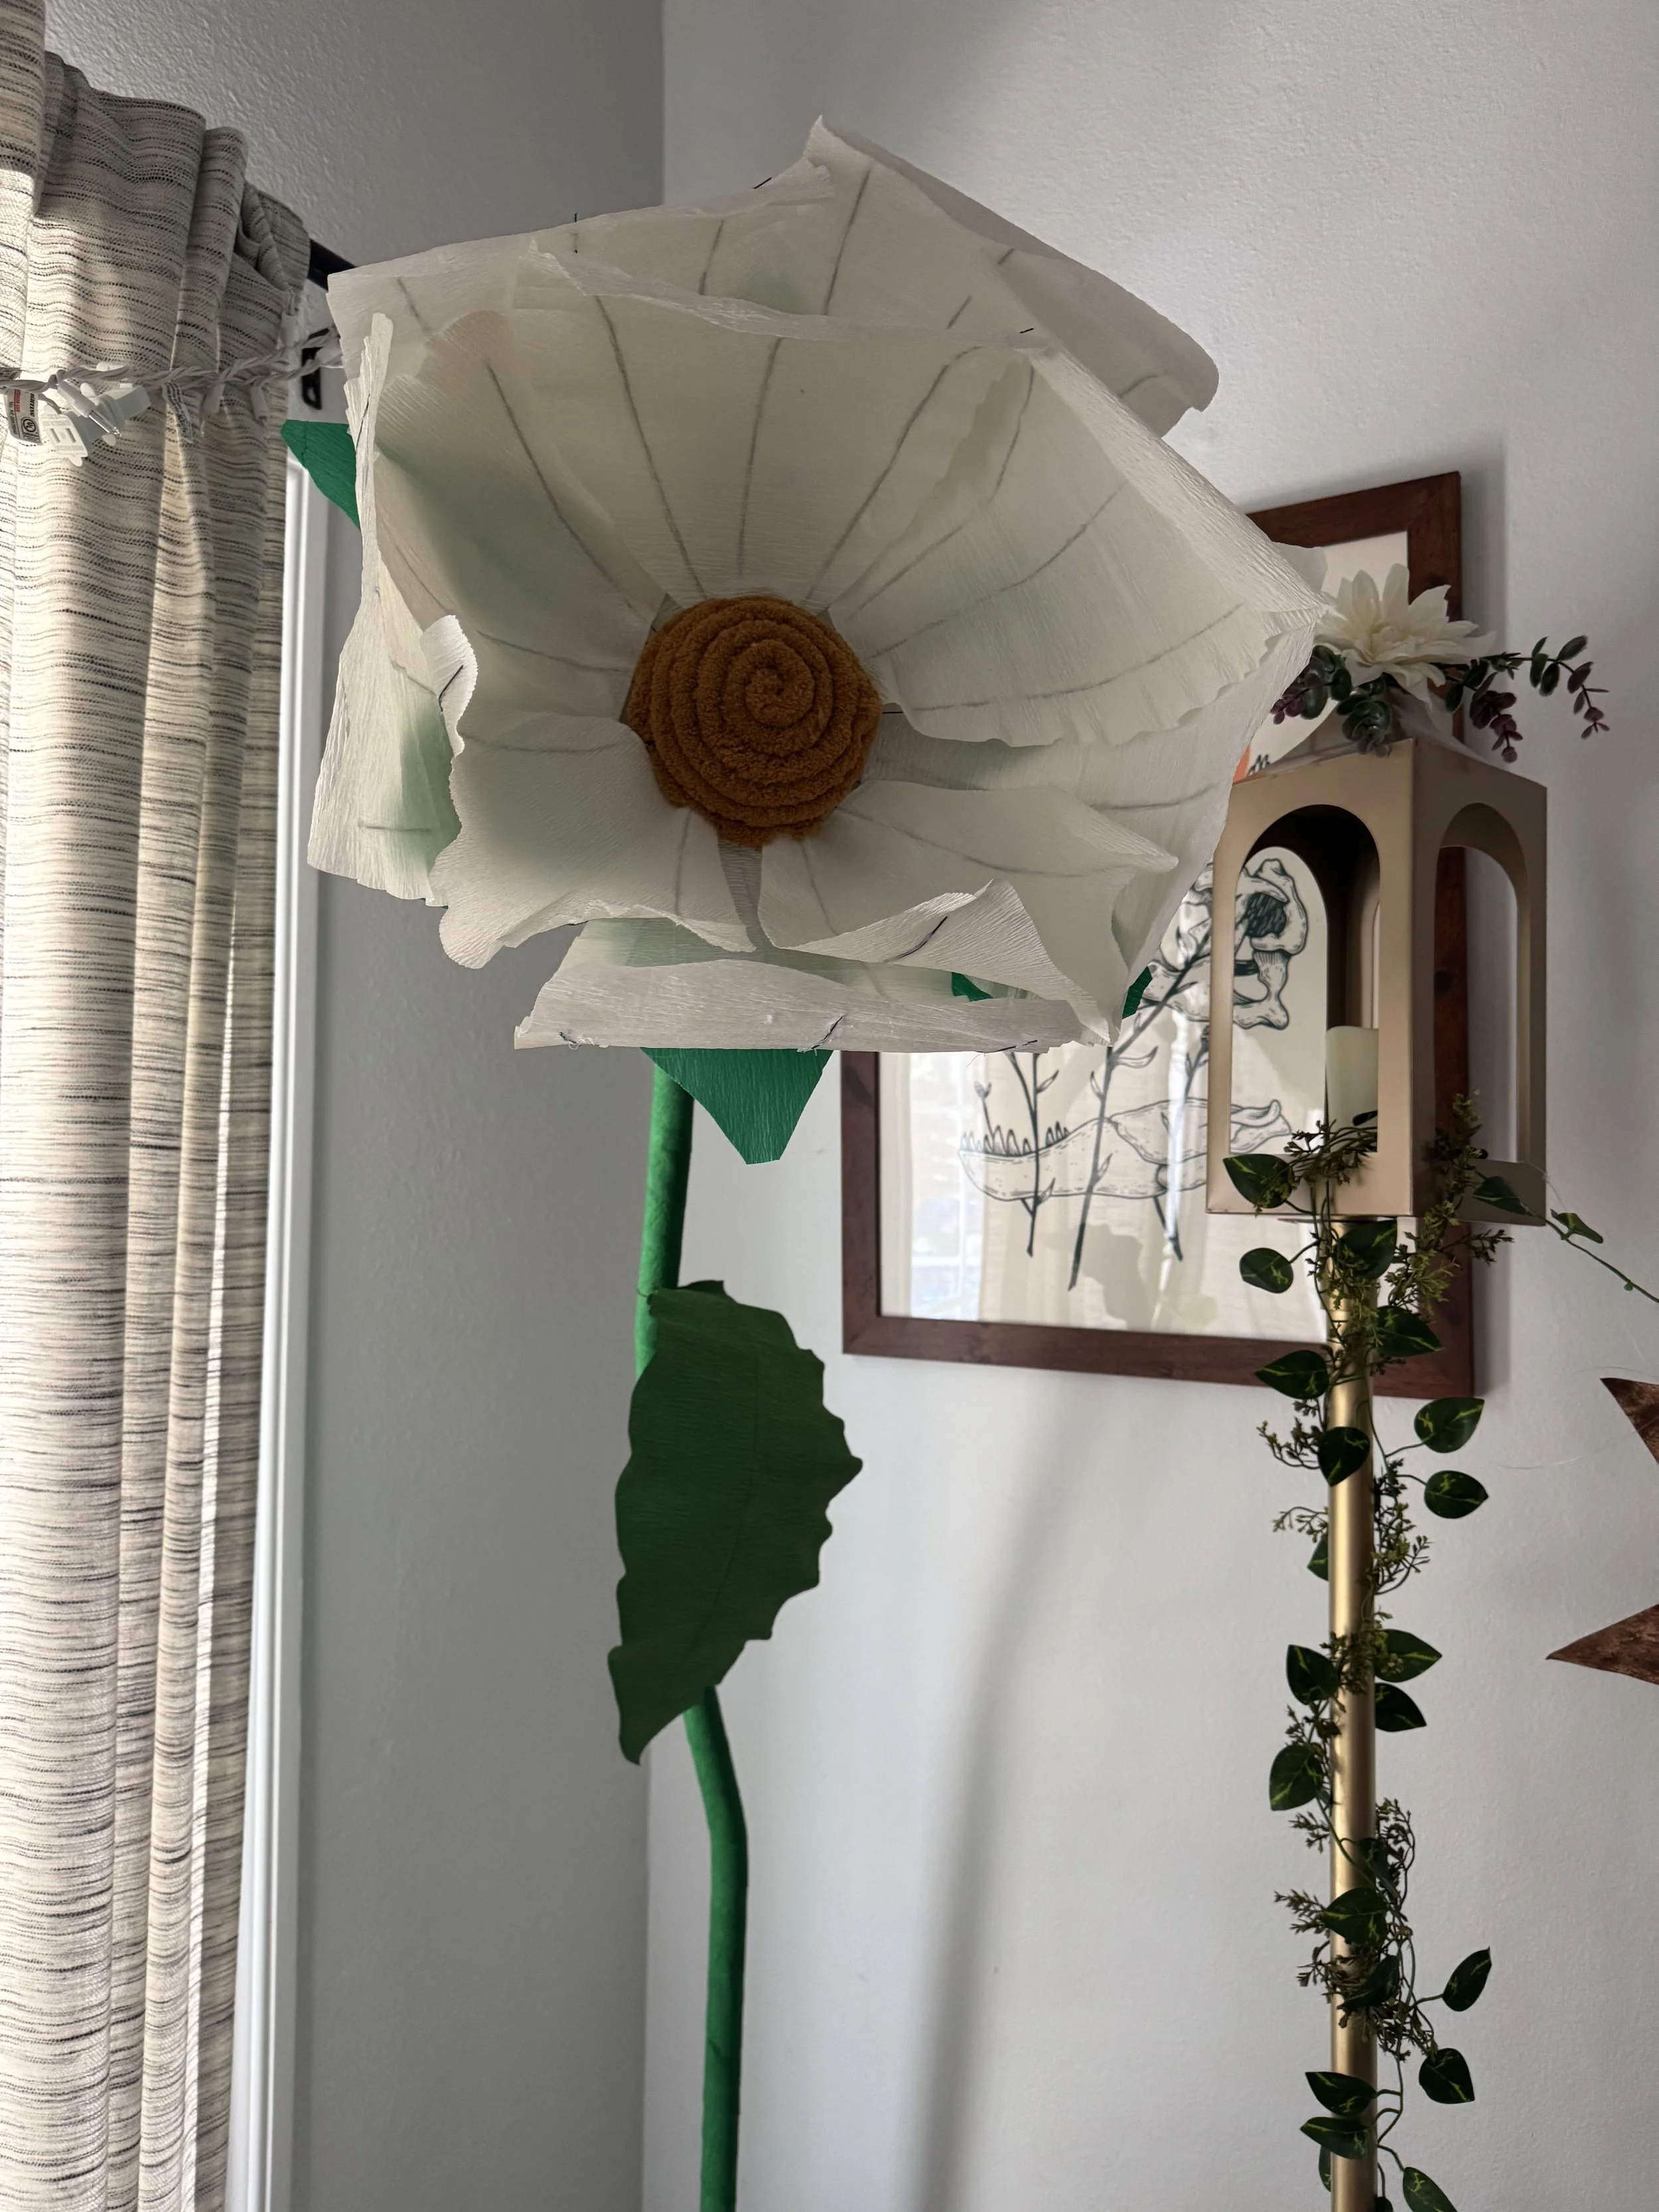
These were the stars of the room. Oversized blooms instantly change your sense of scale, so the whole space feels like you've shrunk down to fairy size.
The fairy throne
My villain throne got a softer, woodland makeover and became the centerpiece of the photo scene.
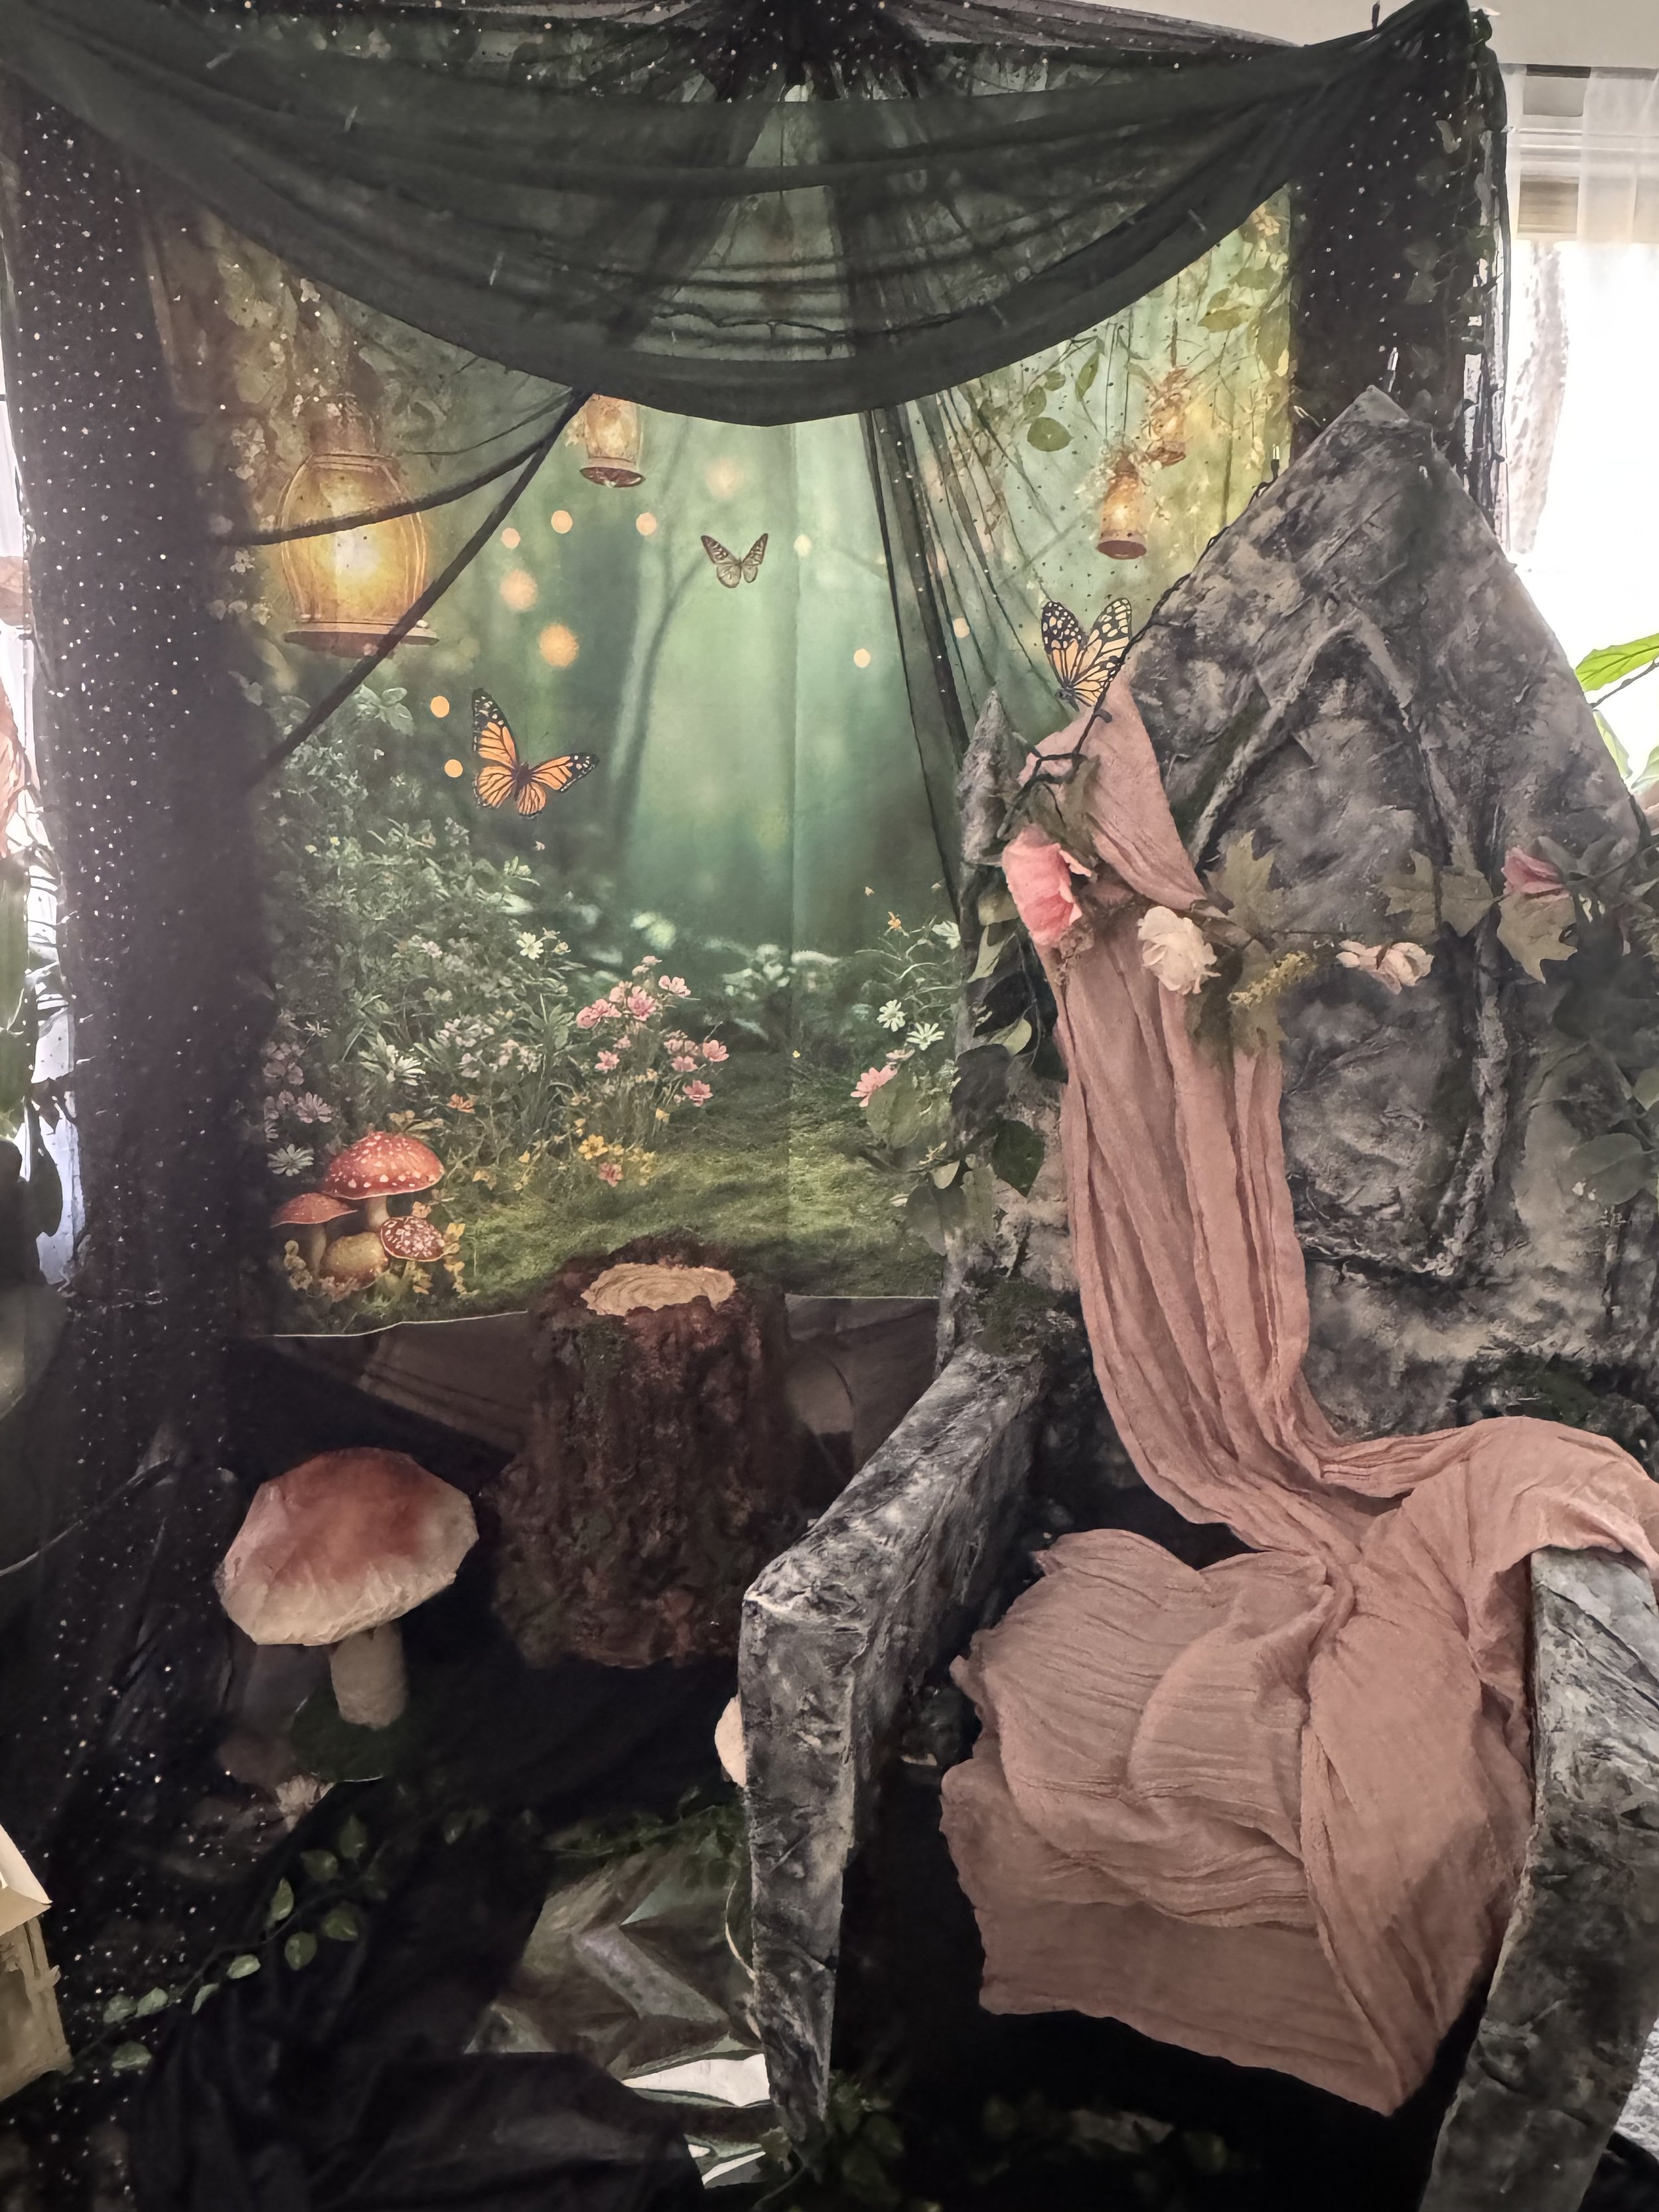
I sponge painted the previously black throne to give it a stone like appearance.
Tree stump and mushrooms
A log stool and a cluster of mushrooms grounded the scene, and made it feel like a real forest floor. They also gave guests fun props to sit on and pose with.
The photo scene
With the throne, flowers, mushrooms, and stump all together, the photo area came together exactly the way I'd pictured it on my moodboard.
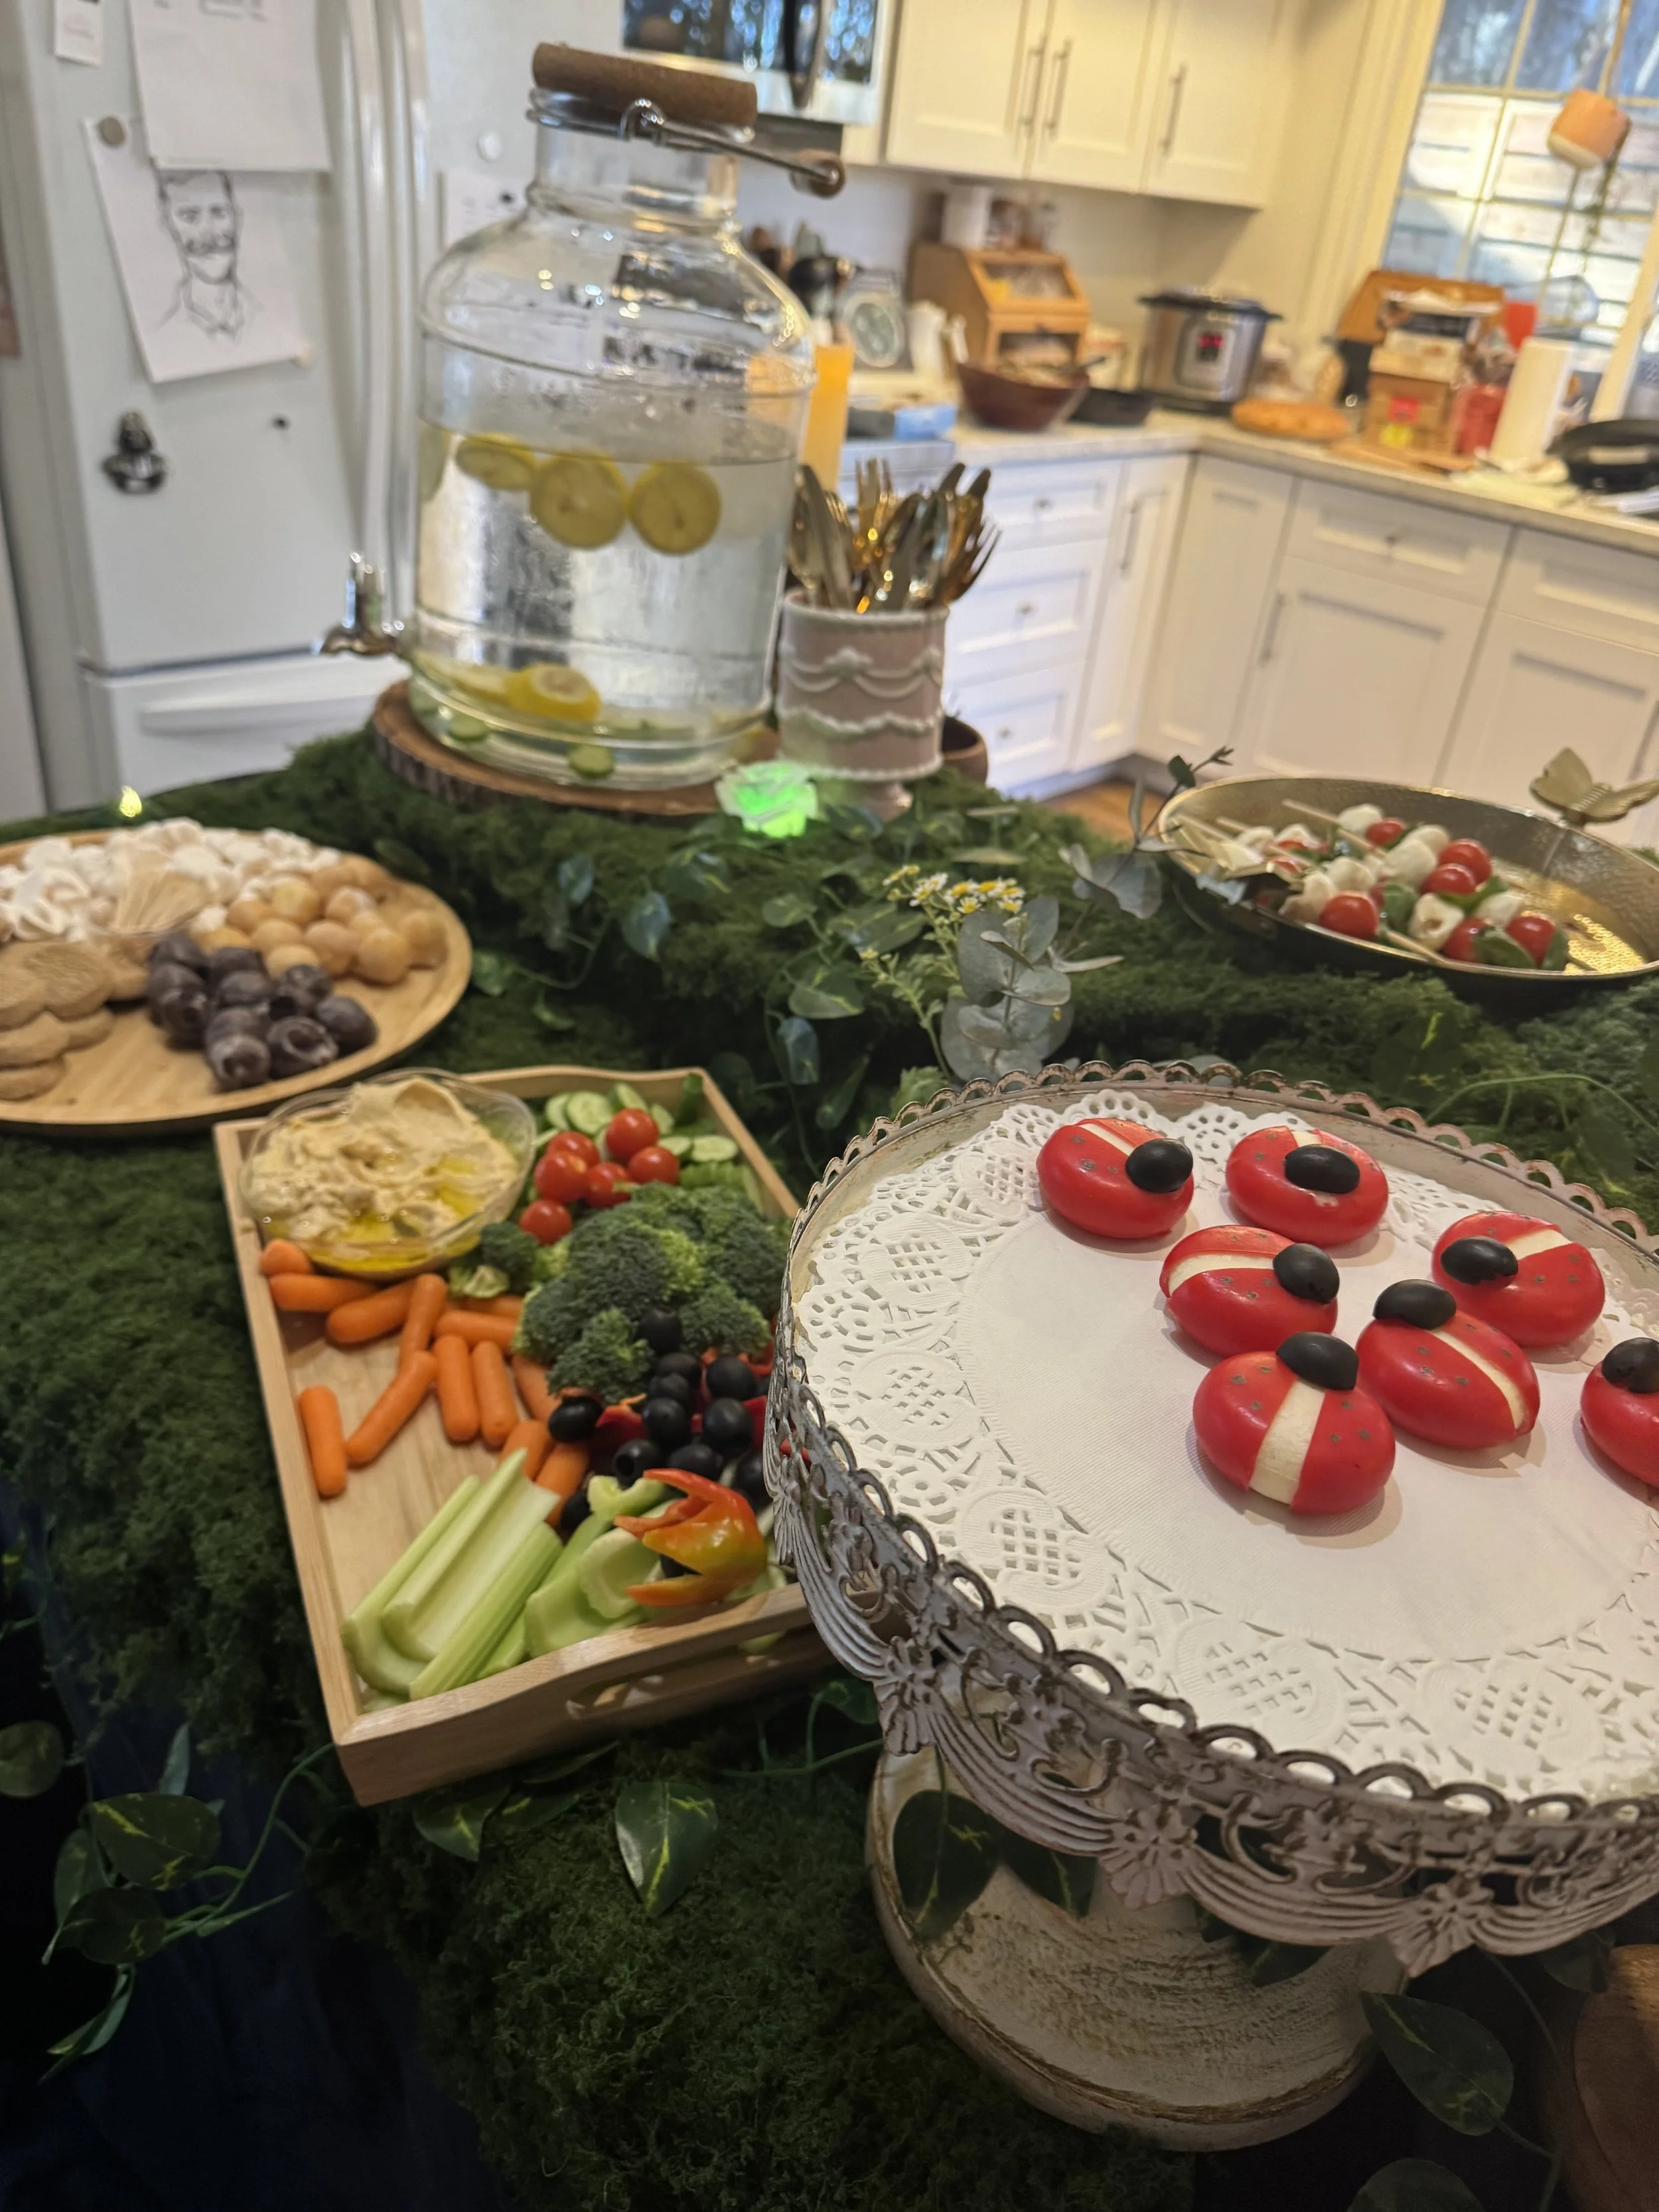
Fairy-sized food
For the menu, I kept it to finger foods and appetizers, which are easy for guests to graze on while they mingle and take photos. My favorite touch was these little ladybug cheeses. They're adorable, and they fit the theme perfectly.
For the table, I found a fantastic moss fabric that made the perfect tablecloth. It turned the whole spread into a mossy forest bank.
My look: the Fairy Queen
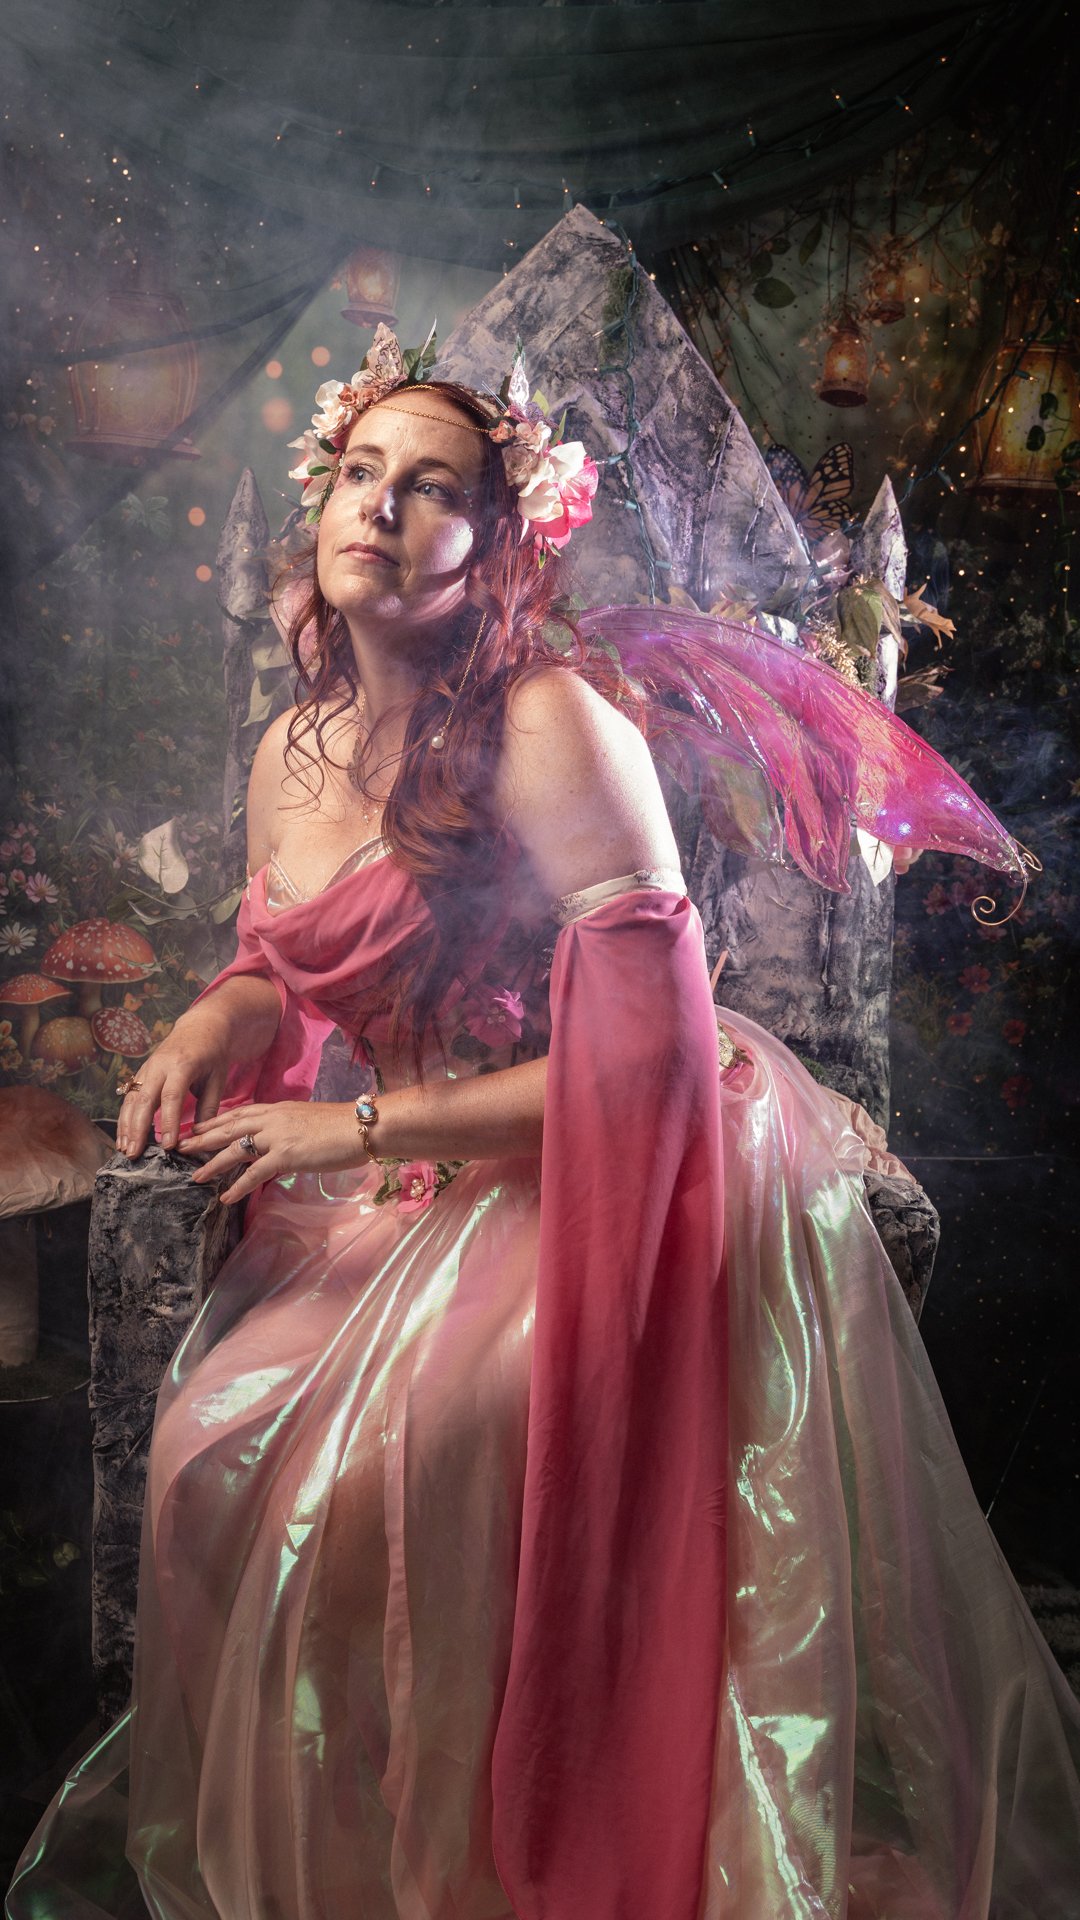
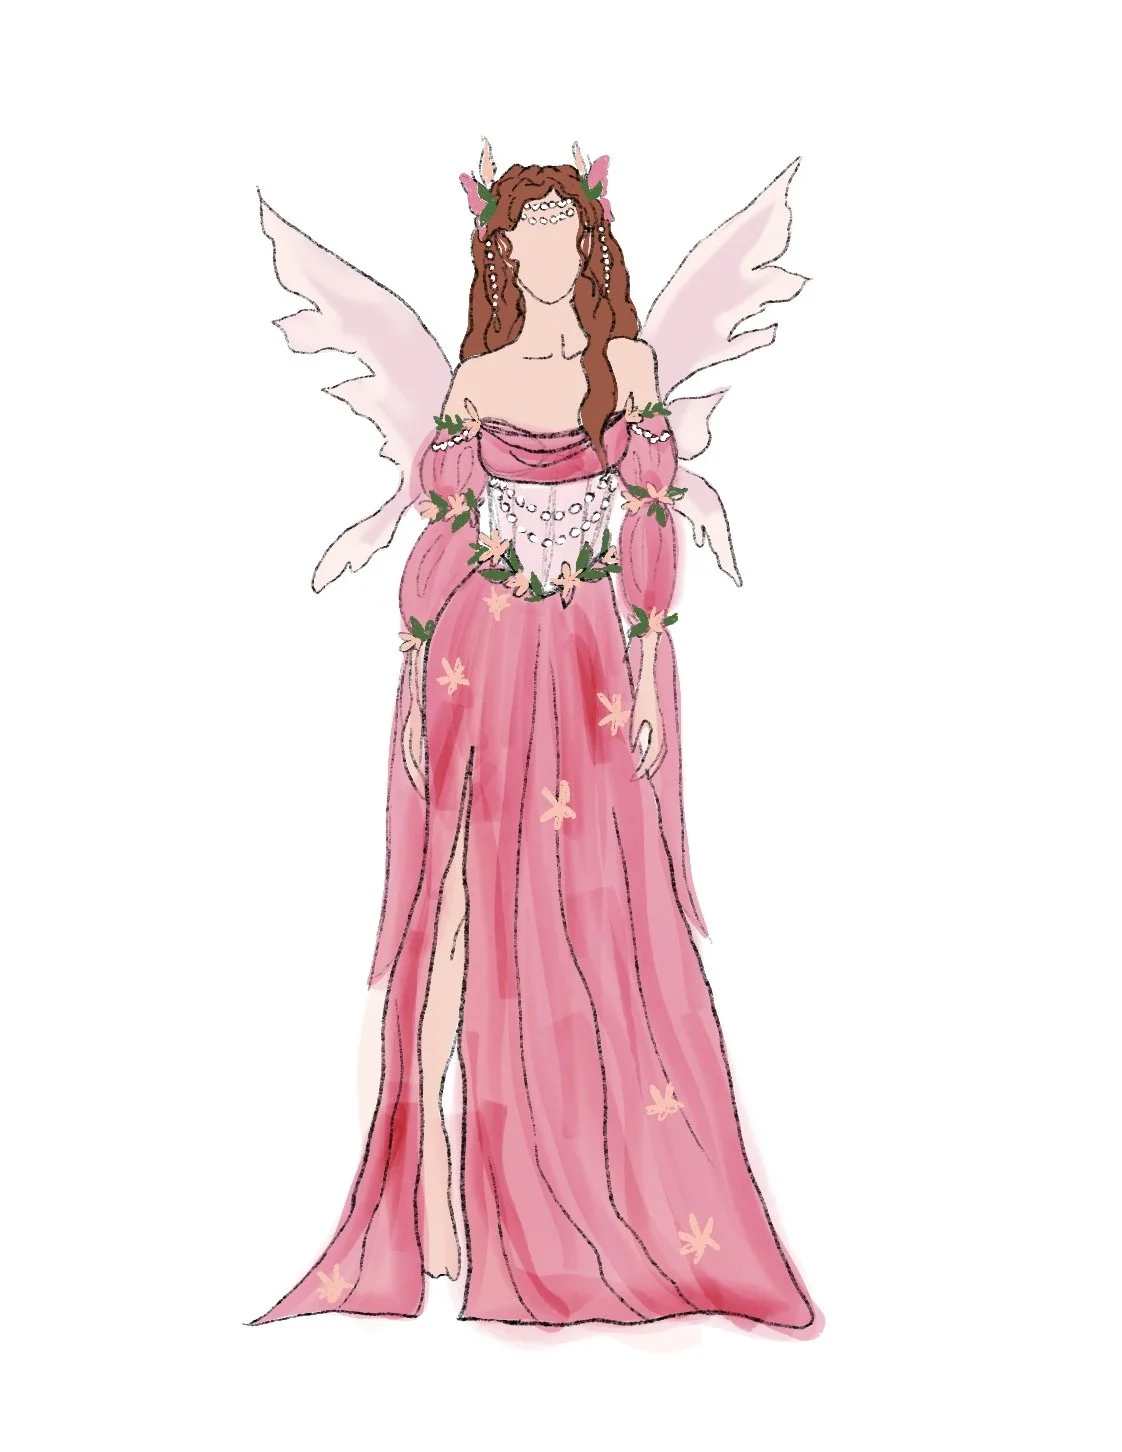
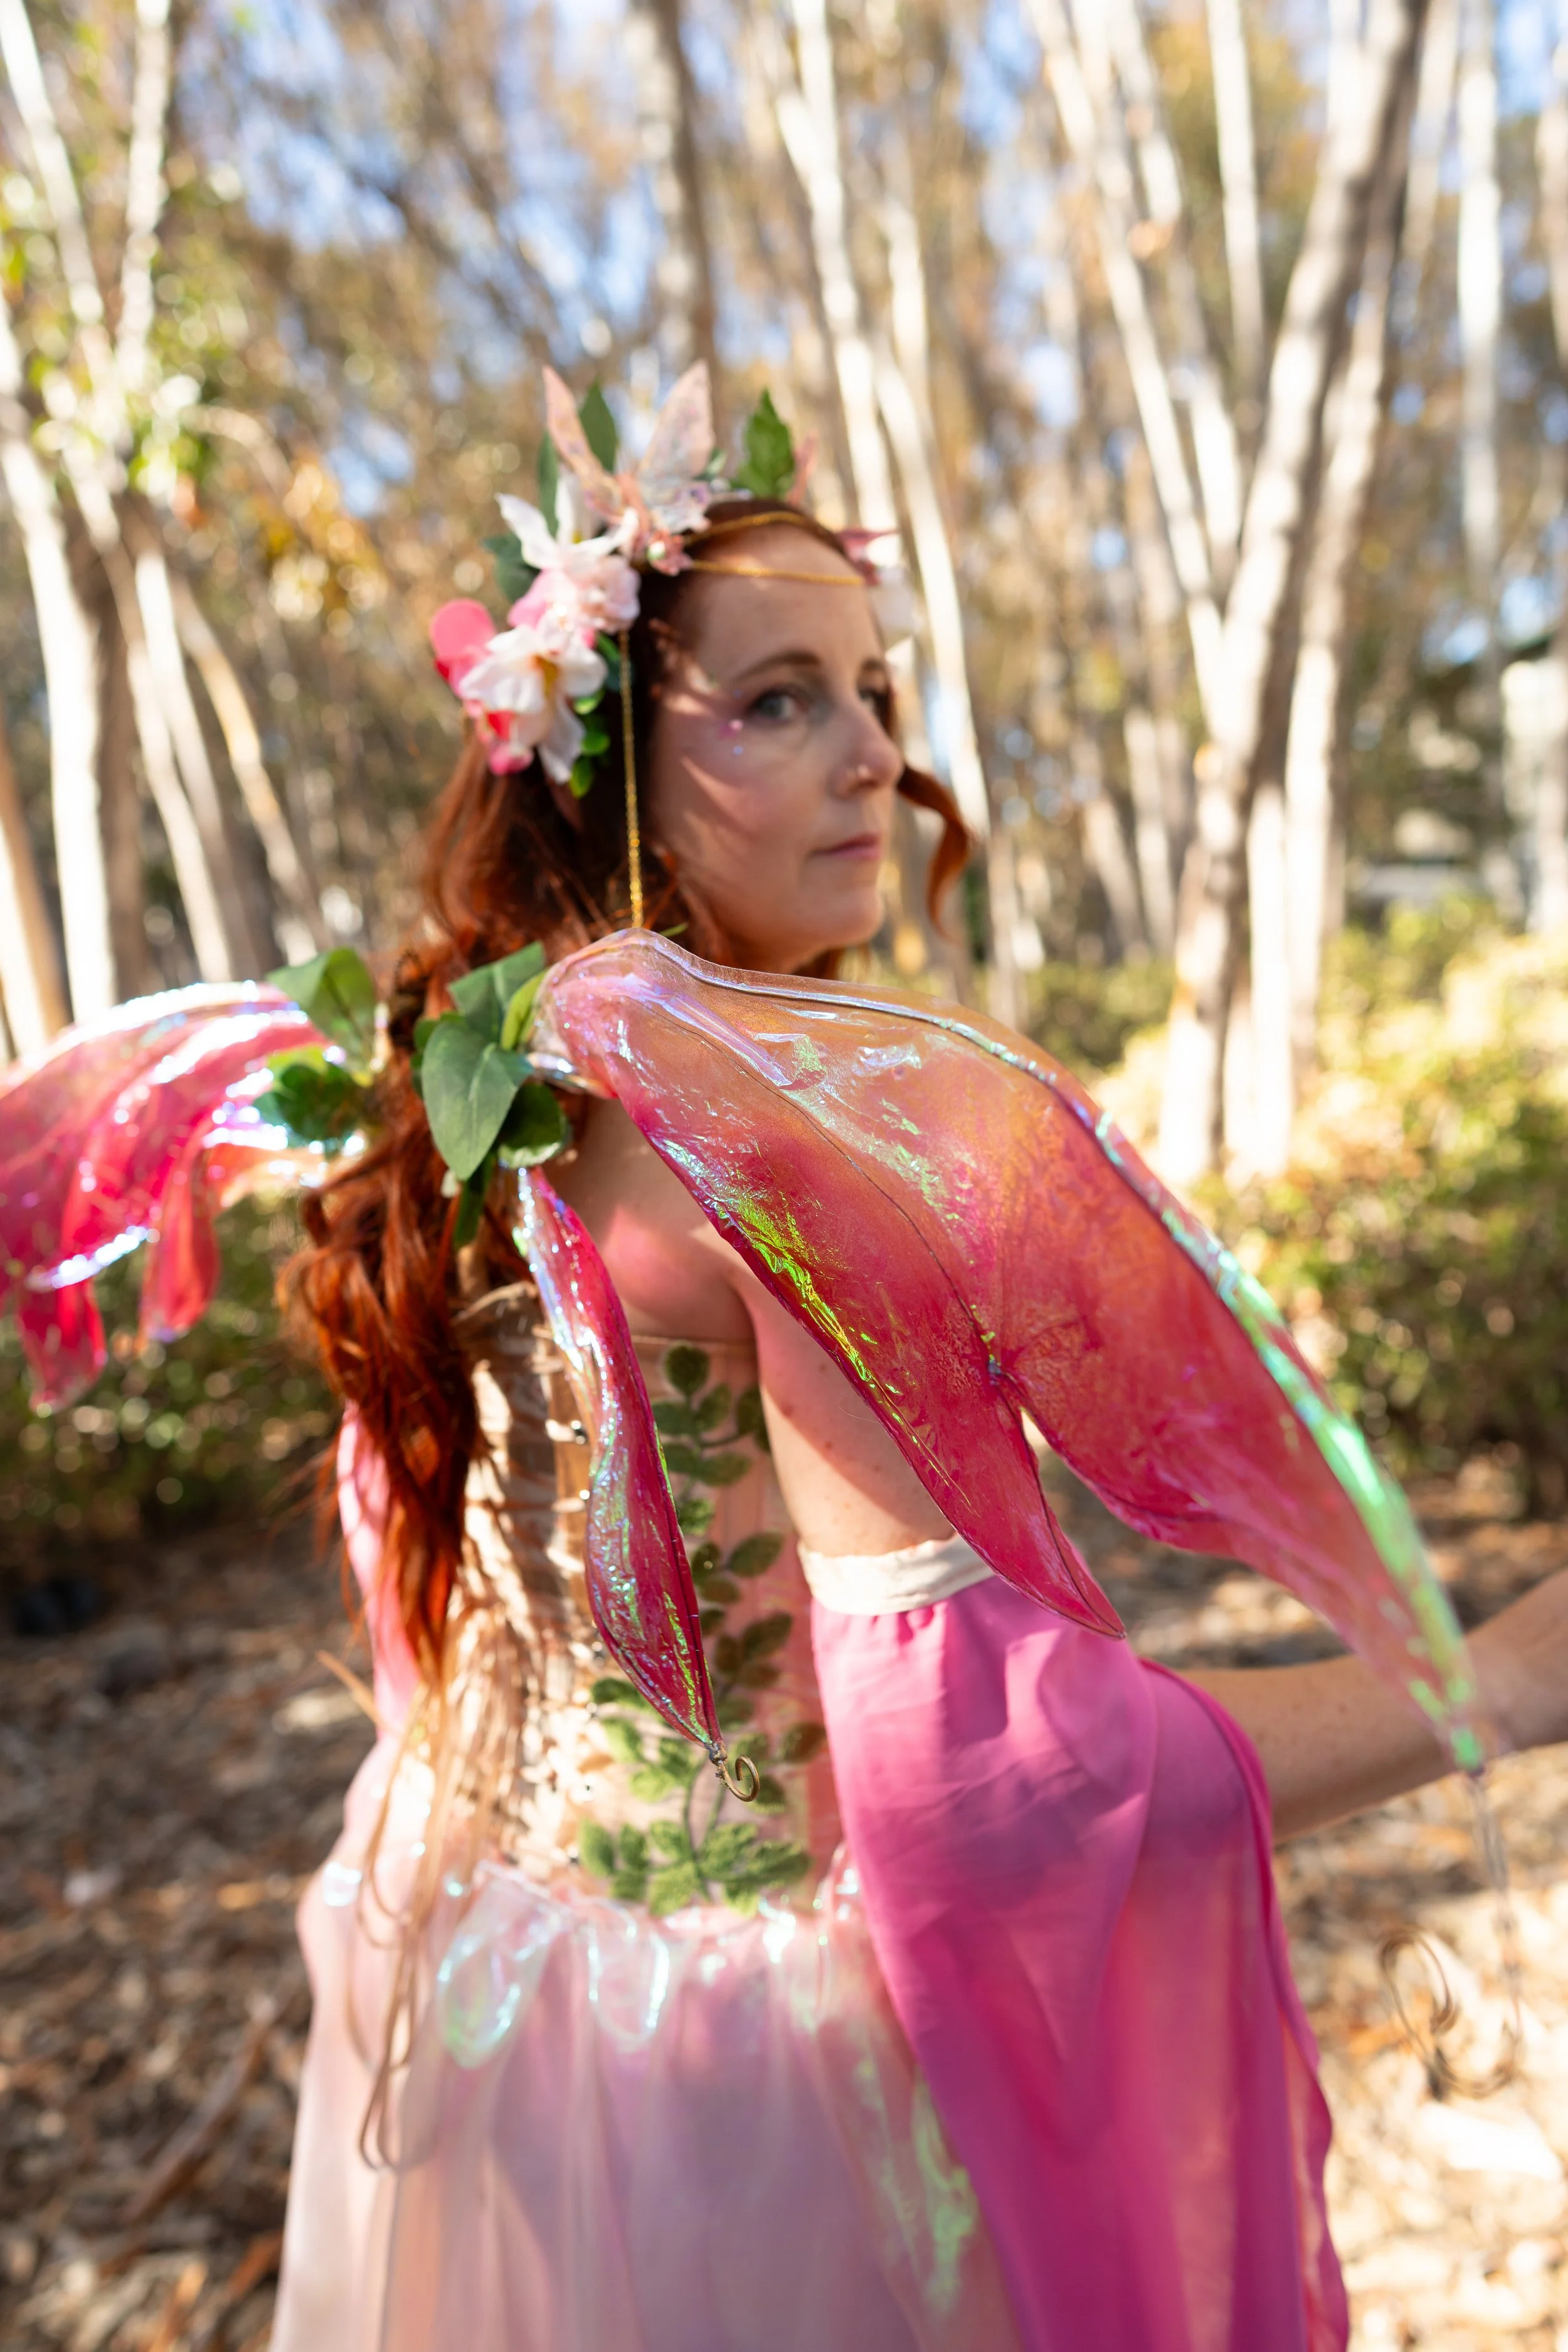
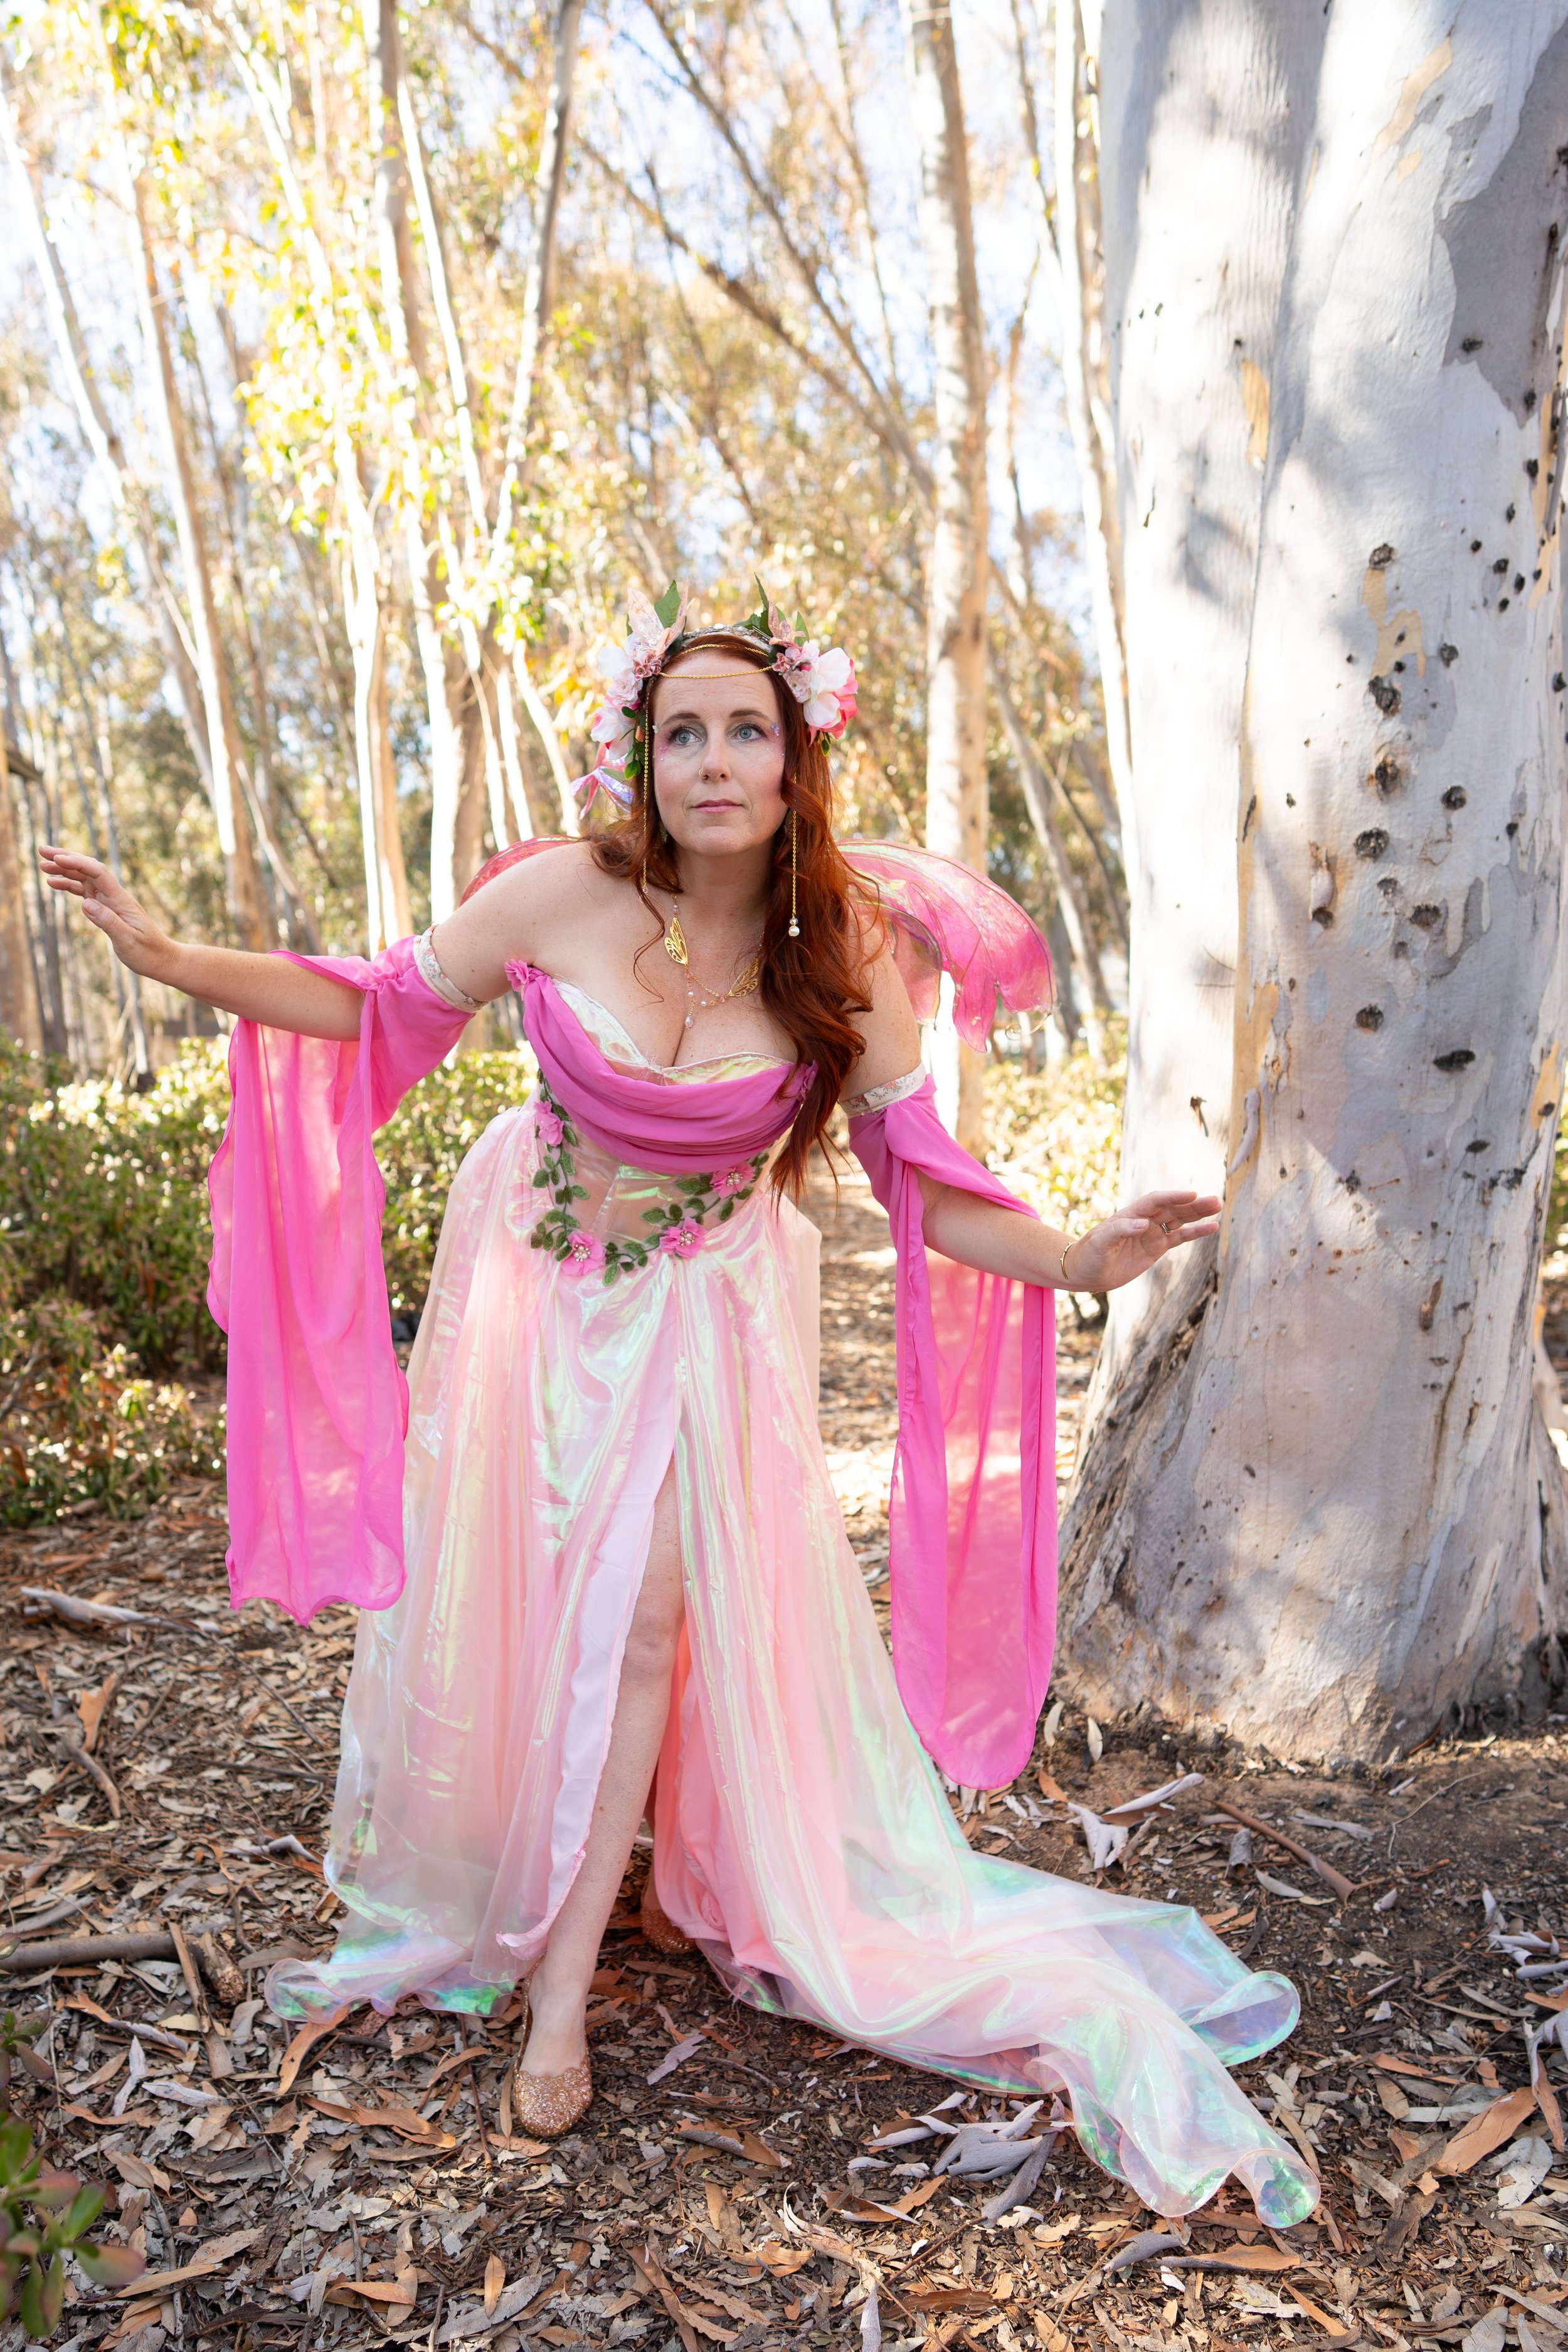
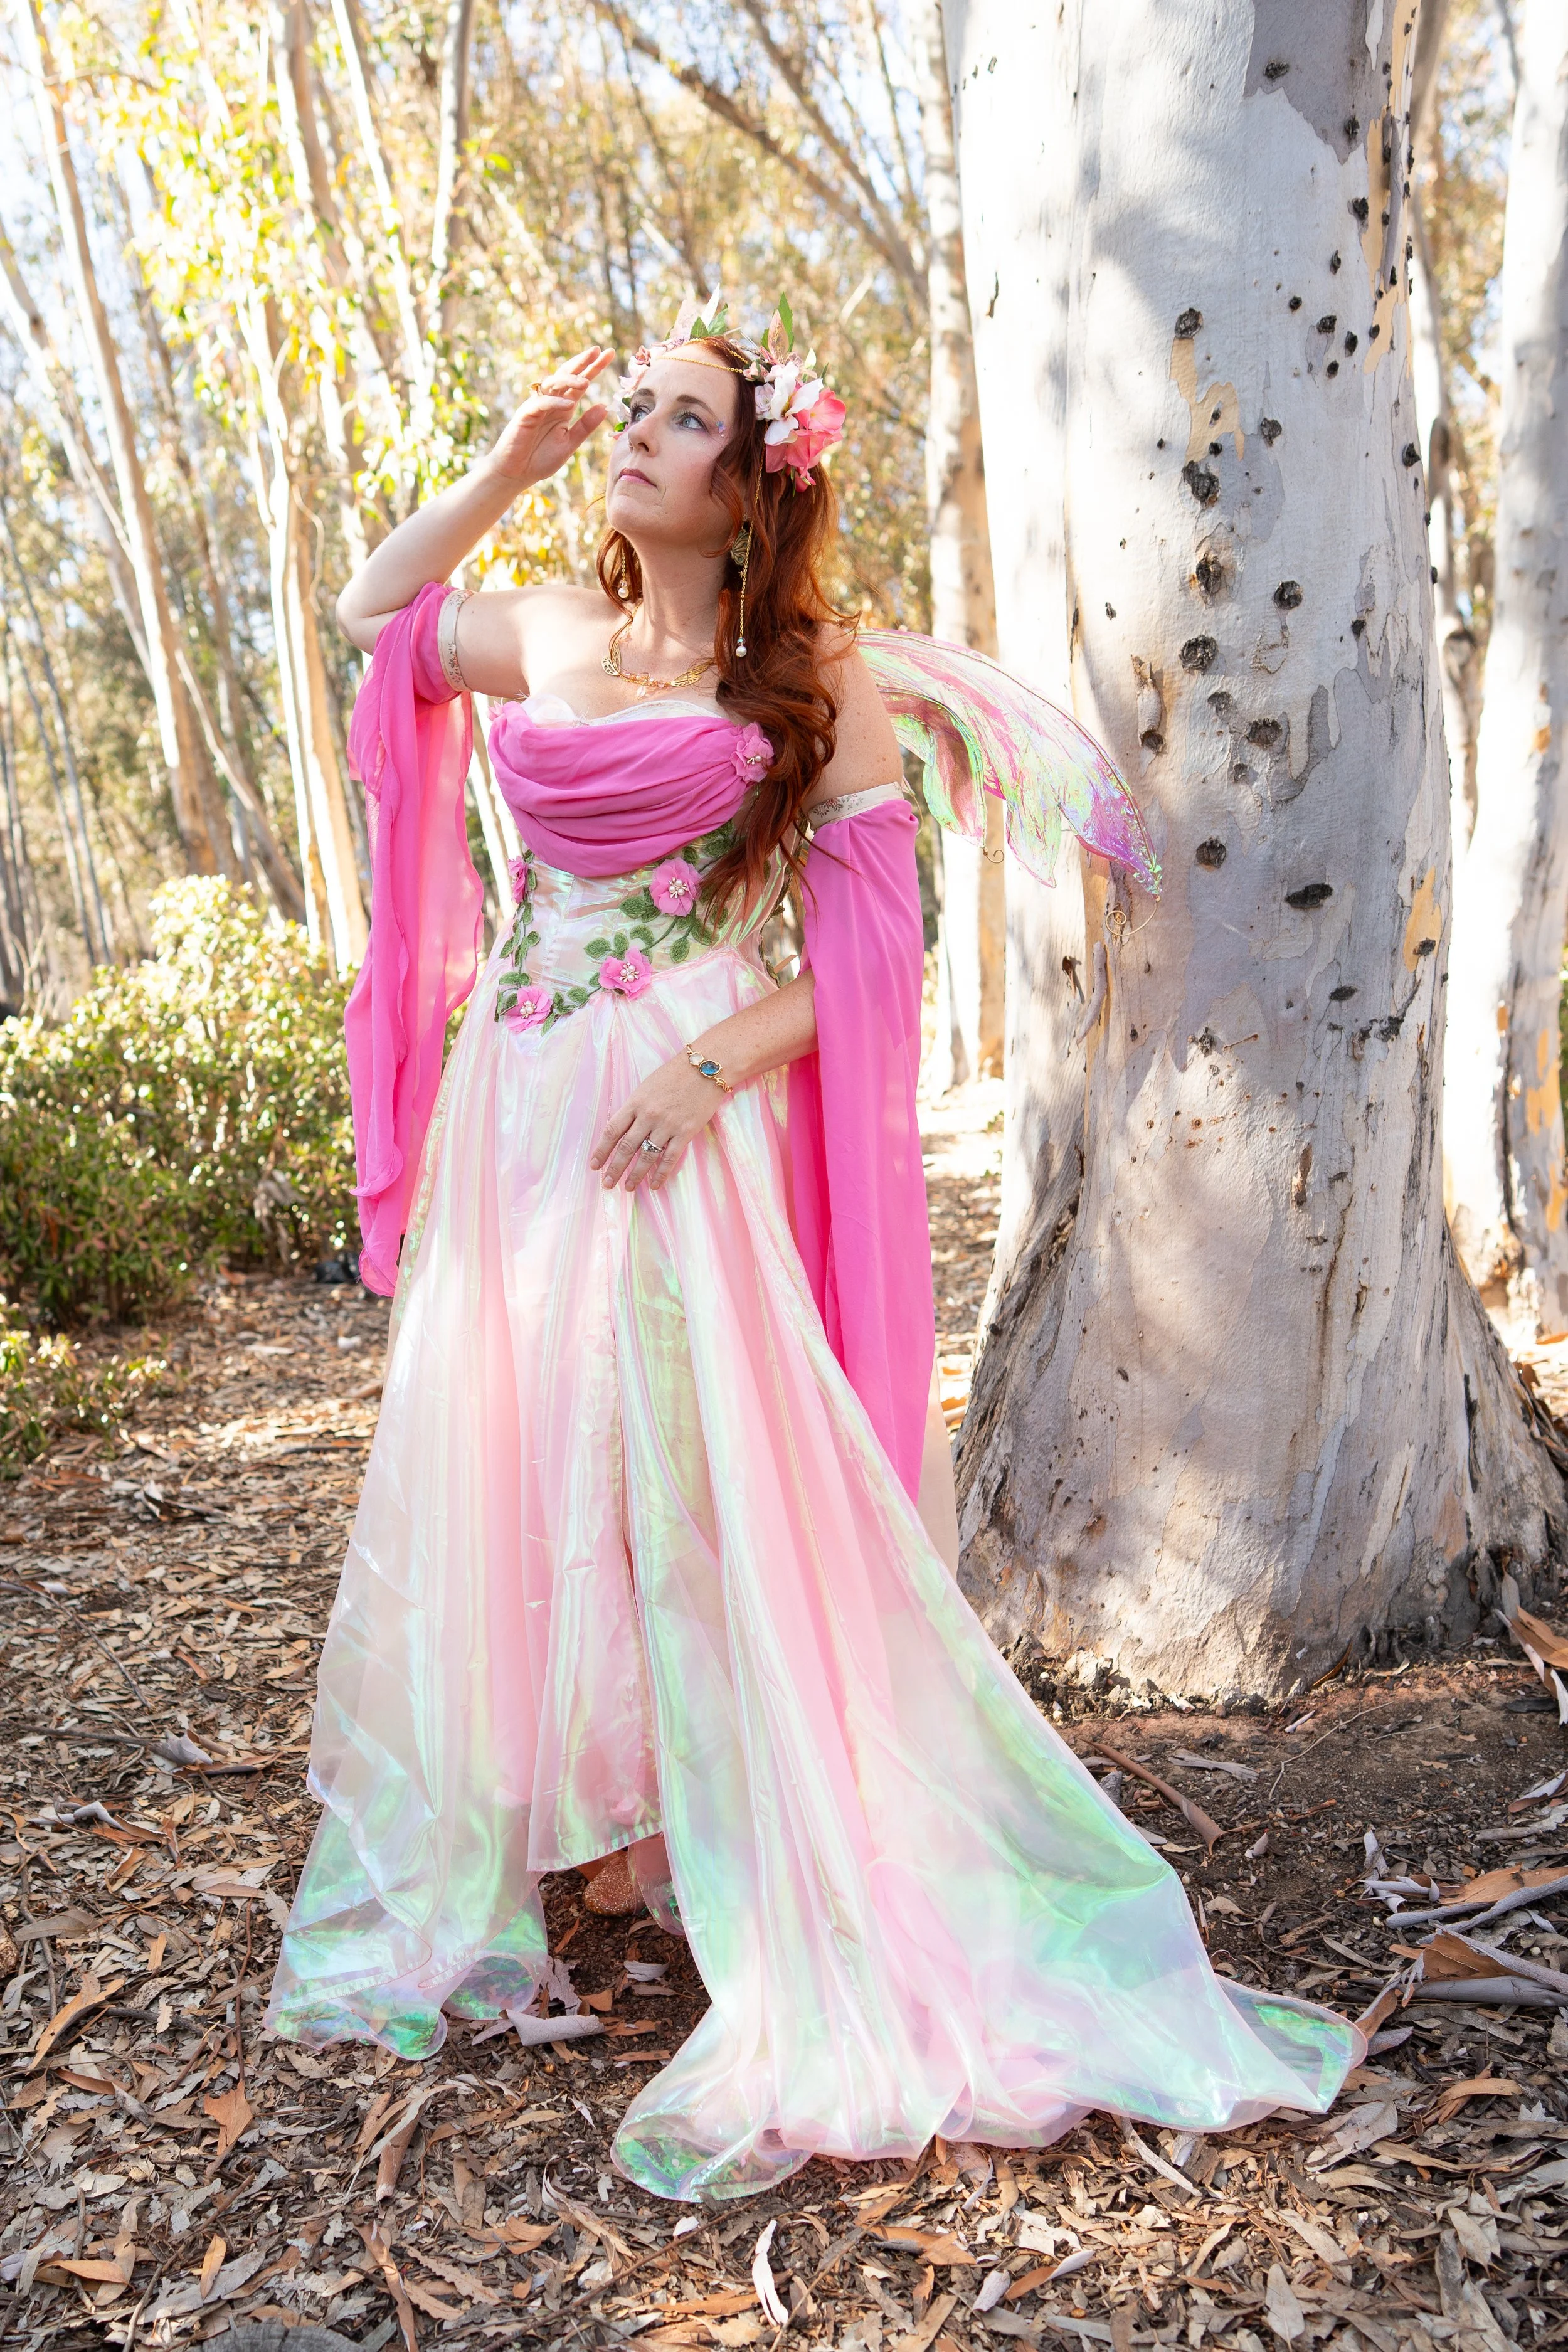
Every good fairy court needs a queen, so I made myself one very ambitious outfit. I'd been wanting to attempt a full gown for a while, and this party was the perfect excuse.
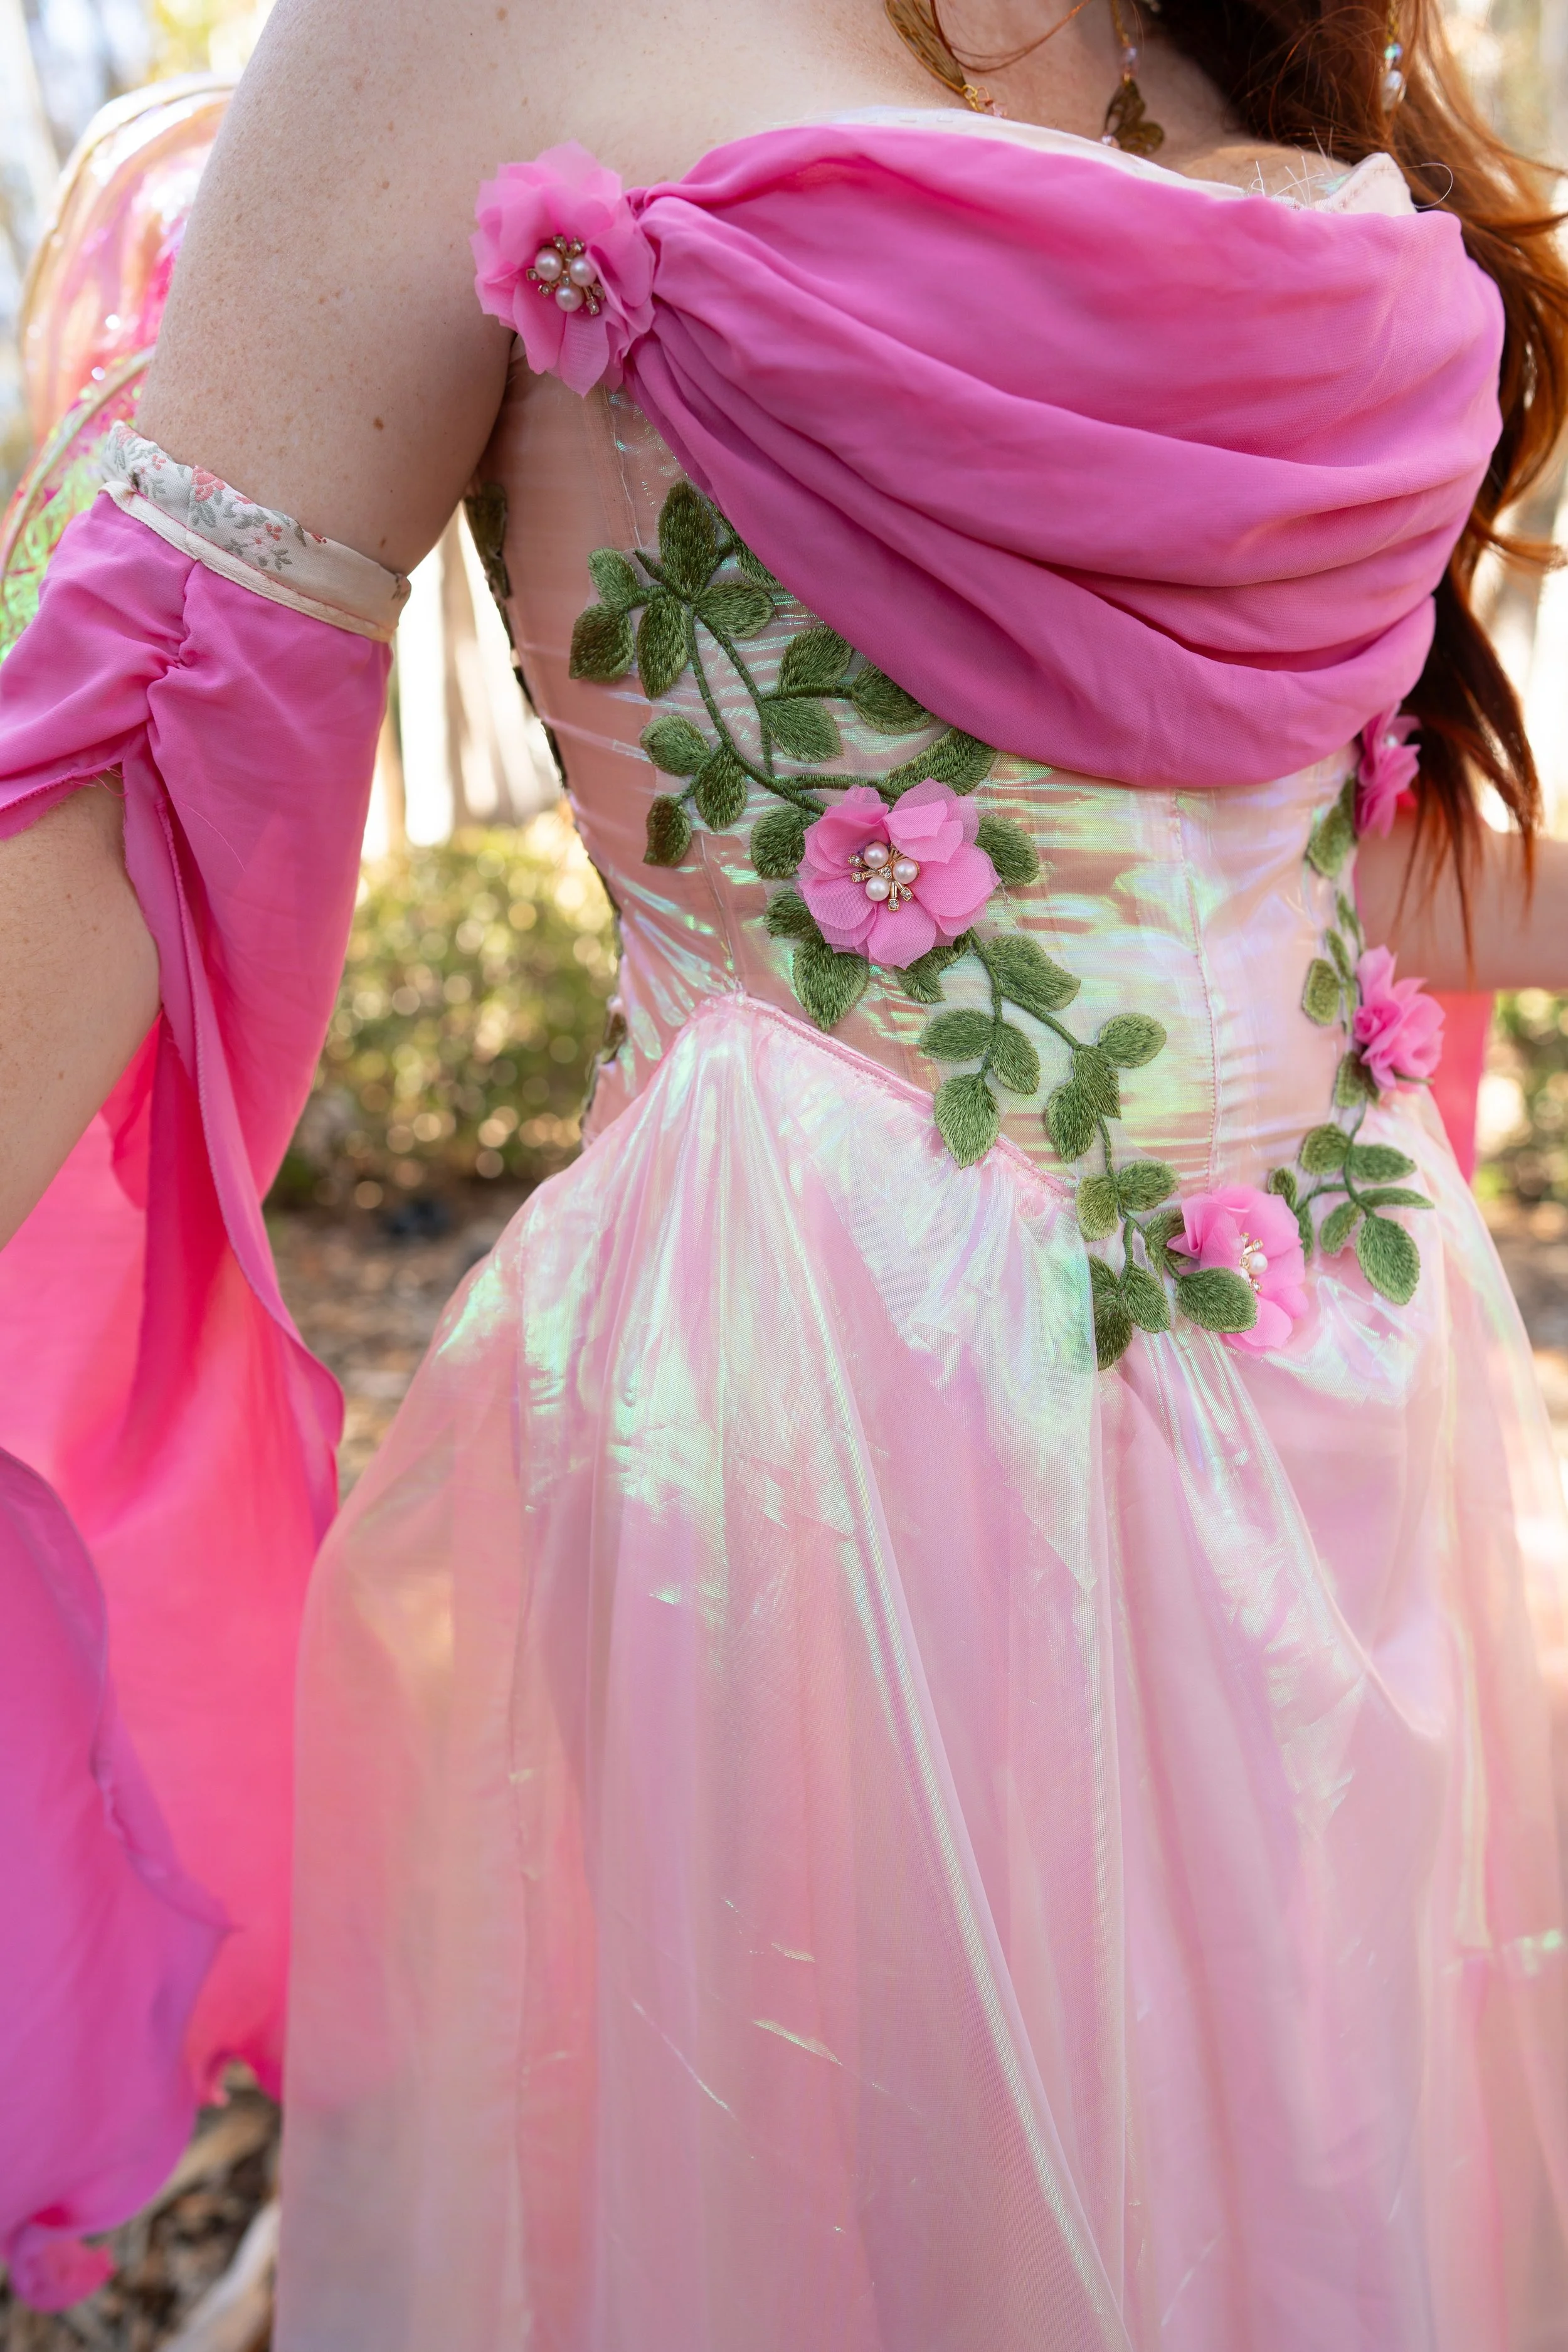
I took a class from Whimsy Forge and adapted what I learned to design my own fairy gown. This project pushed me into two brand-new techniques:
Applique. This was my first time experimenting with it, and it added so much texture and detail to the dress.
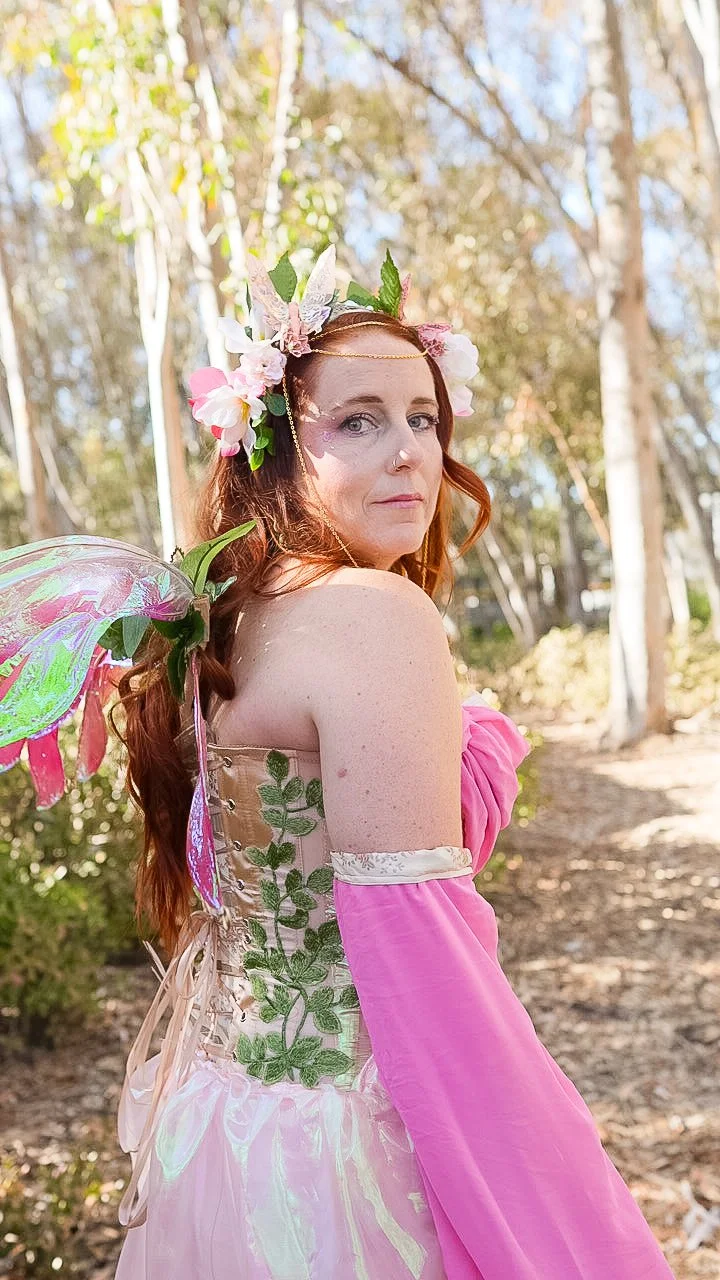
Building a dress off a corset. Using a corset as the foundation gave the gown structure and shape, and it's a method I'm excited to use again.
The pieces I'm proudest of, though, are the crown and the wings. Those finishing touches are what really turned the gown into a Fairy Queen look.
Everything that made the magic
The party was a success, and the space turned out just as whimsical as I'd dreamed. If you want to build your own fairy glade, here's the full rundown.
What I made by hand:
Giant flowers
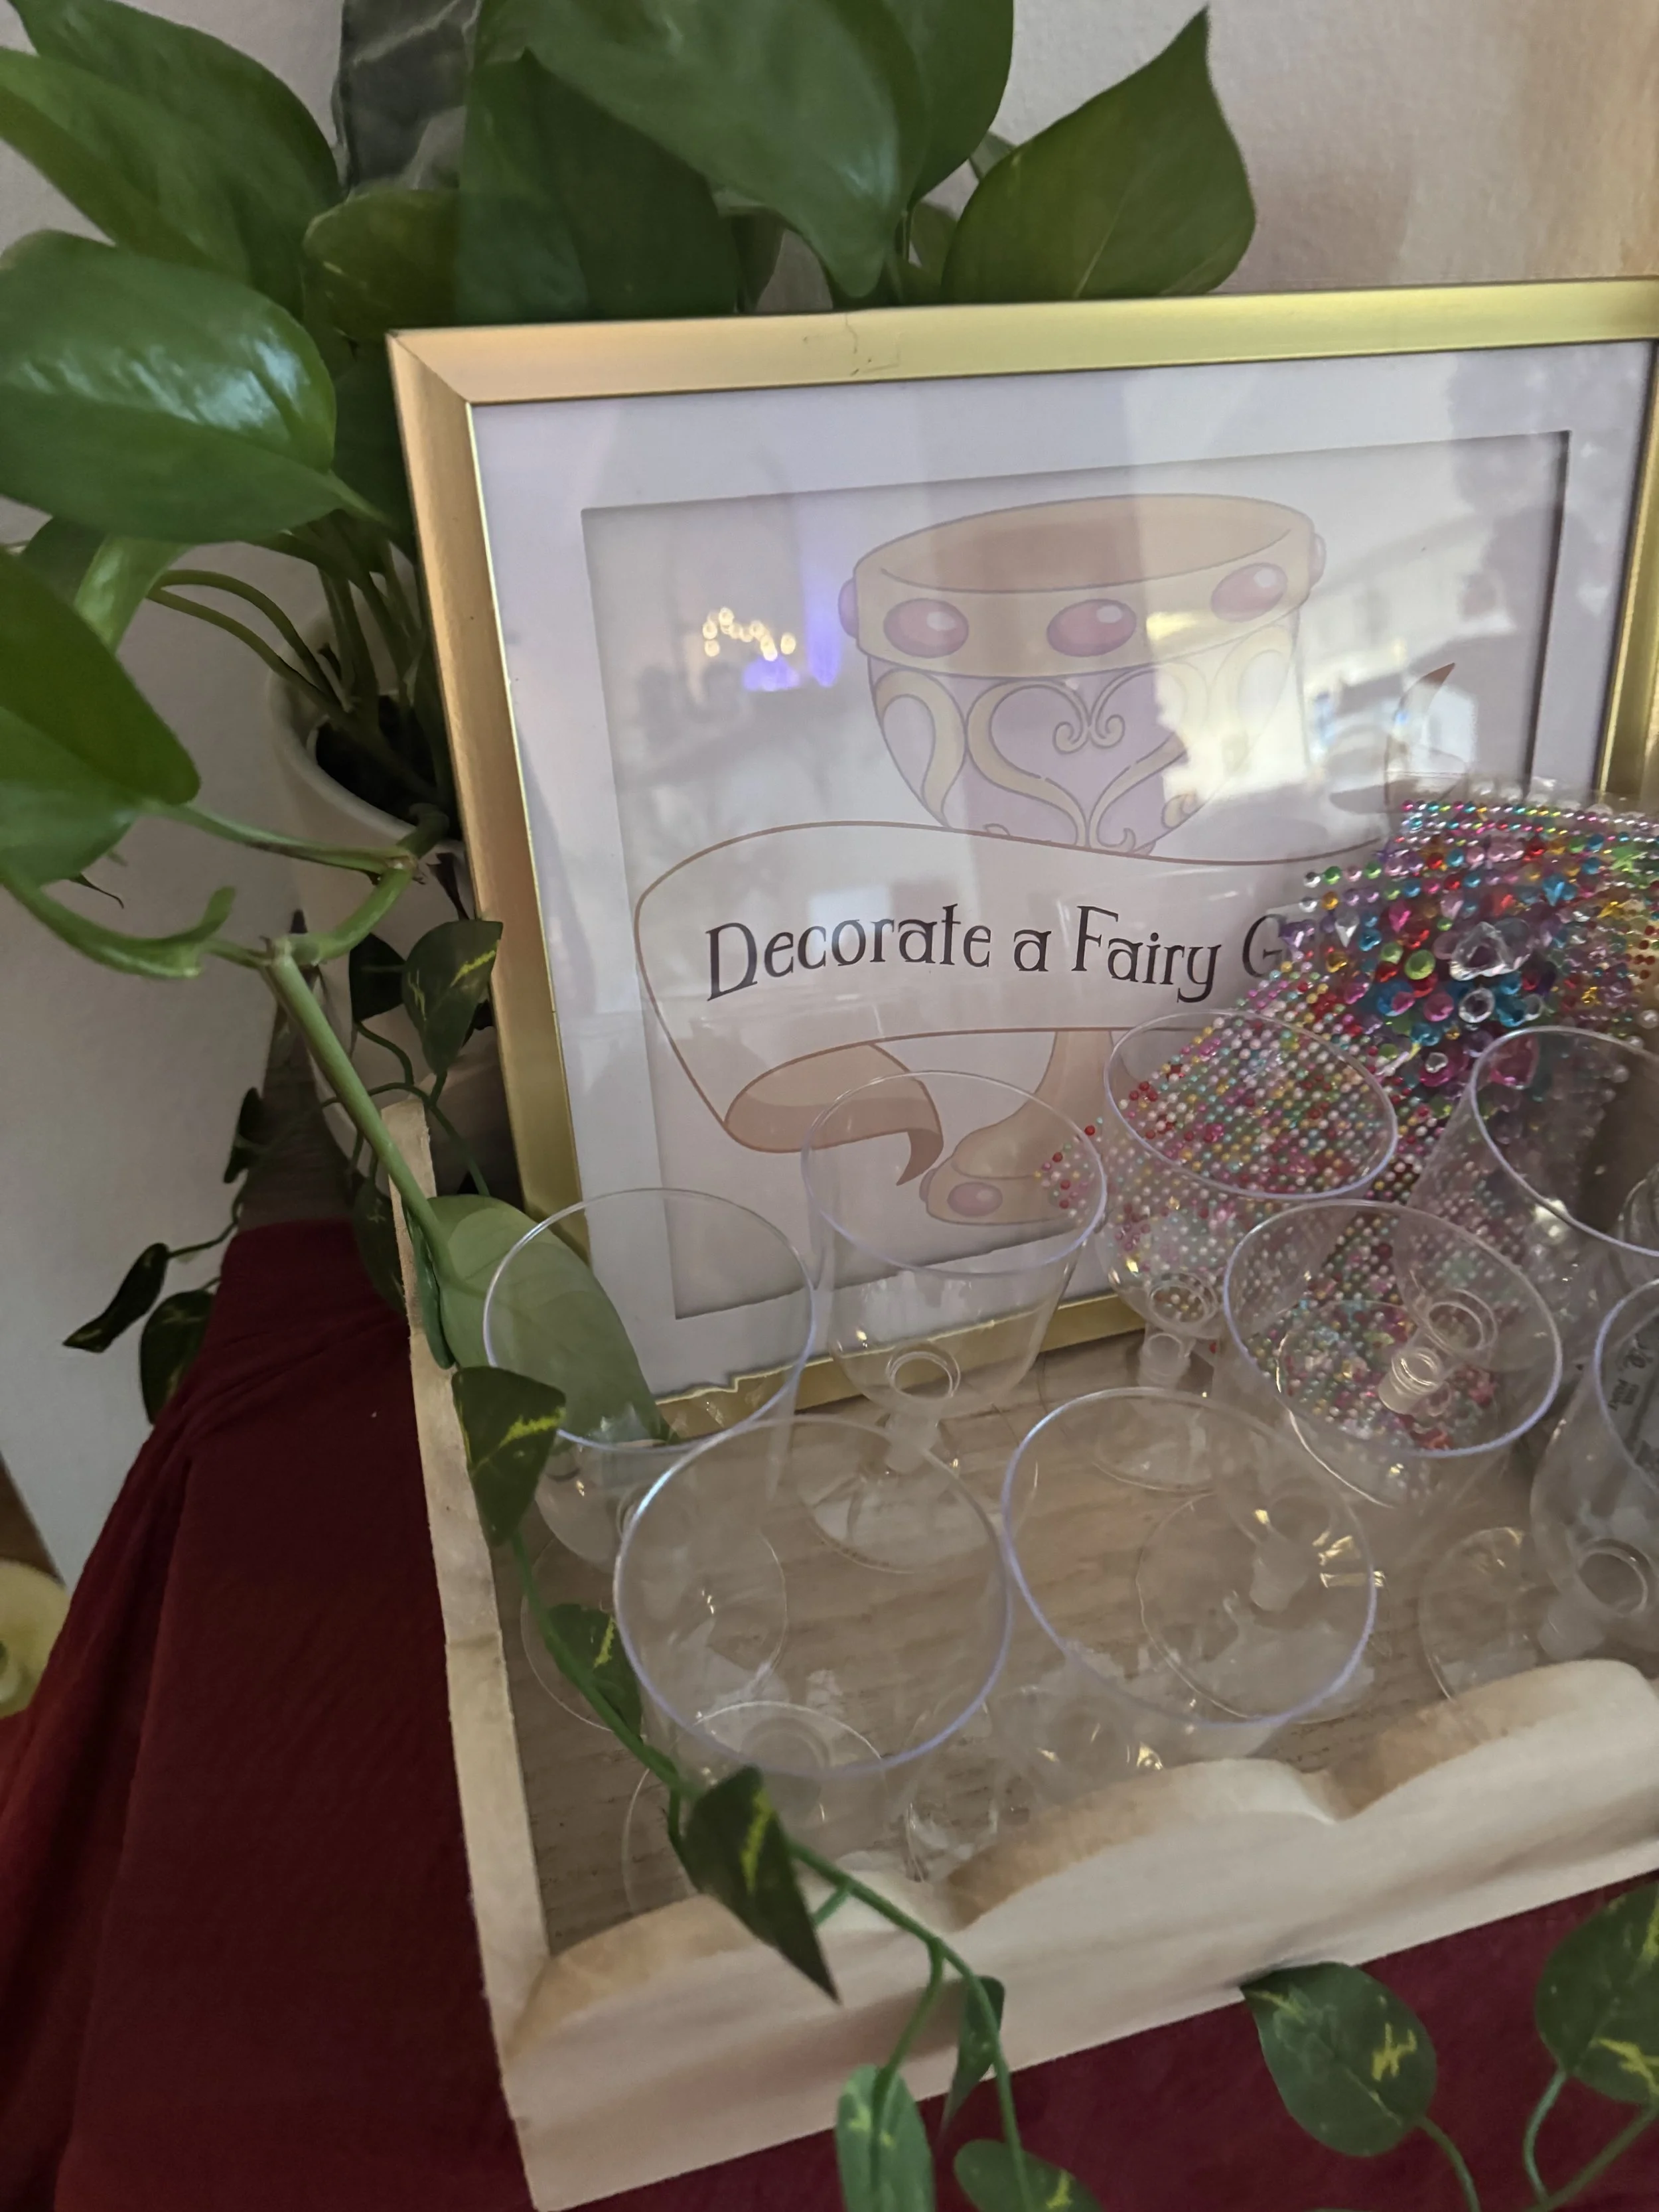
Fairy jars
Fairy throne
Mushrooms
Log stool
Hanging stars and moon
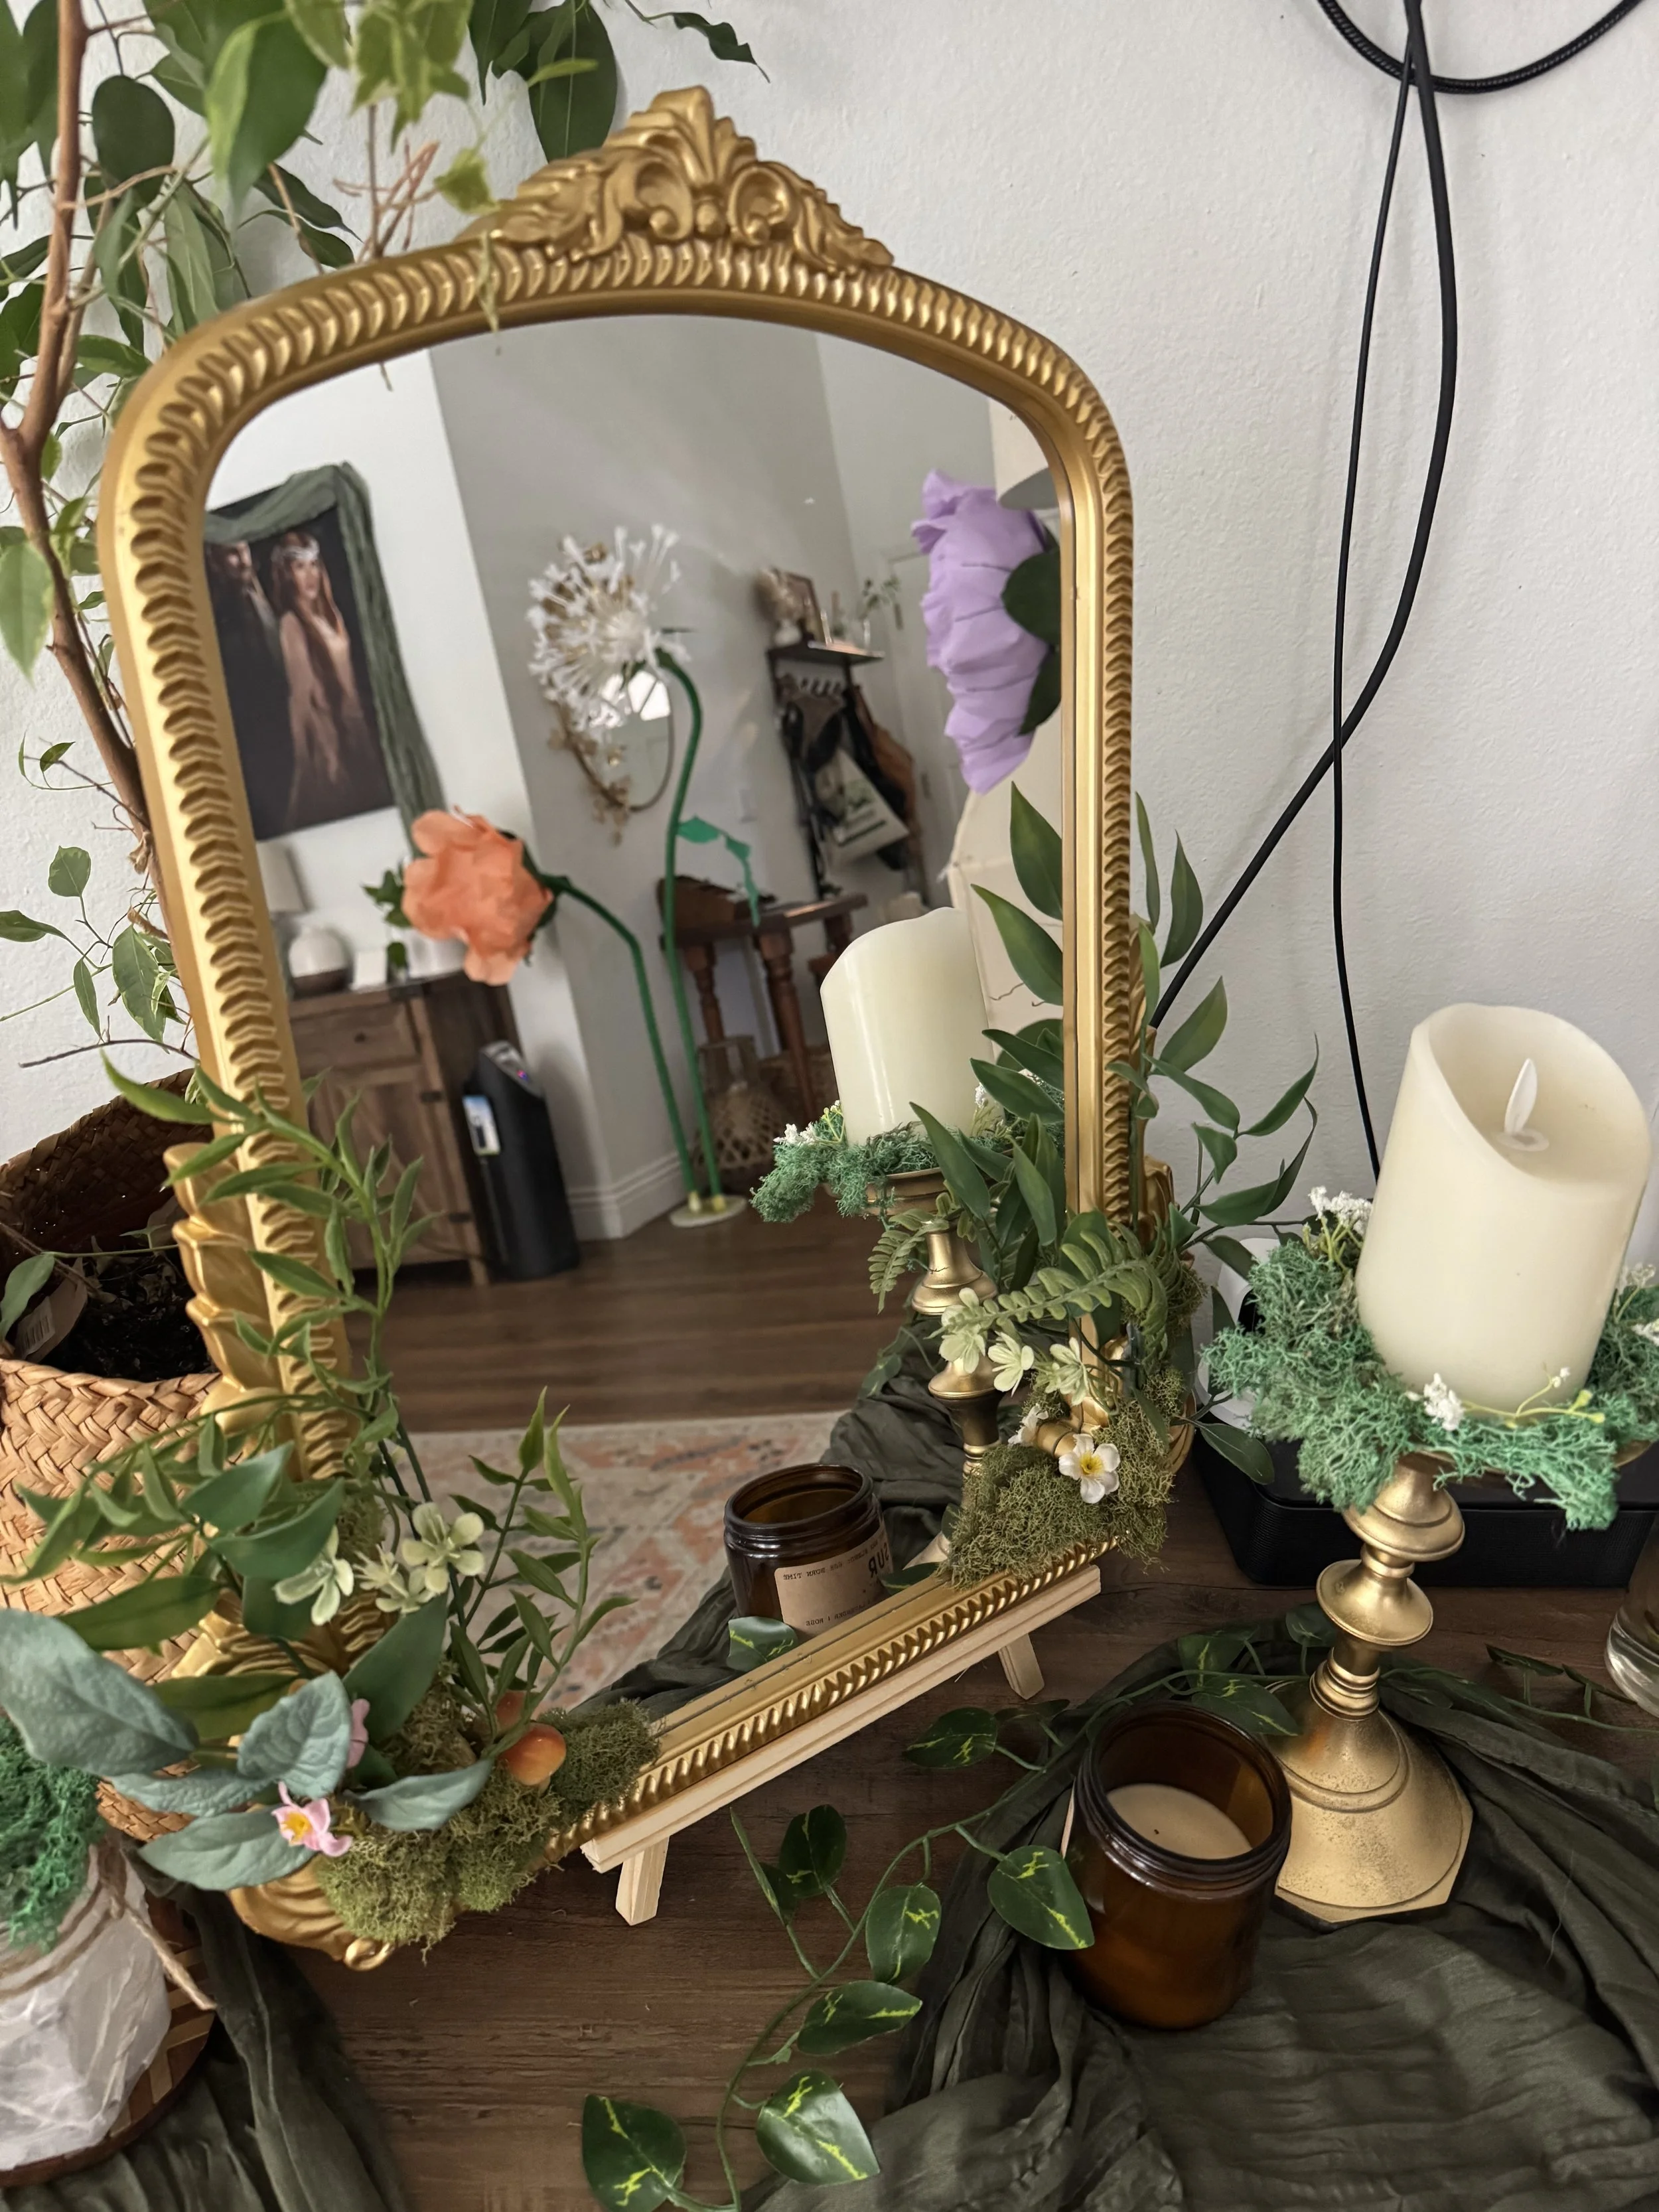
Fairy mirror
Candlestick holders
Hanging banner
Lantern stands
Added decor that helped create the atmosphere:
Colored cheesecloth fabric
Fairy lights
Floral garlands
A fog machine (trust me, it's worth it)
Which fairy project would you want to try first? Let me know in the comments!