Build Guide: How to Compile a Viking Costume
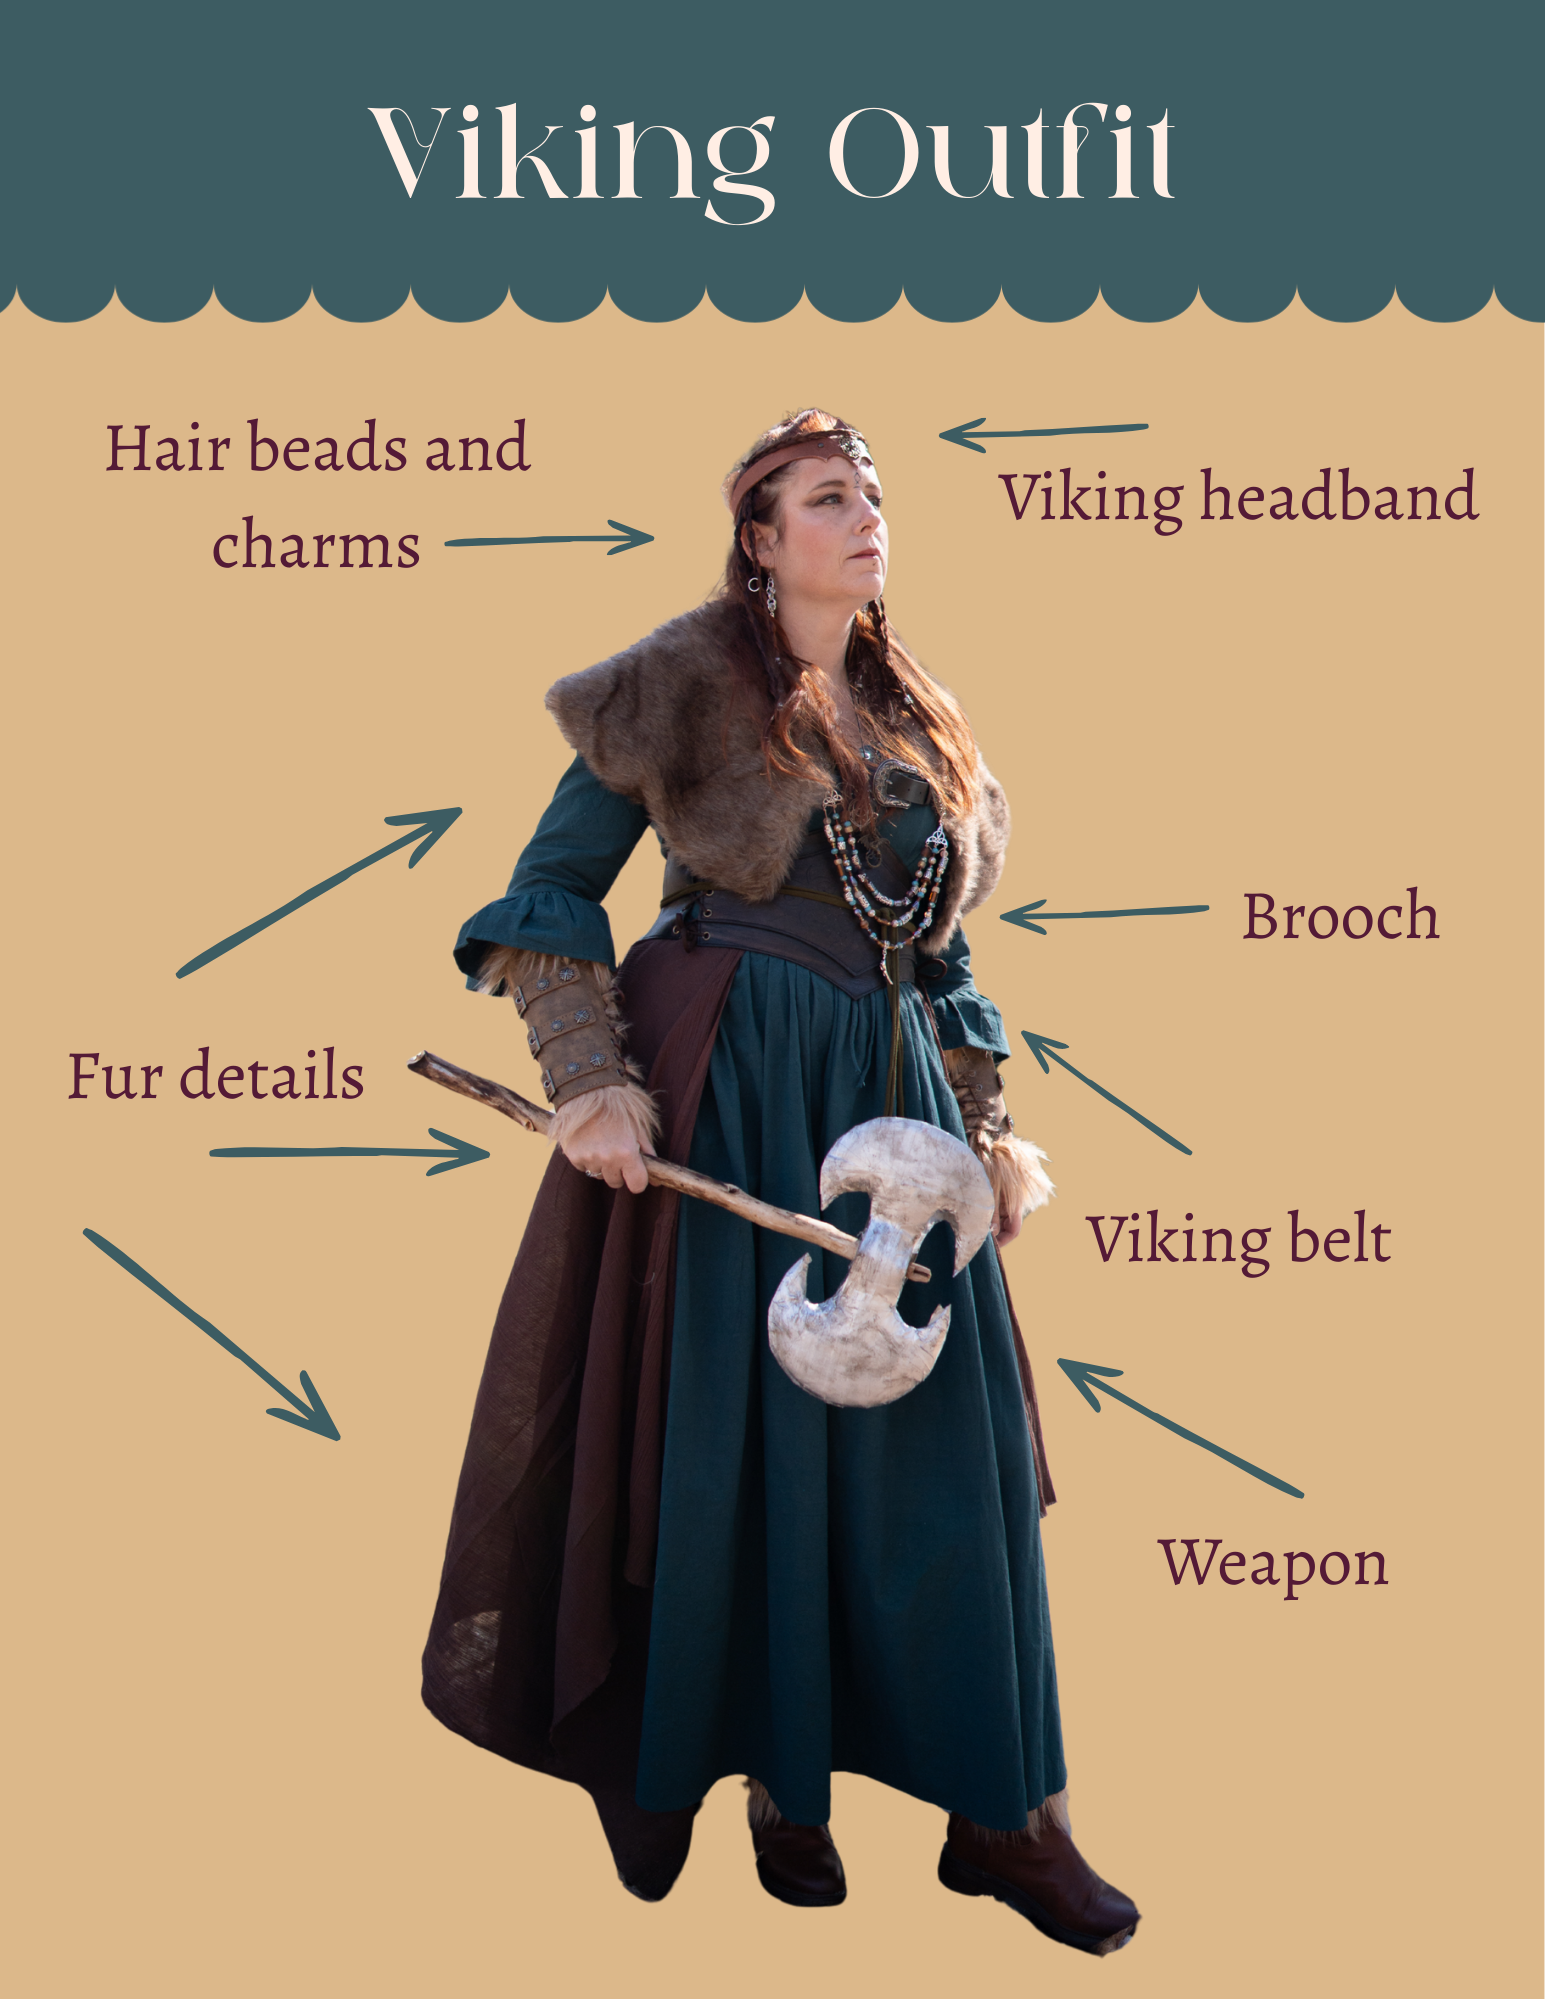
Costume Pieces
Teal Dress
Brown fabric
Brown boots
Tan fur fabric
Brown leather lacing
Brown bracers
Fur caplet
EVA Foam headband
Beaded brooch piece
Viking belt
Chainmail errings
Hair charms
Wood and paper mache ax
Various jewelry
How to Create a Viking Costume: A Mystic Maker Guide to A Norse-Inspired Look
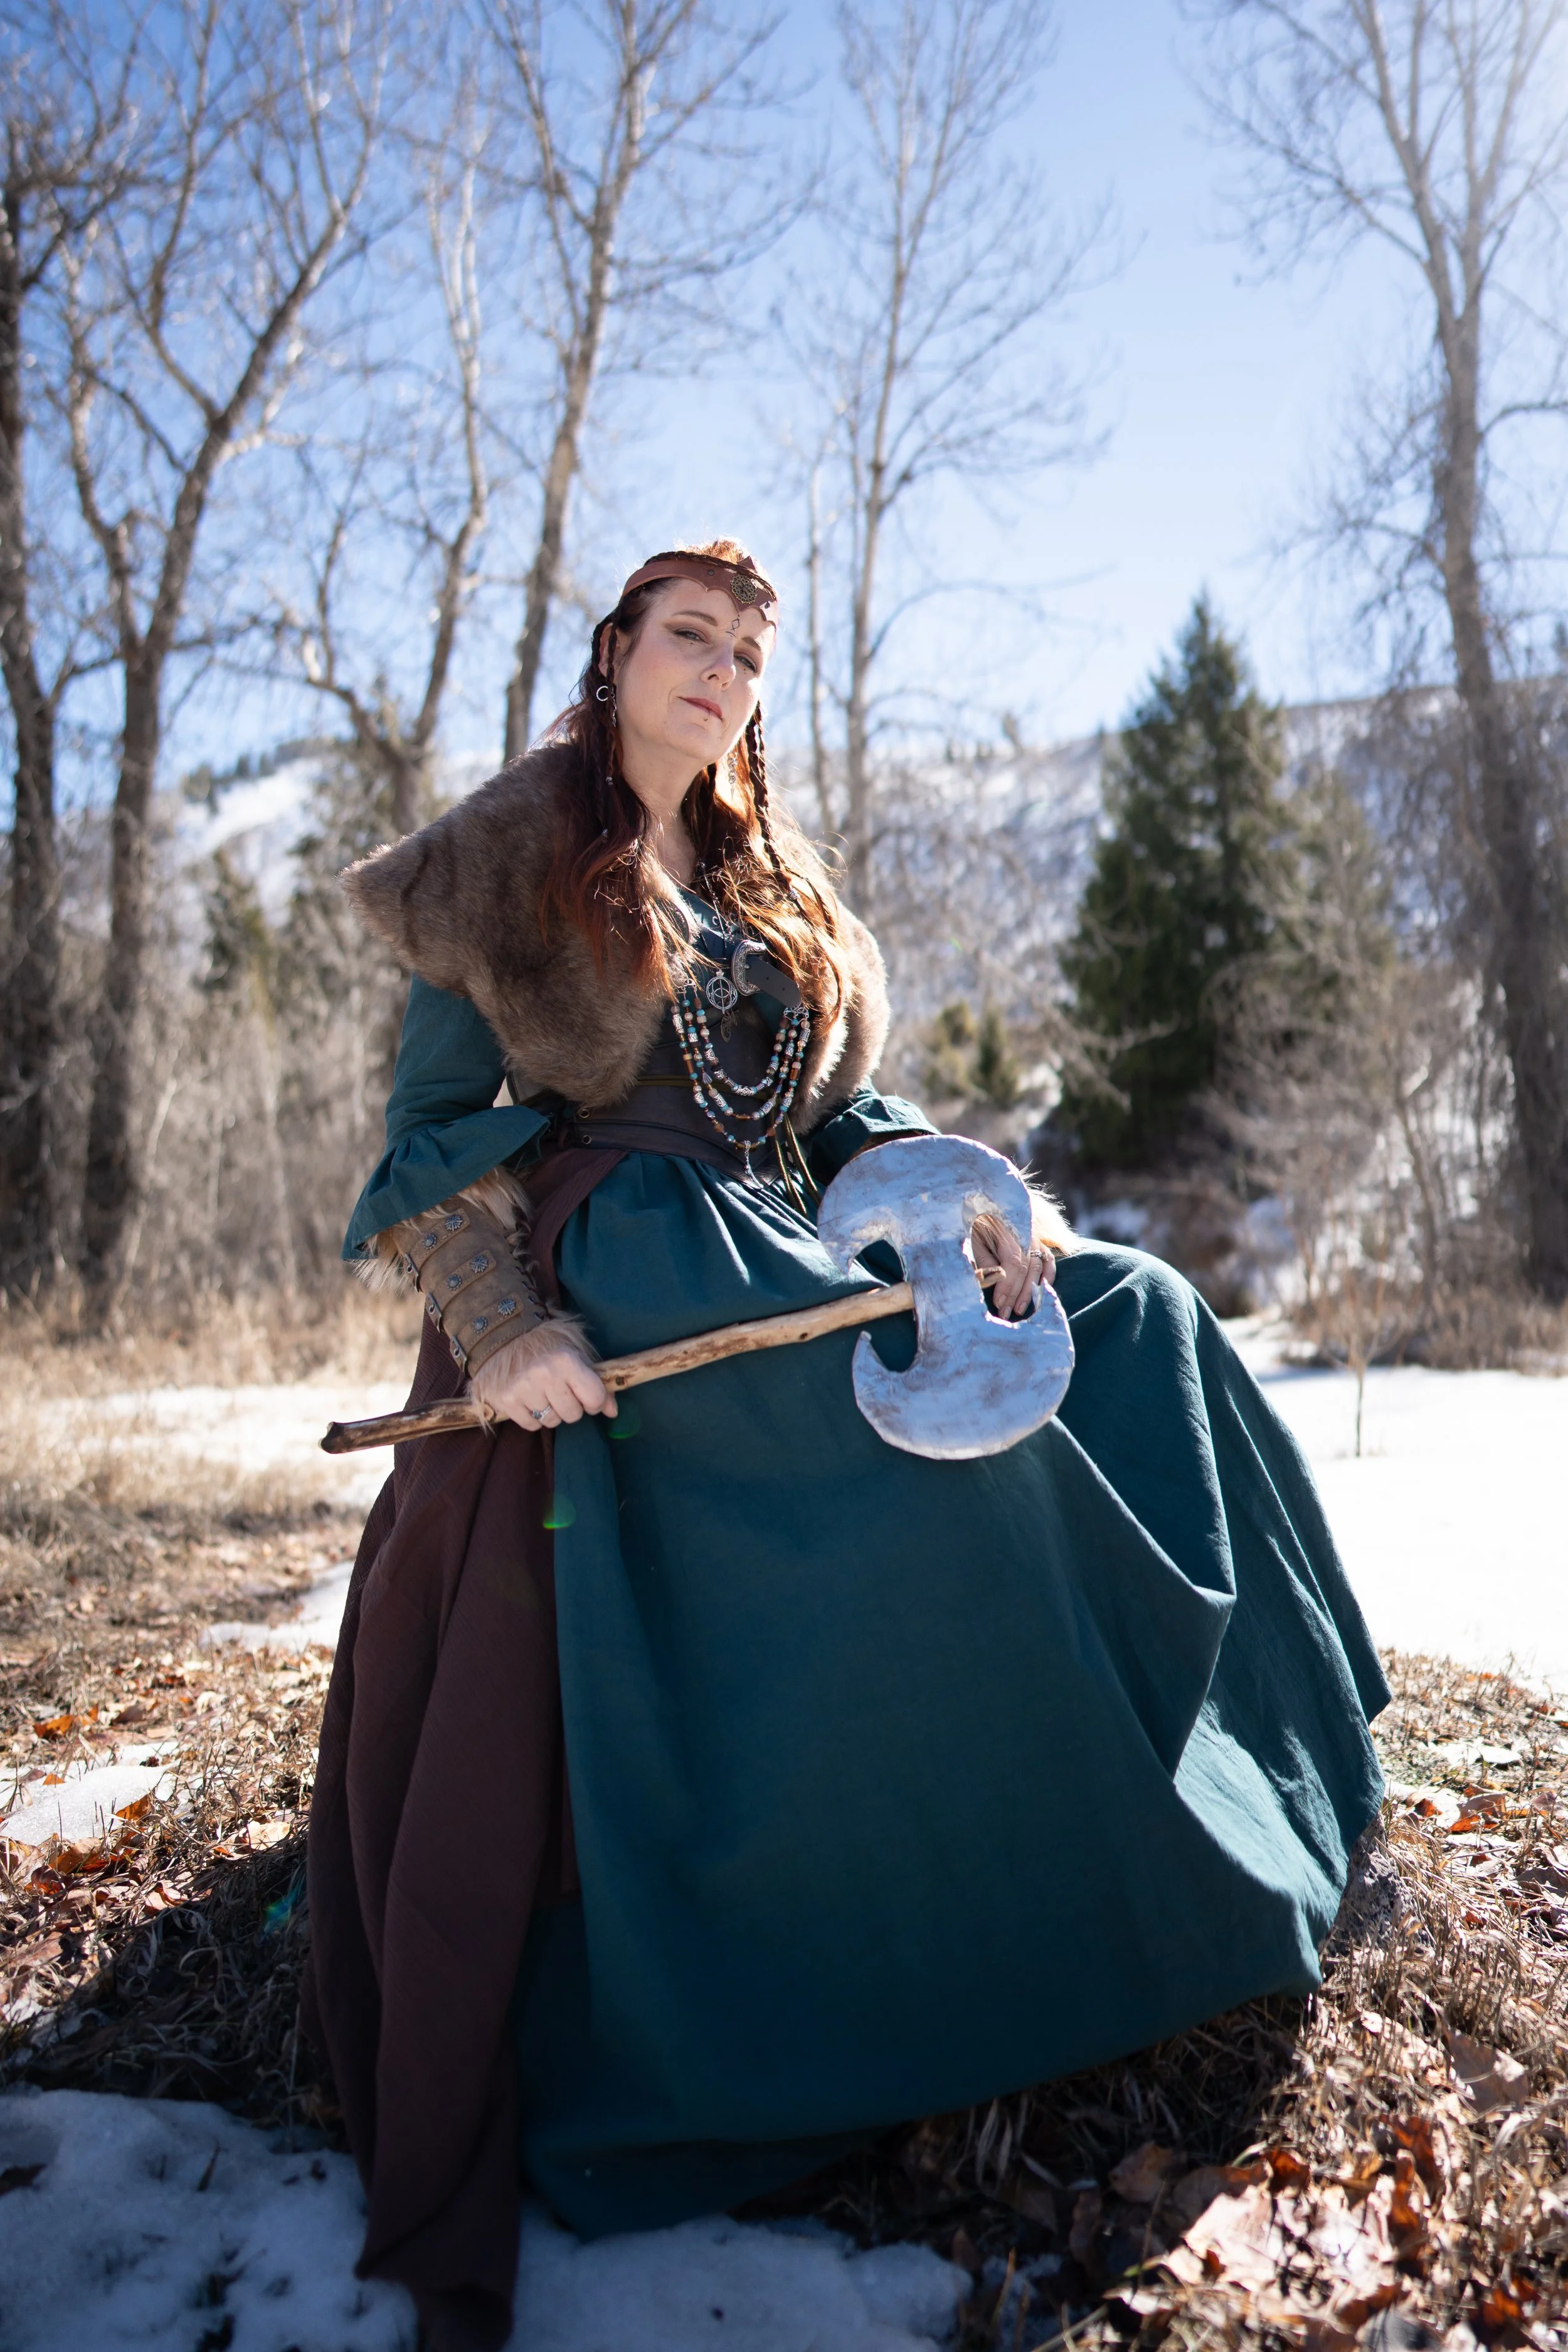
Enter the World of the North
There’s something about snow that feels like stepping into another world.
This winter, I visited family in a place I grew up going to, known for its beautiful winters. The kind of landscape that hushes the modern world and makes space for something calmer. As I planned for my trip, I couldn’t shake the feeling that the landscape would feel like dropping into a Nordic saga.
And of course, I did what any cosplayer would do: I decided to build a costume to match the moment.
I wanted to take advantage of the scenery, not just as a backdrop, but as part of the story, something that would breathe life into the character I was about to step into.
So I began compiling a Viking costume, layering textures, pulling together pieces, and letting the landscape guide the design. What emerged was something rugged, a little mystical, and deeply connected to the setting.
In this post, I’ll walk you through the process of building a Viking costume that feels authentic, expressive, and ready for its own windswept adventure.
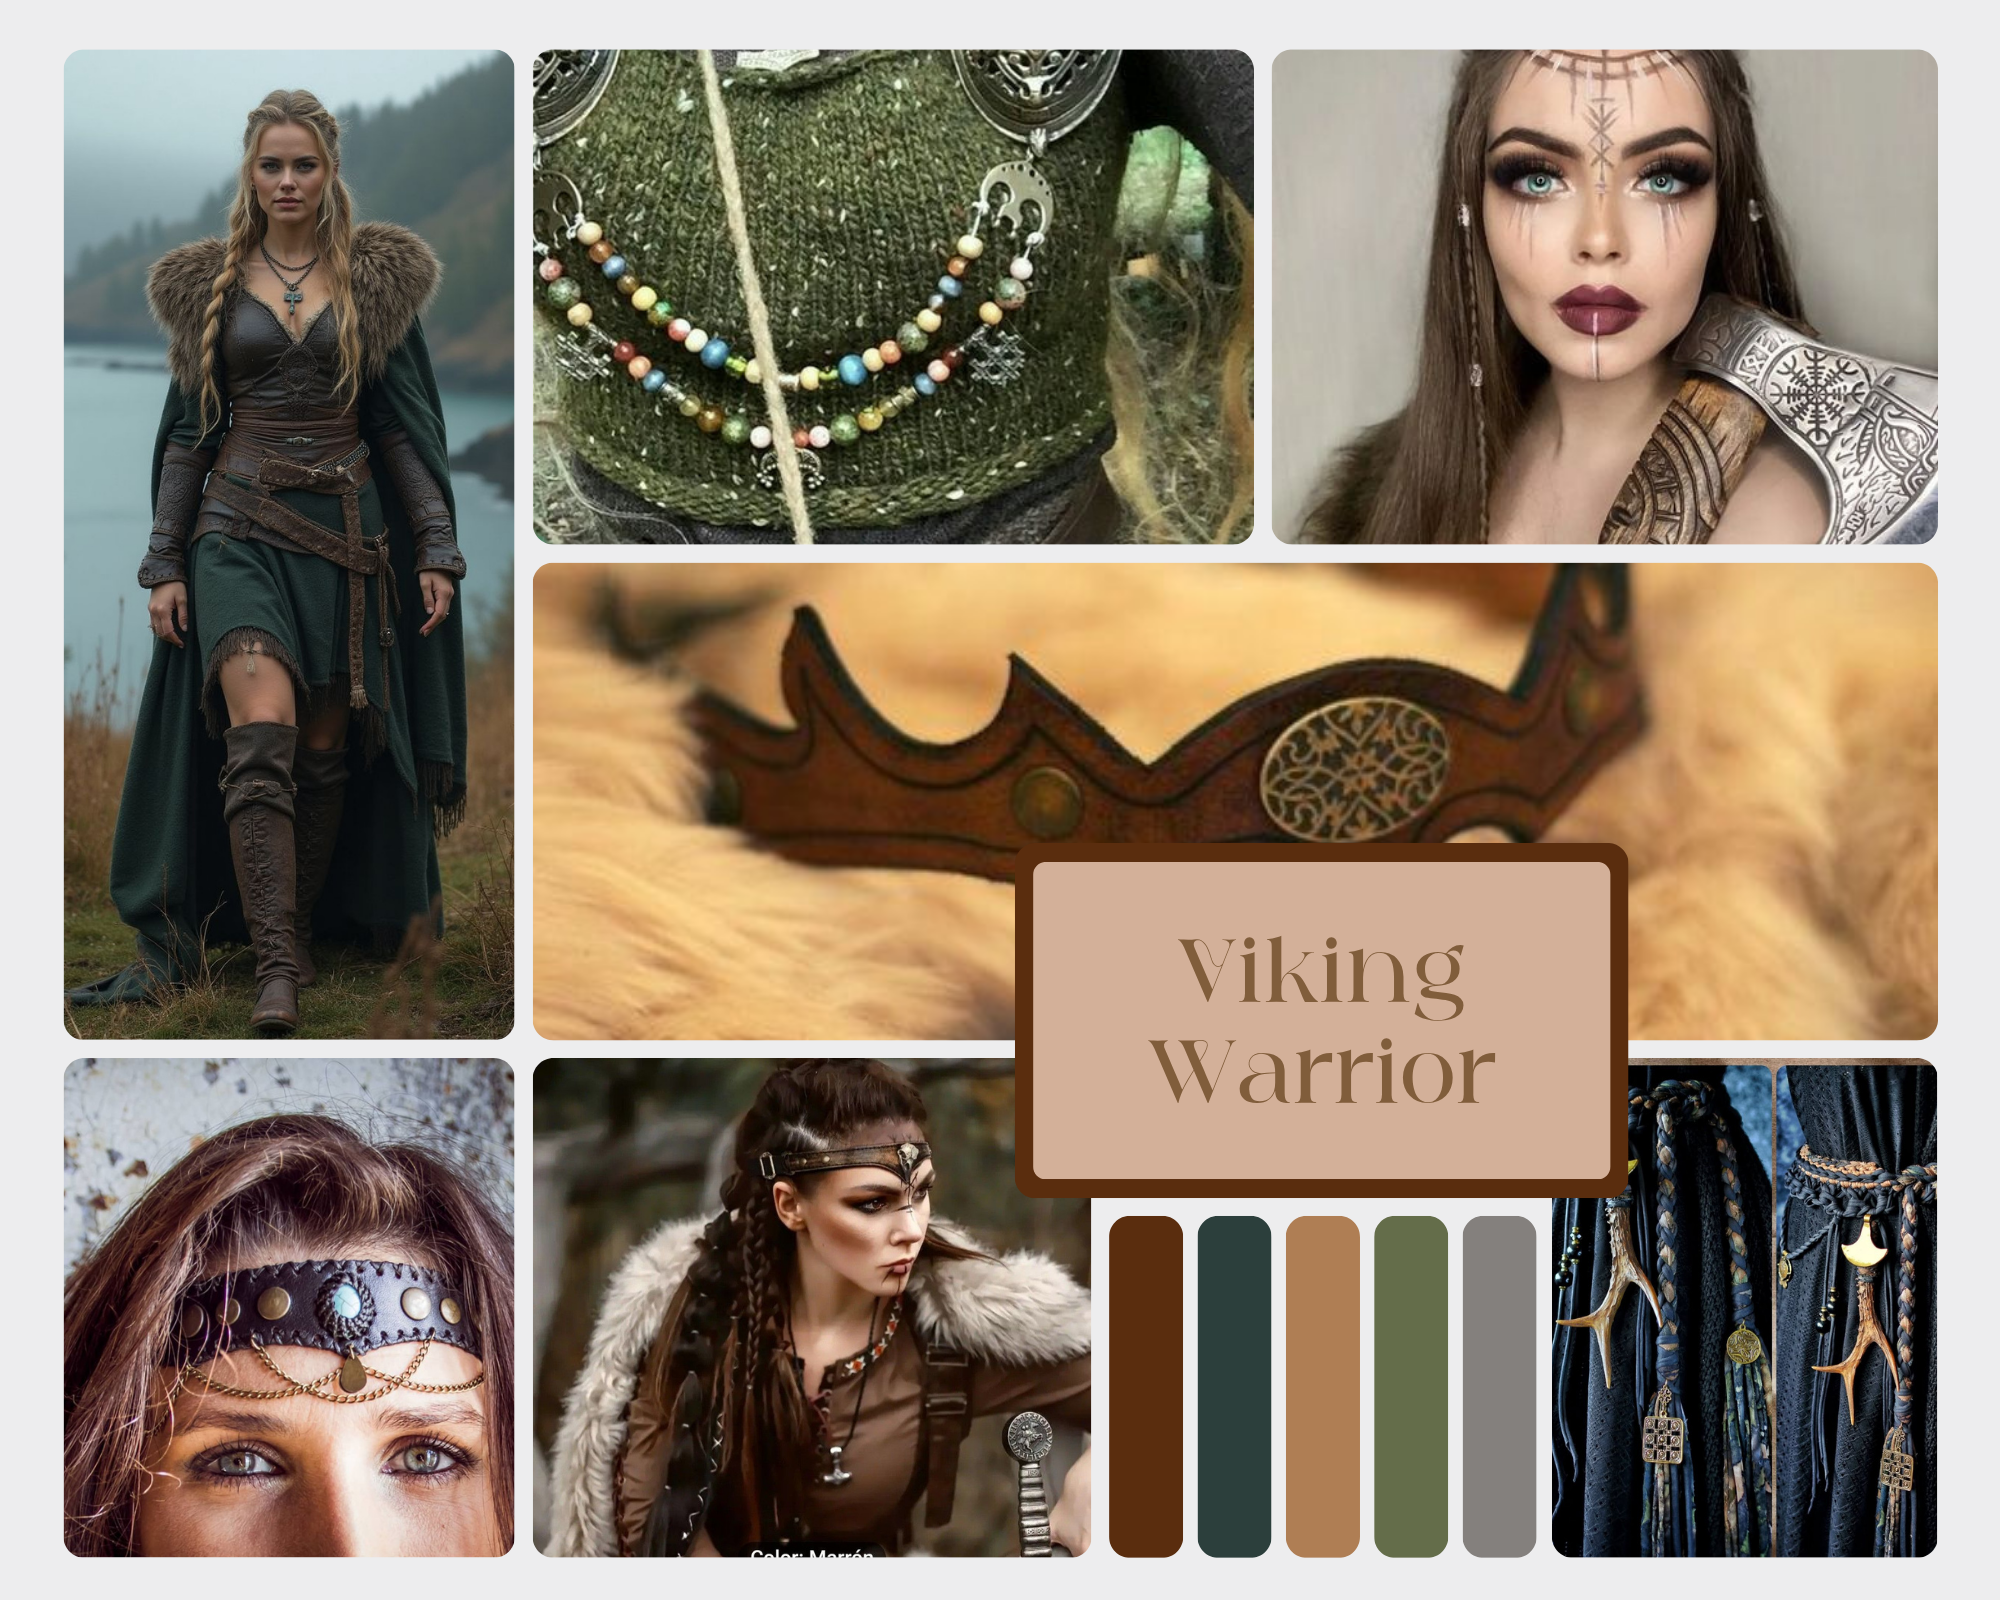
My Viking Persona
I recently read the Unfated Series by Danielle L. Jensen and was definitely feeling inspired by the Norse mythology influence. With Vikings on my mind, I wanted to construct a Viking persona inspired by the main female character. A warrior, shieldmaiden, but also some classic influences.
Meet Isolde . . .
Core Viking Garments
Here are the base pieces I used to create my costume.
Tunic or Dress
I had a pretty teal Renaissance-inspired dress that I had purchased from Etsy a while back and hadn’t used, which I thought would make a good base for my outfit.
Skirt
I found a piece of brown gauzy fabric at a local thrift craft store that I thought would make a nice detail to the skirt by tucking it into my belt.
Belt
I had purchased this Viking-inspired belt a while back for Viking fest, so I had this on hand to break up the outfit.
Materials & Textures That Tell a Story
When I think of Vikings, I think of a variety of textures. I had the gauzy brown fabric, the teal linen dress, and wanted to add some fur elements. I wanted to create an outfit that would be fit for the snow.
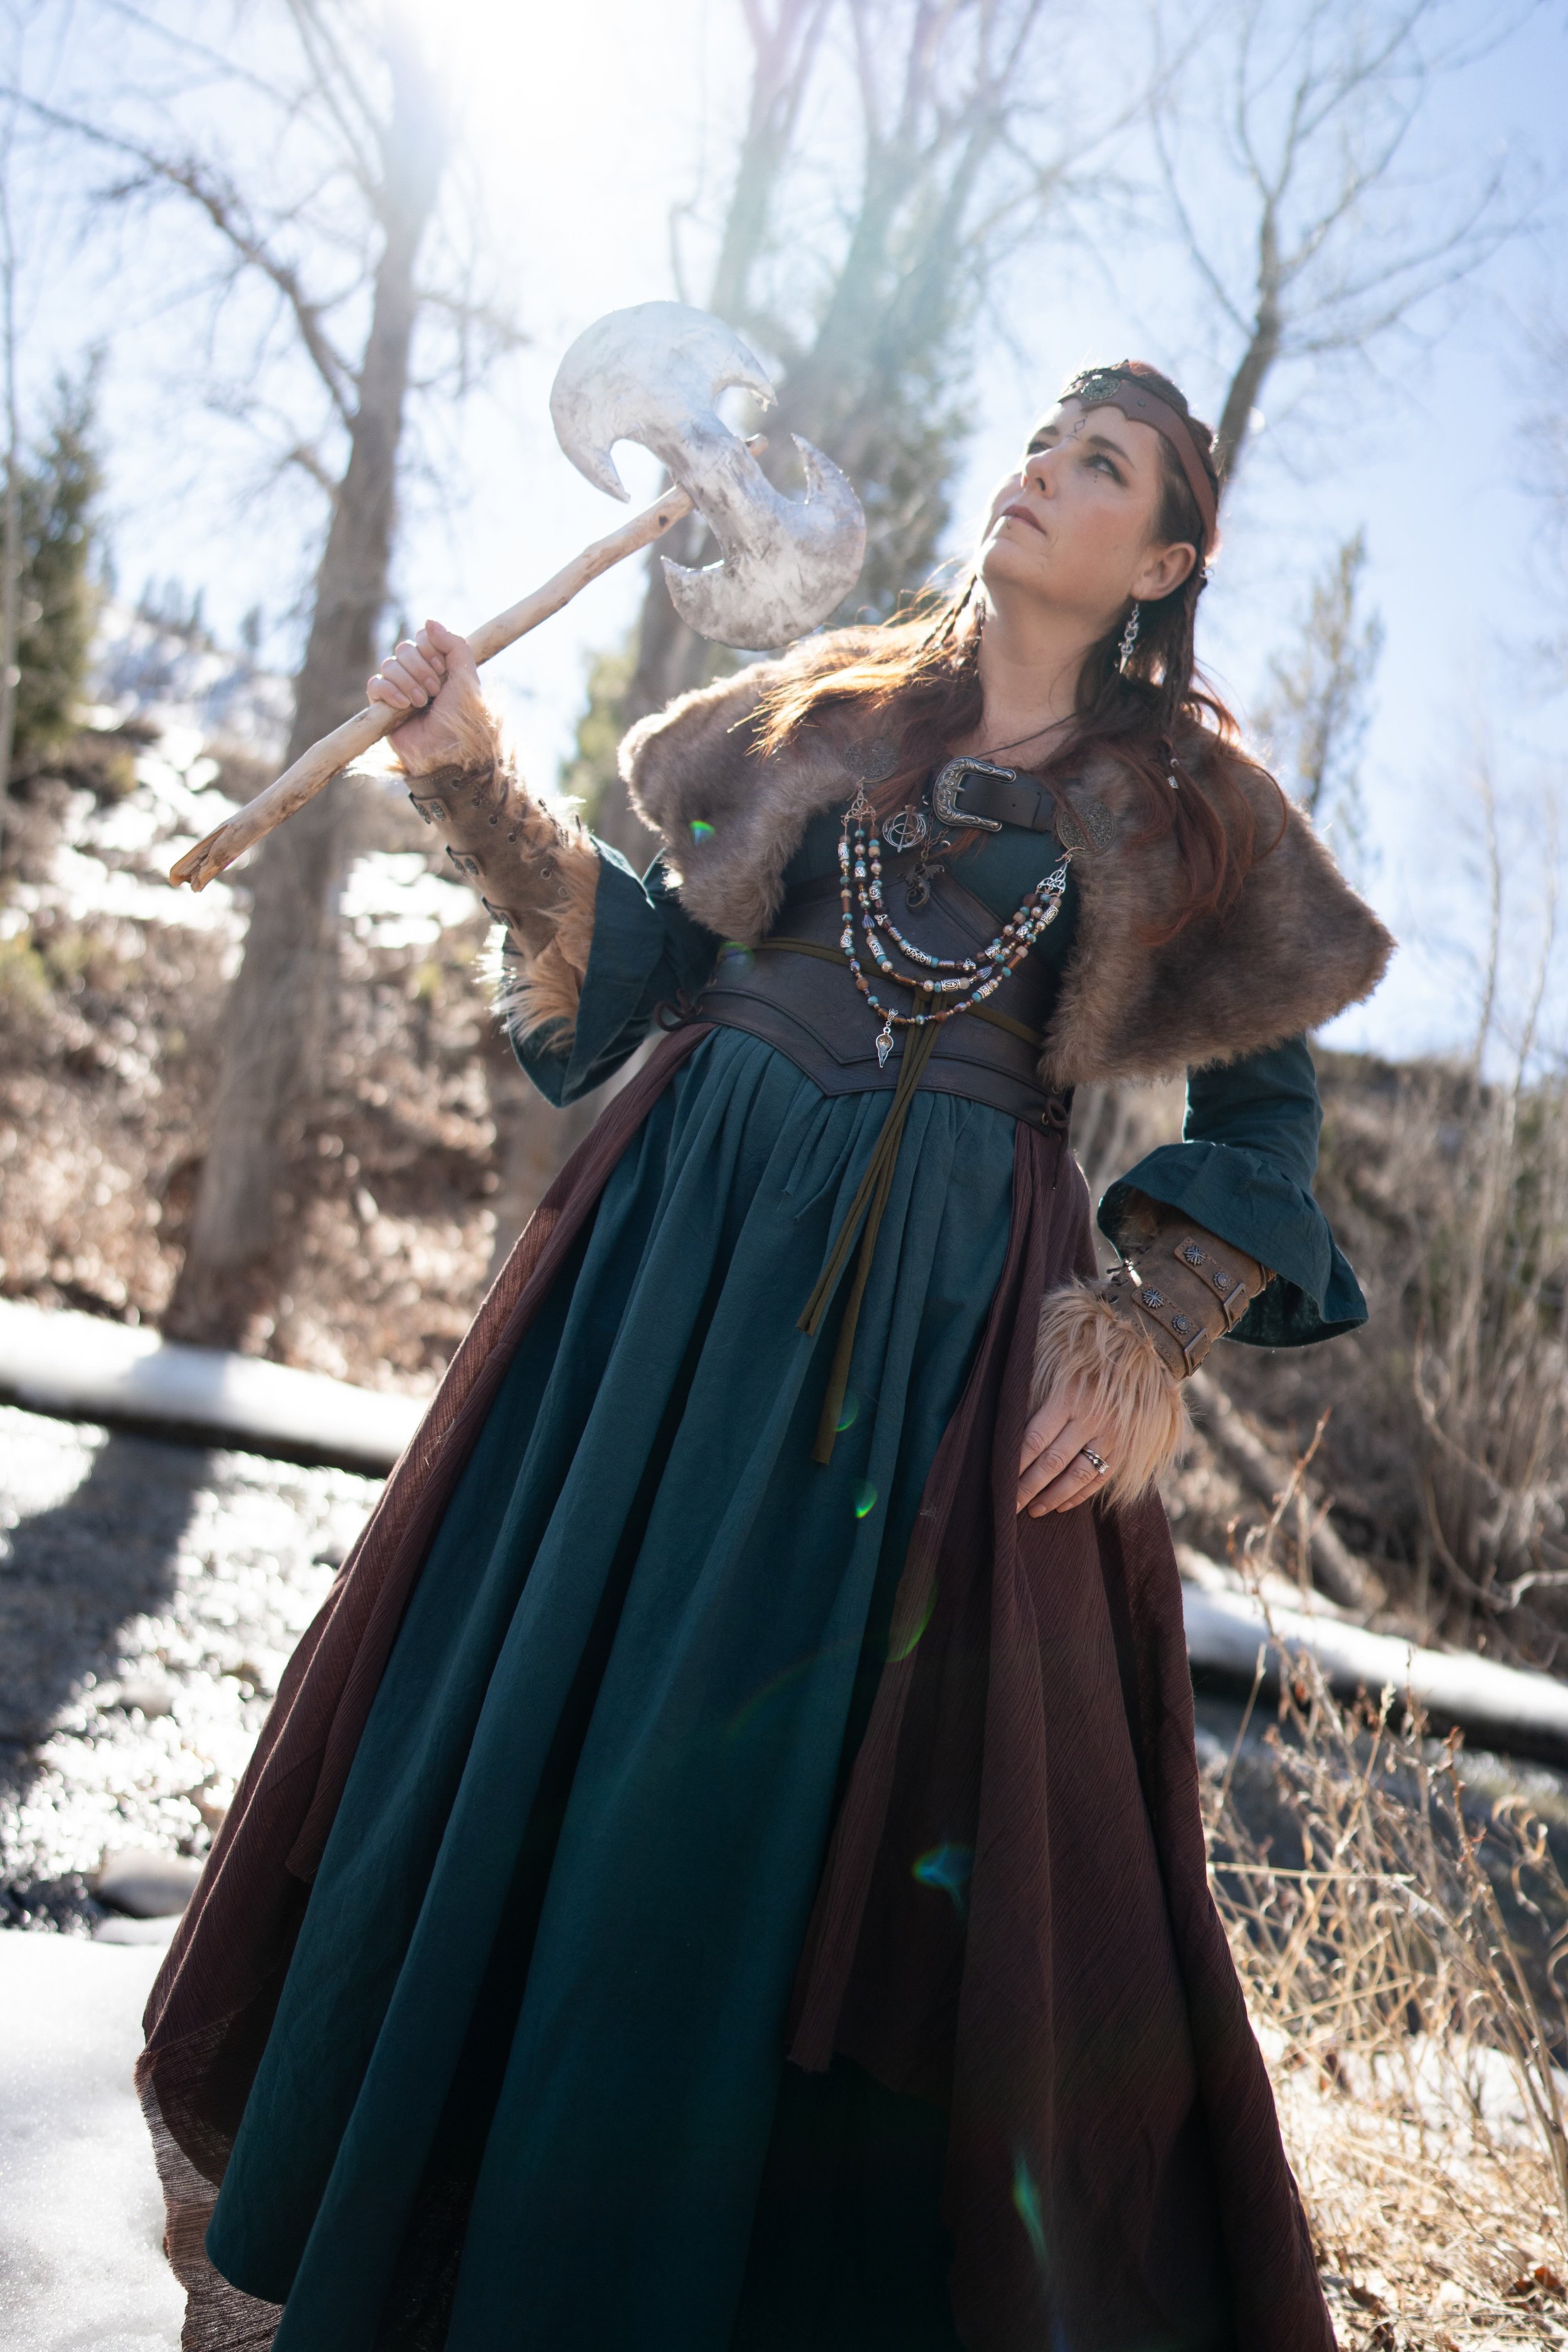
Weapons & Accessories: Building the Character
Jewelry
I love adding jewelry elements to my costumes, and I think it really builds the character.
I created this beaded brooch as a focal point for the outfit, using beads and filigree pieces I had on hand.
I wore some chainmail earrings I made and layered necklaces with dragons and Celtic symbols.
Accessories
I had the brown bracers on hand and thought they would look nice layered over some fur.
I found some fur at the second-hand craft store and cut it into pieces to layer over my boots and under my bracers.
I purchased the fur caplet online to finish off the outfit.
I created a simple Viking headband using EVA foam and filigree pieces.
Props
Props are fun as it gives you something to do with your hands or help you come up with poses. I was lucky that my sister-in-law had constructed some weapons for us to use.
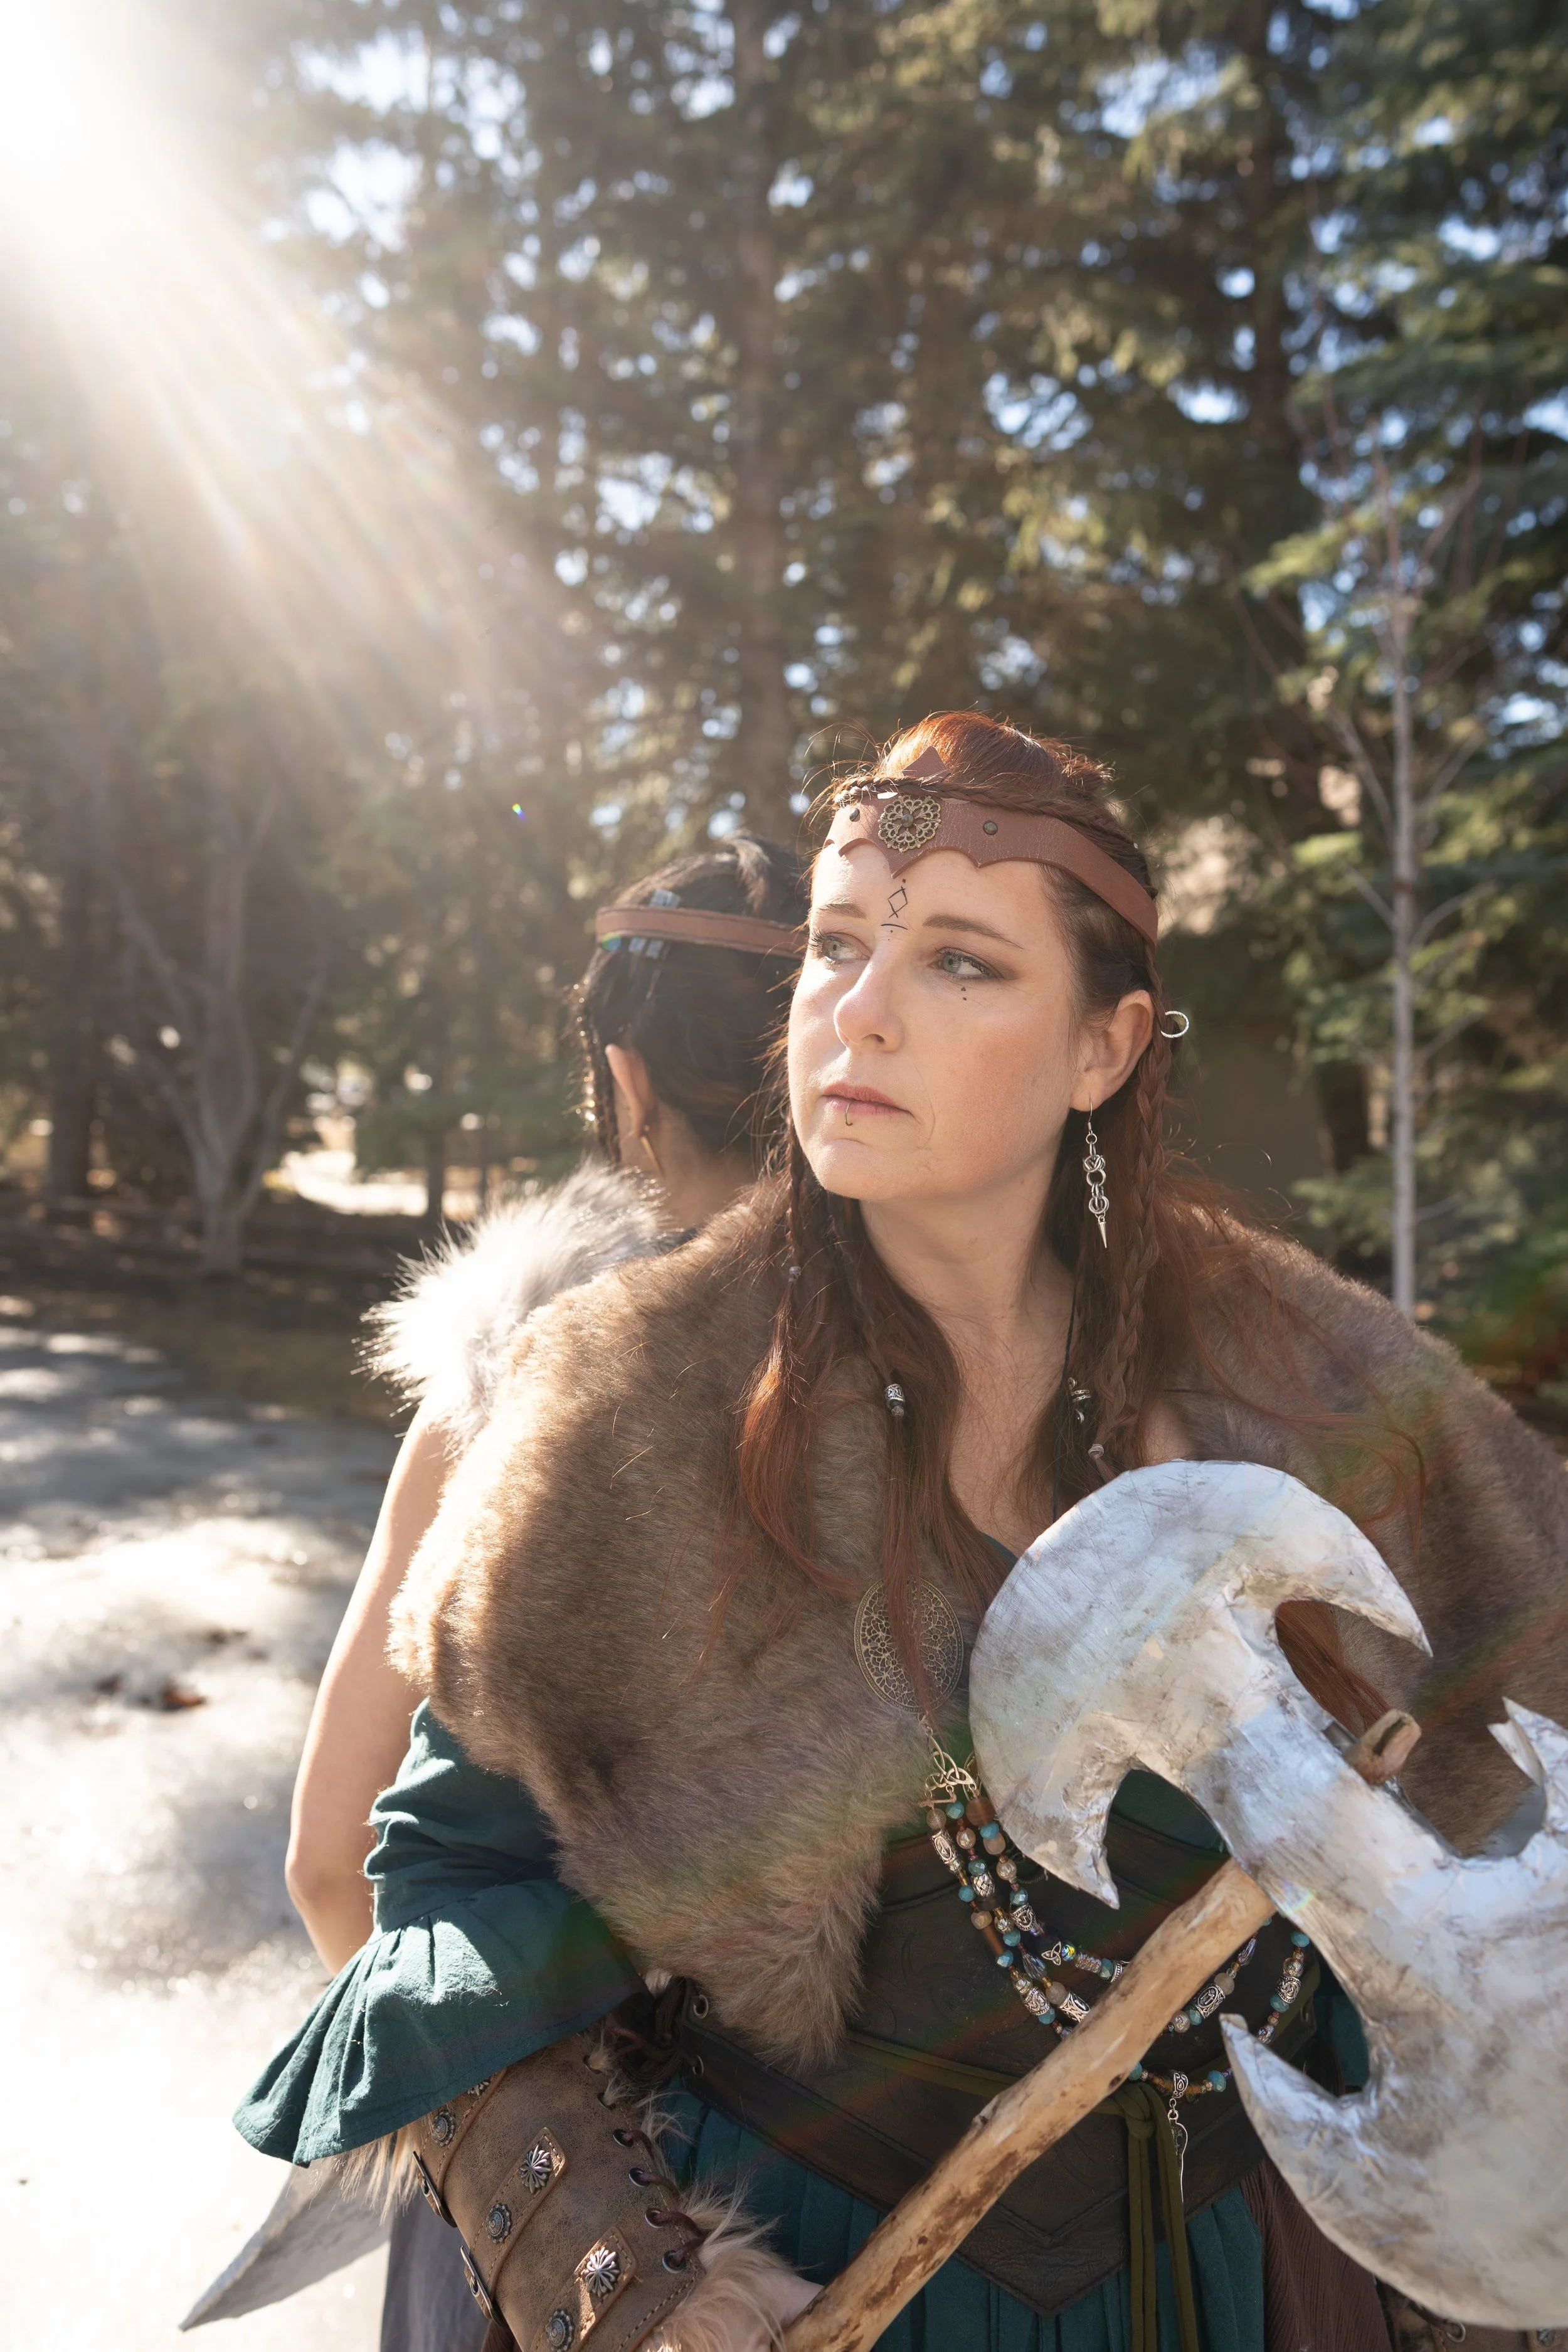
Hair, Makeup & Final Details
The hairstyle really builds the character. I had fun playing around with adding braids and hair beads for fun warrior-like details.
As for my makeup, I opted for bronzer to give my face color and dark eye makeup. I added a few runes and details to my face to emphasize my character.
Final Tips
Play Viking music before or during your photoshoot to get into character.
Opt for simple base layers and build your character with your accessories.
Build a shotlist and scope out places to shoot ahead of time.
Practice poses and facial expressions before going out to take photos.
*This post may contain affiliate links